How To Make Koji Rice Or Barley
Koji is an extremely useful mould and has been used in Asian cultures and cooking for centuries.
Servings 4 portions
Ingredients
- 1000 g (5 cups) Pearl barley or polished rice
- 4 g (1 teaspoon) Koji tane
Instructions
- Soak the barley or rice for 12 hours in the fridge or overnight at room temperature.
- Sterilise all your utensils and hands. Also, boil or steam the linen cloth. This is to make sure no bad bacteria gets involved.
- If you don't have a steamer at home. Use a colander lined with cloth set over a pot filled ¼ with water and a lid that closes the colander. The colander needs to fit inside the pot but not touch the water.
- Steam barley for about 45 minutes or until just cooked but not blooming. Do not boil it as it would ruin the process and drown the mould later on. If you are making the rice koji the process is the same but the steaming time will be around 20 minutes. Make sure to test the doneness every 10 minutes to know at which stage it's at.
- Once your barley or rice is cooked, cool it down in a separate sterilized tray or bowl to about 30°C or 86°F. Sprinkle over the Koji tane and mix well. This is to inoculate the substrate with spores.
- Line your perforated or flat tray with a slightly damp cloth(not wet) and spread the inoculated barley/rice out and cover with the cloth completely.
- Place into your incubation setup. Place the thermostat needle into the substrate and let the humidity controller sensor dangle close by.
- Set your thermostat to maintain a temperature of 30°C or 86°F . Set your humidistat to 70% and makes sure the humidifier is switched on and has enough water.
- Place a buffer like a bowl or wire rack in between the warming mat and the tray so that there is some circulation and it does not directly touch the heating source.
- Close the incubation chamber and keep an eye on the temperature. You can connect the thermostat and humidistat to your phone via Wi-Fi so that it tells you when things are changing.
- We now start a 48-hour cycle. Over the next 12 hours, the koji will start “infiltrating” the barley or rice. At some point, it will start to form a mycelium and the koji will produce its own heat. When this happens we have to break it up and cool it down.
- We want the temperature to stay within range. So, break it up and spread it out when the temperature jumps. Don’t worry if the temperature goes a bit above the maximum limit. Just don’t let it stay there for too long.
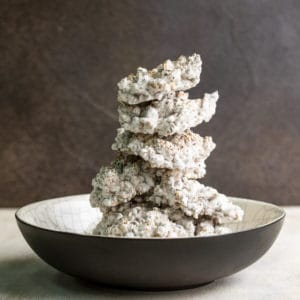
- Keep this up for 48 hours until the substrate is covered in a thick mycelium of white mould.
- You now have fresh koji. Taste it. It's delicious just like that.
Video
Notes
- Storage instructions - Store airtight in the freezer. Otherwise, you can dry it out for longer storage or store it in the fridge for up to a week.
- Tip - If you made koji to produce protease, it should have a mushroomy flavour, a bit like the rind of camembert cheese. If you made it to produce amylase, it will have a sweeter aroma and flavour, a bit similar to very ripe apricots.
- Safety - Keep everything extremely clean and sanitised. Mould ferments can easily go wrong if bad bacteria creeps in. If you see strange colour mould growing throw it out. Only buy koji spores from trusted sources to ensure the purist mould.
- Alternative - You can grow koji on nearly any starch-rich substrate. This recipe works for making rice koji equally well.
Nutrition
Serving: 500g Calories: 880kcal Carbohydrates: 194g Protein: 25g Fat: 3g Saturated Fat: 1g Polyunsaturated Fat: 1g Monounsaturated Fat: 1g Sodium: 23mg Potassium: 700mg Fiber: 39g Sugar: 2g Vitamin A: 55IU Calcium: 73mg Iron: 6mg
Keywords:barley koji, how to make koji, koji, koji rice
Did you make this?Tag @pantsdownapronson or hashtag #pantsdownapronson so I can see your hot skills!