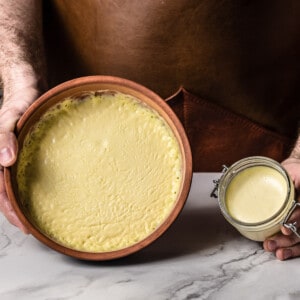
Homemade Clotted Cream
Homemade clotted creammade in the microwave or on the stove top. Rich smooth and the perfect topping for biscuits or scones.
Servings 10 portions
Ingredients
For the stovetop method
- 1 Liter (4 ¼ cups) cream - Heavy or whipping cream (note 1)
- 50 grams (3 ½ tablespoon) butter - note 2
For the microwave method
- 1 Liter (4 ¼ cups) cream - Heavy or whipping cream (note 1)

Instructions
For the stovetop method
- Add cream and butter to a pan.
- Bring to a simmer while whisking. Continue whisking and reduce the cream by half.
- Pour a little bit on a cold plate and place into the freezer to check that it sets. If it needs to reduce a bit more then do that.
- Once ready pour into storage jars and place into the fridge until completely chilled and set.
For the microwave method
- Place the cream without any butter into a shallow microwave dish about halfway filled.
- Microwave on 5 minute intervals checking the progress and making sure the cream don't spill over.
- After 15 minutes(3 x 5 minute intervals) check to see if the clotted cream sets by placing a bit onto a small dish into the freezer for 5 minutes.
- Once ready simply chill in the fridge until completely set before serving.
Video
Notes
- Cream fat content — Do not use cream with a fat percentage below 33%. The higher the fat percentage, the richer the set. Heavy cream at 36-40% is the most reliable and widely available option. UHT cream at 33% also works, as demonstrated in this recipe.
- Butter (stovetop method only) — Butter adds richness and extra flavor by boosting the overall fat content of the reduction. Whisk it in from the start so it emulsifies fully. You can leave it out if you prefer, but the set will be slightly less rich. The microwave method omits butter intentionally — the microwave's uneven heat makes emulsification harder to control and risks a grainy result.
- The cold-plate test — Spoon a small amount of the reduced cream onto a cold plate and place it in the freezer for 5 minutes. If it sets firm, the cream is ready. If it stays loose or pourable, return to the heat and reduce further, then test again. This is the only reliable doneness check — timing varies with pan size, cream brand, and stove output.
- Chilling is non-negotiable — The cream must cool completely in the fridge before serving. Two to three hours minimum; overnight produces the best texture. The cream will look like thick pourable cream straight off the heat — this is normal. The clotted structure forms during chilling, not on the heat.
- Keep the skin — A thin skin forms on the surface during chilling. This is concentrated fat and the richest part of the batch. Do not discard it. Stir it back into the cream before serving, or spread it directly onto a scone.
- If it is not setting after chilling— The reduction did not go far enough. Return the cream to the pan, bring back to a simmer, reduce further, run the cold-plate test again, then re-chill. This is fully recoverable.
- If the texture is grainy — On the stovetop, this means the butter separated rather than emulsified, usually because it was added to cream that was already too hot, or the cream was left unwhisked. On the microwave method, the cream overheated in a burst that was too long. A grainy batch cannot be fully recovered to a smooth texture, but it can still be used in soups, ice cream bases, or baking where it will be melted again.
- Alternative methods (slow cooker and oven) — These produce traditional clotted cream but with significantly more whey and a thinner cream layer. Slow cooker: fill ¼ with water, set to low, place a cream-filled dish in the water, cook 12 hours, chill completely before scooping. Oven: 80°C (176°F), shallow dish filled ¾ with cream, 12 hours, chill before harvesting.
- Storage — Store airtight in jars or sealed containers in the fridge for up to 6 days. Freezing is not recommended for use as a spread or topping — the texture becomes grainy after thawing. Frozen clotted cream can still be used in soups, ice cream bases, or baking where it will be heated through.
Nutrition
Serving: 50g Calories: 348kcal Carbohydrates: 3g Protein: 2g Fat: 37g Saturated Fat: 23g Polyunsaturated Fat: 1g Monounsaturated Fat: 11g Cholesterol: 138mg Sodium: 43mg Potassium: 82mg Sugar: 1g Vitamin A: 1478IU Vitamin C: 1mg Calcium: 71mg Iron: 1mg
Keywords:cornish cream, devonshire cream, homemade clotted cream, quick clotted cream
Did you make this?Tag @pantsdownapronson or hashtag #pantsdownapronson so I can see your hot skills!