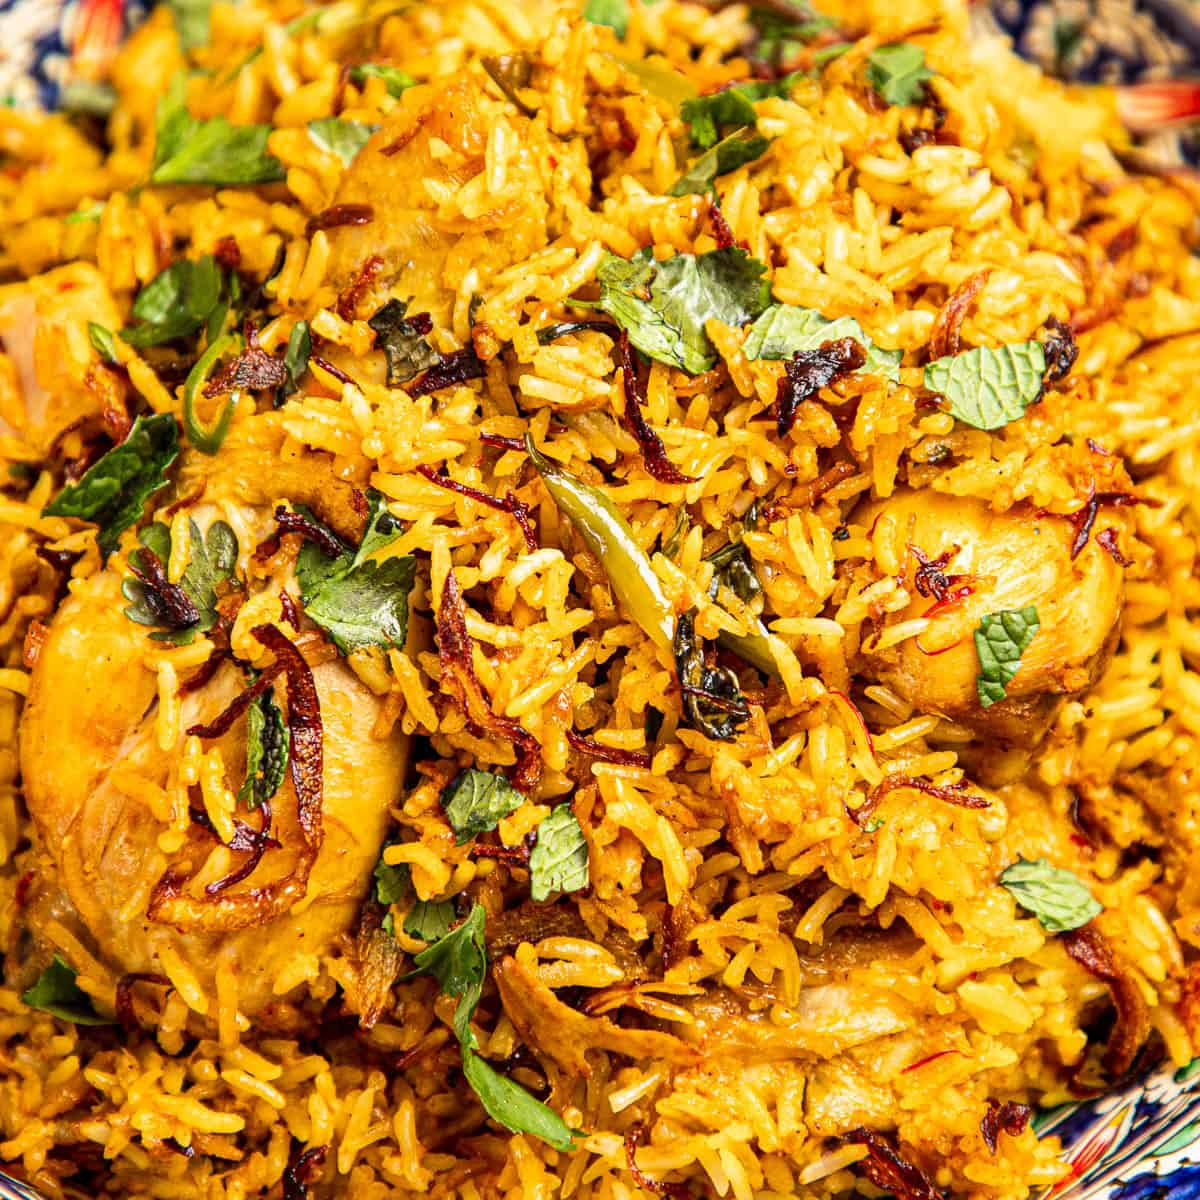
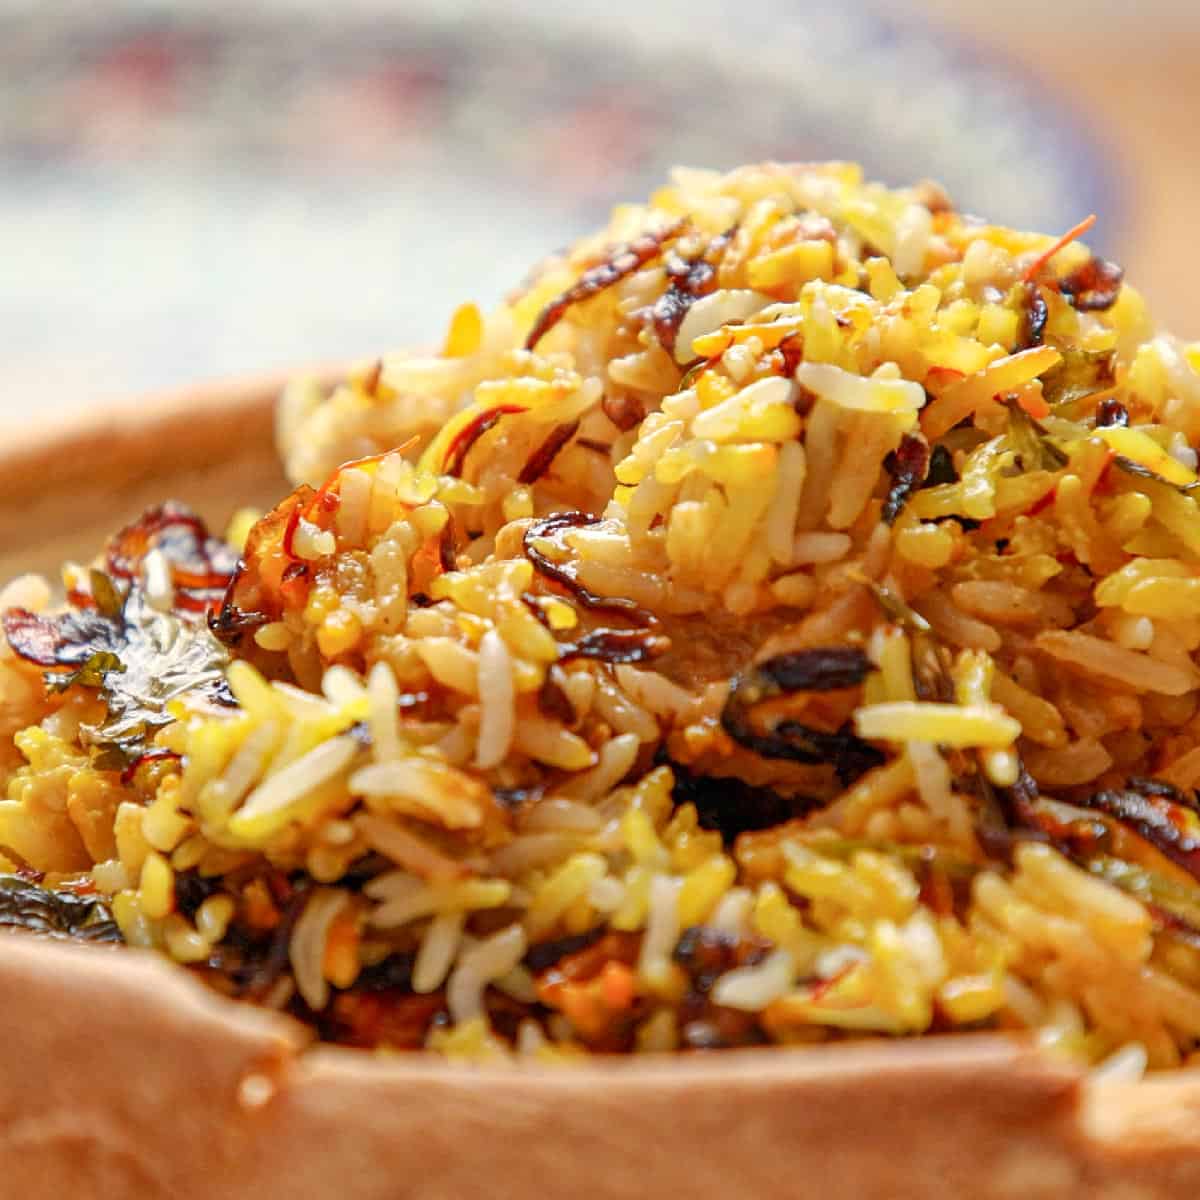
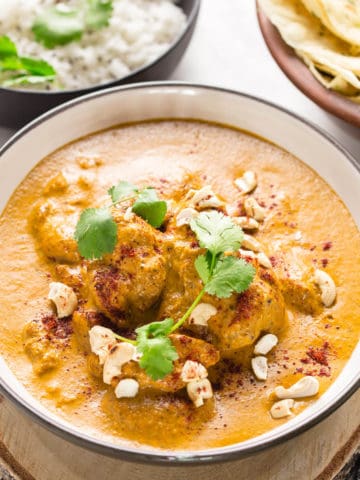
Chicken Biryani is India's most celebratory rice dish, cooked with the authentic dum method-sealed tight to steam in its own juices. You get fluffy golden saffron rice, tender chicken in a fragrant curry gravy, and a hit of fresh mint, cilantro, and crispy onions.
Unlike saucy curries like butter chicken, aloo chana curry, or Kerala coconut chicken curry, biryani is a drier, layered rice dish with bold spices available in most supermarkets. This biryani recipe includes two practical shortcuts for those wanting to simplify the spice selection.
Additionally, this authentic chicken biryani recipe can be adapted into a vegan biryani with straightforward substitutions. Either way, it will be the best chicken biryani recipe you've ever made.
Jump to:
Watch how to make it
What is biryani?
Biryani is a traditional Indian rice dish featuring parboiled basmati rice layered with spiced meat or vegetables. Distinct from wet curries, it offers a drier texture, enriched with ingredients like saffron, cardamom, and fried onions. Regional variations, such as Hyderabadi and Lucknowi, highlight its adaptability across India's culinary landscape.
Its history began with Persian traders and Mughal rulers in the 16th century, who introduced rice-and-meat combinations to India. Initially crafted for royalty, biryani spread widely, adopting local flavors and the signature dum technique-slow-cooking in a sealed pot. This method ensures a fragrant, unified dish, popular for gatherings and feasts.
Best rice for biryani
Basmati rice is widely regarded as the best choice for making biryani due to its long, grains and aromatic profile. Grown primarily in India and Pakistan, it remains separate and fluffy when parboiled, absorbing spices like saffron and cardamom effectively. This ensures the layered texture biryani is known for.
While basmati is preferred, alternatives like seeraga samba, a short-grain rice from South India, offer a distinct fragrance and hold up well in dum cooking. Jasmine rice can work, but it's more prone to overcooking and can lead to a sticky consistency.
Basmati rice comes in many forms, with aged basmati making the best biryani possible.
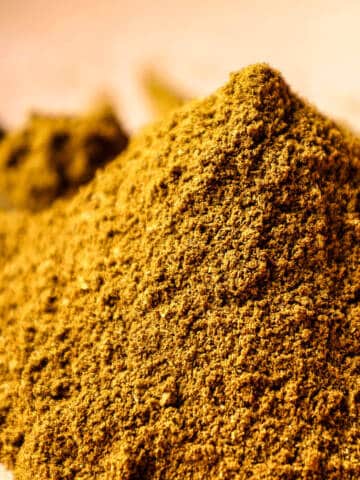
Essential spices for biryani
There is no hard rule for which spices go into a biryani, but there are a few key spices that contribute to the unique flavor.
- Saffron: Adds a golden color and earthy taste.
- Cardamom pods: Provides warm, aromatic notes.
- Cloves: Contributes a strong, pungent flavor.
- Garam masala: A blend of spices used in many Indian dishes.
- Cinnamon sticks: Add a sweet, woody taste.
Other spices enrich regional styles. Star anise gives a licorice-like note, bay leaves add a mild fragrance, and Kashmiri chili powder brings color with subtle heat. Mace blades provide a floral touch, but nutmeg can be used instead.
If you don't want to buy all the individual whole spices, you can use extra garam masala instead. It won't be as authentic but still delicious. Many people do not enjoy whole spices even though they are traditional, so there is a small plus to using powdered spices instead.
If you do want to use the spices whole, but don't like eating around them, then simply remove them after cooking or tie them up in a muslin cloth.
Boneless vs bone-in chicken
Bone-in chicken, such as drumsticks and thighs, is often preferred for biryani due to its richer flavor and juiciness. The bones add extra flavor during the dum cooking process. Best if you want the authentic biryani eating experience.
Boneless chicken, typically thighs, offers convenience, ideal for quicker preparation and easier eating. While it lacks some of the flavor of bone-in chicken, it's still delicious and will take on all the flavors in the biryani. Both work in this Chicken Biryani recipe, depending on whether authenticity or simplicity is prioritized in the final dish.
Chicken breast tends to be dry even if marinated beforehand. It's Best to make juicy oven-baked chicken breast with them if you buy whole chickens.
Do you need to marinate the chicken?
In the Traditional Hyderabad biryani the chicken is marinated in yogurt, spices, and ginger garlic paste for 2 to three days to tenderize free-range, often tough, chickens.
It's not necessary to marinade regular store-bought chicken as it's tender enough. The marinade only works if you leave the chicken in it for an extended amount of time.
In most home cooking cases you won't have enough time for that so this recipe has been adapted from the Hyderabad biryani to make it quick, easy, and logical for the average home cook.
Ingredients
Crispy onions
Crispy onions are essential to making biryani. Ironically they soften during the cooking process but their sweet caramelized flavor is important. If you don't want to go through the hassle of making this you simply buy crispy shallots and toast them in the oven until dark brown.
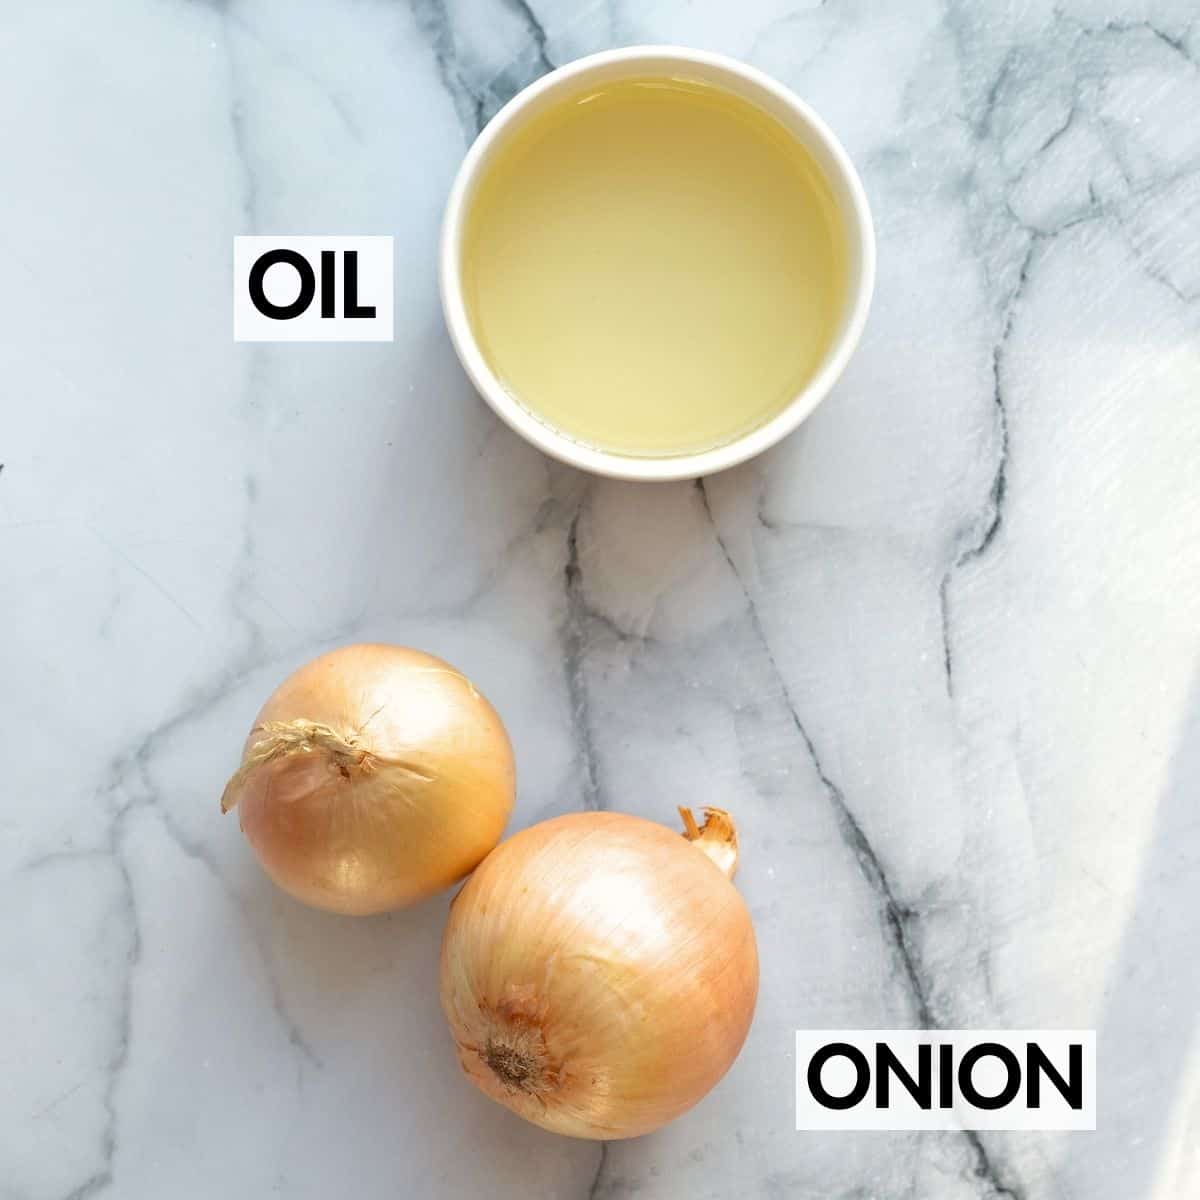
- Onion - Use either regular yellow skin or red onions.
- Oil - Neutral cooking oil or ghee(clarified butter).
Note: The leftover oil can be reused for cooking the chicken gravy or other dishes that require oil for frying.
Chicken gravy
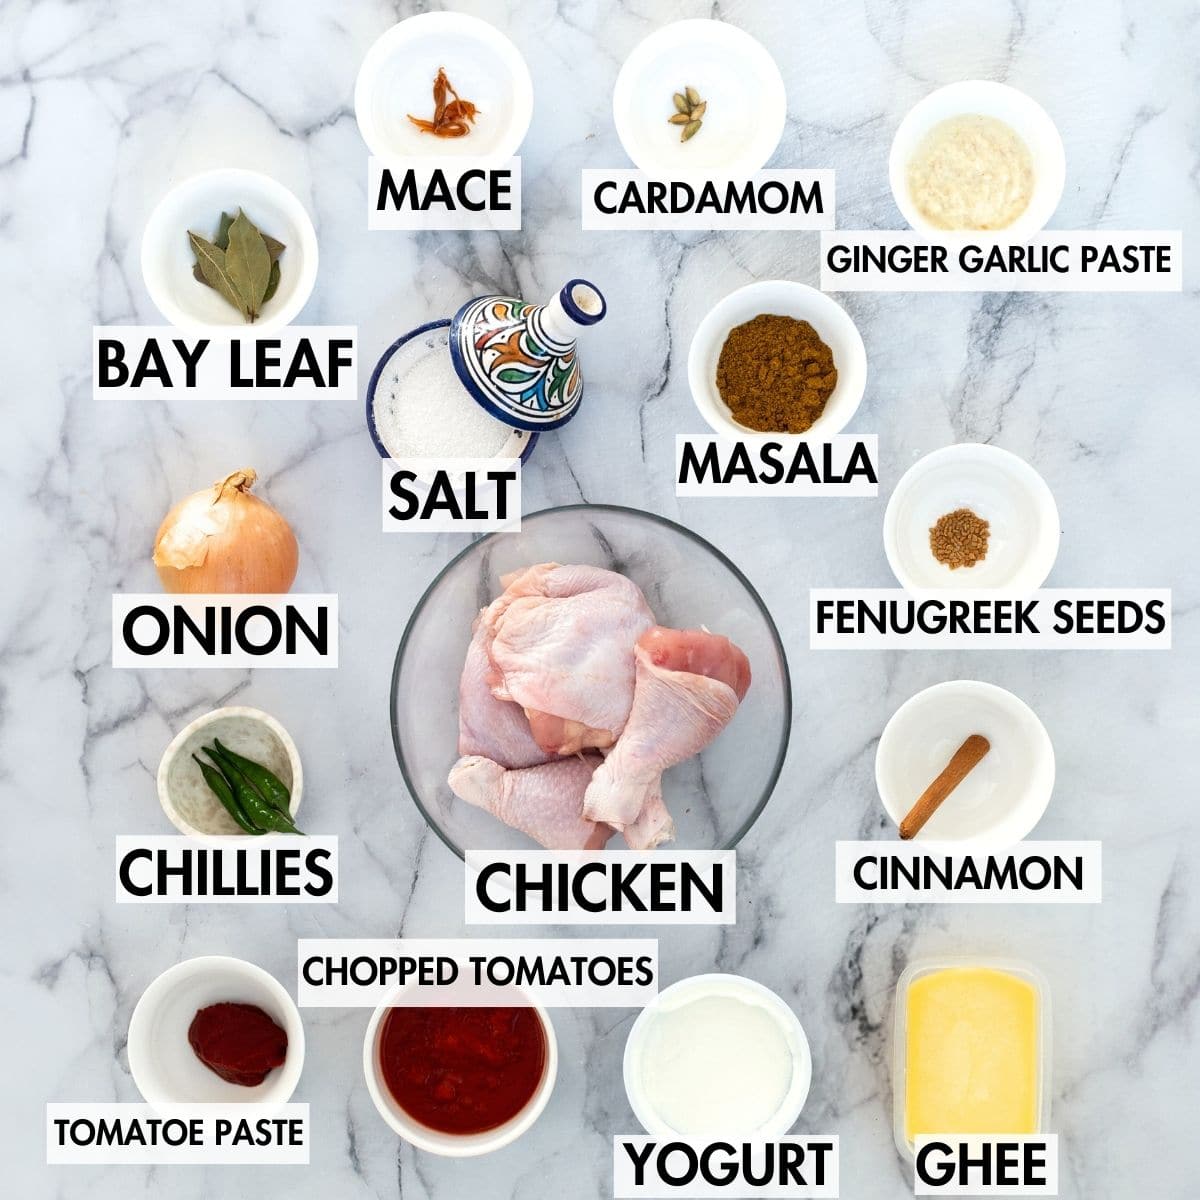
- Spices - Garam masala is the most important spice mix you need for biryani. It contains most of the whole spices already so using extra garam masala instead of whole spices is a shortcut if you don't like whole spices or don't have them. You can use store-bought or homemade Madras curry powder as a substitute, although the flavor is a touch different.
- Chicken - I like using bone-in drumsticks and thighs, but use boneless chicken by all means. Avoid chicken breast as that will end up dry.
- Tomato - Tomato is more of a Southern Indian biryani ingredient, but I love using it in the gravy for extra flavor and richness. We use chopped tomatoes as well as tomato paste. Feel free to skip it.
- Yogurt - Yogurt is widely used in Indian cooking. To stop it from splitting it's always high fat (6% and more). There are also a few tricks I'll show you, to make sure the yogurt does not split when cooking with it.
- Fat - Ghee or clarified butter, is the fat of choice in Indian cooking. It has more flavor than butter and doesn't burn when frying food in it. You can use regular cooking oil if no ghee is available.
Rice
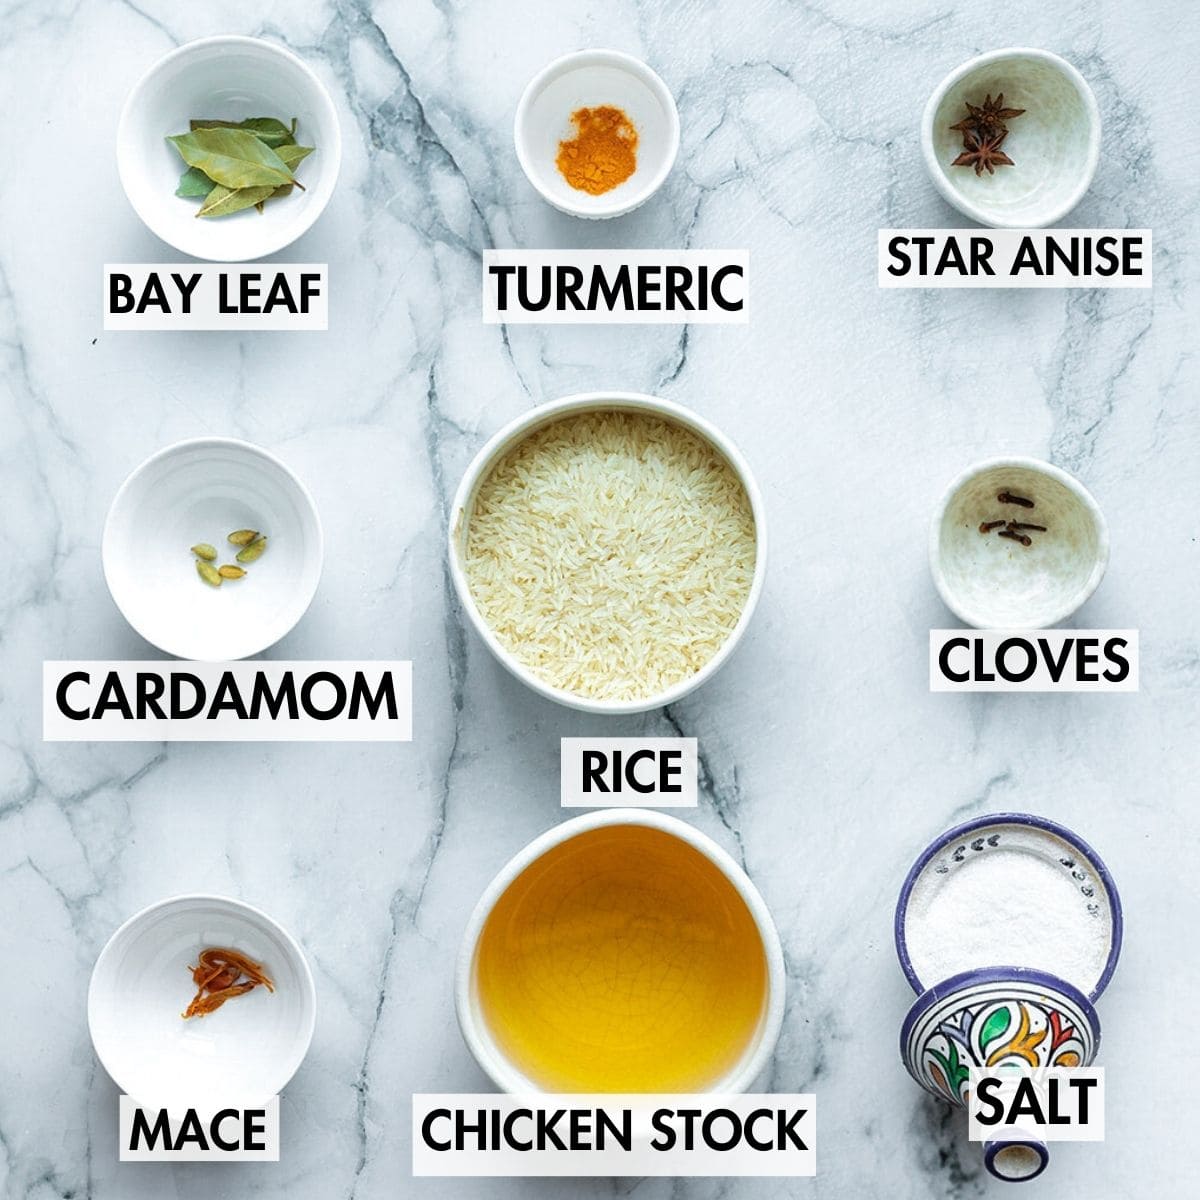
- Rice - Basmati rice is the must-have rice when making biryani. Southern Indian biryani uses short-grain rice sometimes but basmati rice is where it's at. The texture and flavor are superior and it is more forgiving to overcooking.
- Stock/Water - Use chicken stock if you have it or can easily buy it. The more flavor you pack into the rice cooking liquid the better the biryani will taste.
- Spices - Star anise, cardamom, bay leaf, cloves, and mace are some of the spices used to flavor the cooking liquid. If you can find black cardamom then use that. Mace is the leaves covering nutmeg with a very similar taste, so use nutmeg instead if you can't find mace. I also like adding a tiny touch of turmeric to the stock to evenly color the rice golden yellow.
Saffron sauce
The saffron sauce is what gives the biryani its fantastic yellow color and luxurious warm aroma. It's a touch pricey but biryani is a royal dish and meant for showing off.
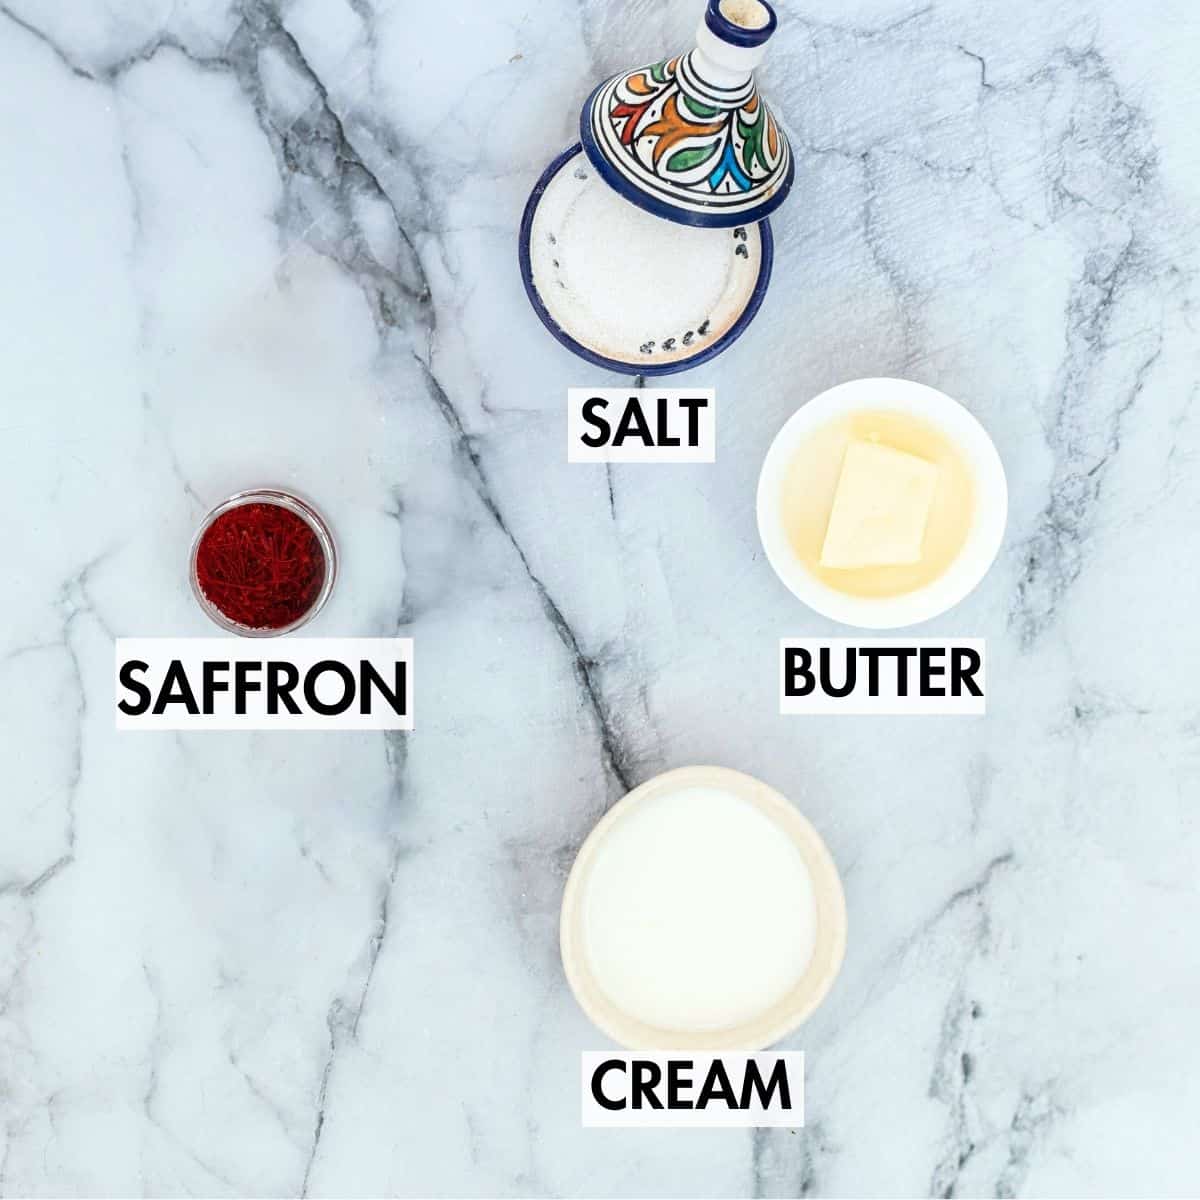
- Cream - Use double cream as single cream or lower fat creams tend to split when boiled.
- Saffron - Saffron strands come in sealed little containers easily found online. If you don't want to spend on the saffron or can't find it use a touch of turmeric instead.
- Butter - Here we use regular butter instead of ghee for richness.
Dough seal
In traditional dum cooking, the cooking vessel is sealed with a piece of dough and closed with a lid to trap steam and cook the biryani. It's optional but it looks authentic and you can use leftover dough to make delicious flatbread, similar to naan to serve with the biryani.
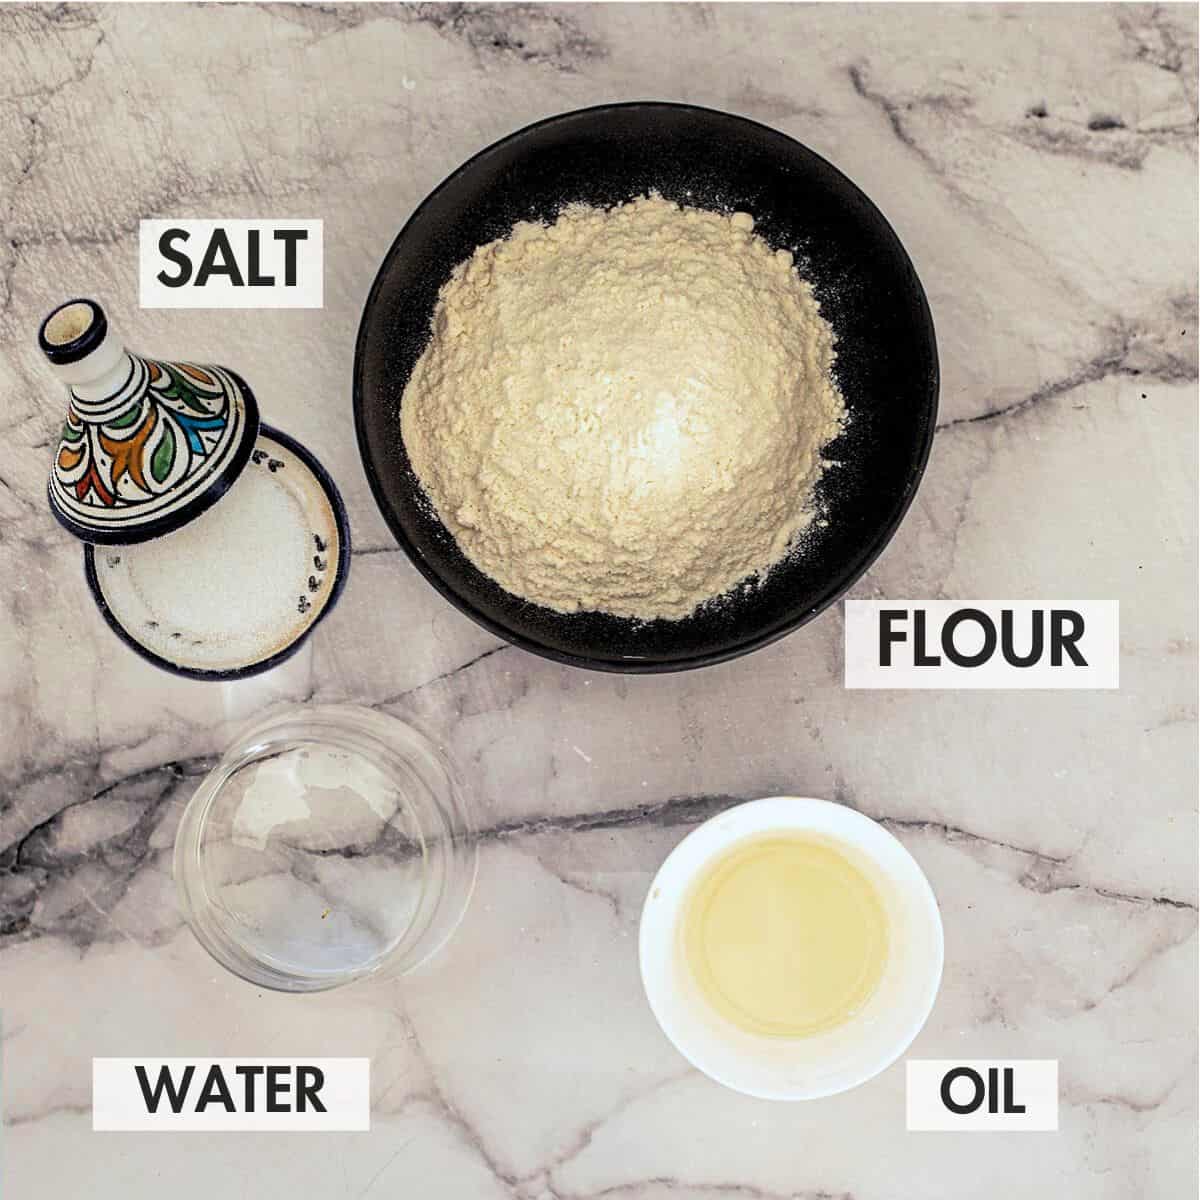
- Flour - Regular all-purpose or bread flour.
- Fat - You can use any fat here. Ghee, oil, melted butter, or rendered animal fat all do the same job.
Herbs
Fresh herbs are scattered in between the layers of the biryani and add to the complexity of the dish.
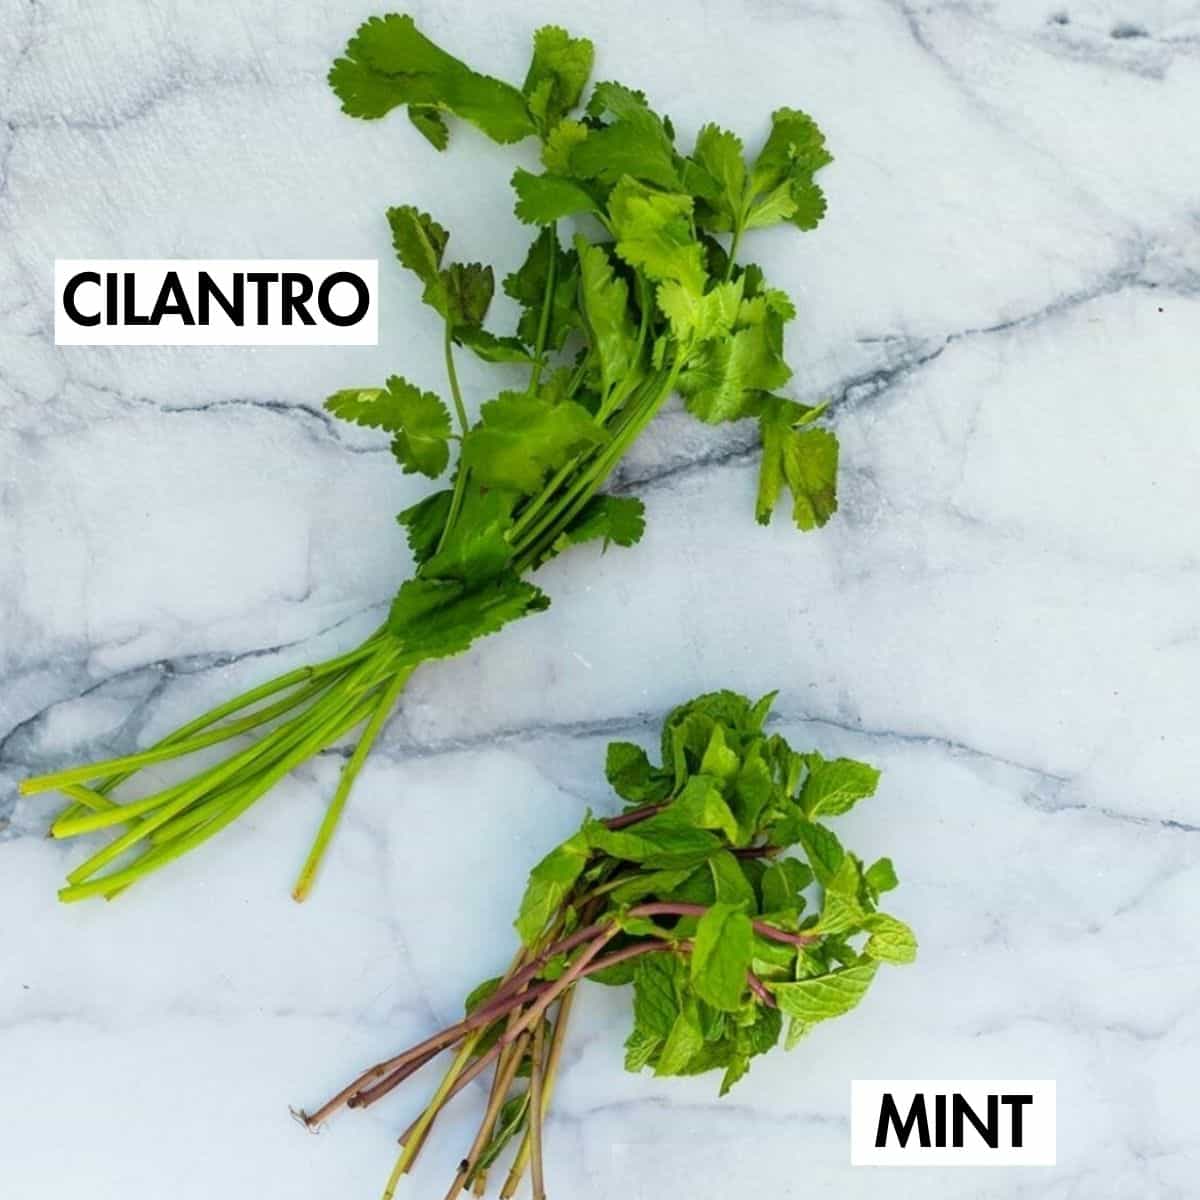
- Cilantro - Also known as coriander. You can use the soft stalks as well as the leaves.
- Mint - Fresh mint or no mint. Dried mint does not give the same fresh aroma and flavor.
See the recipe card for quantities of the ingredients mentioned.
Step-by-Step Instructions
Preparing the Crispy Onions
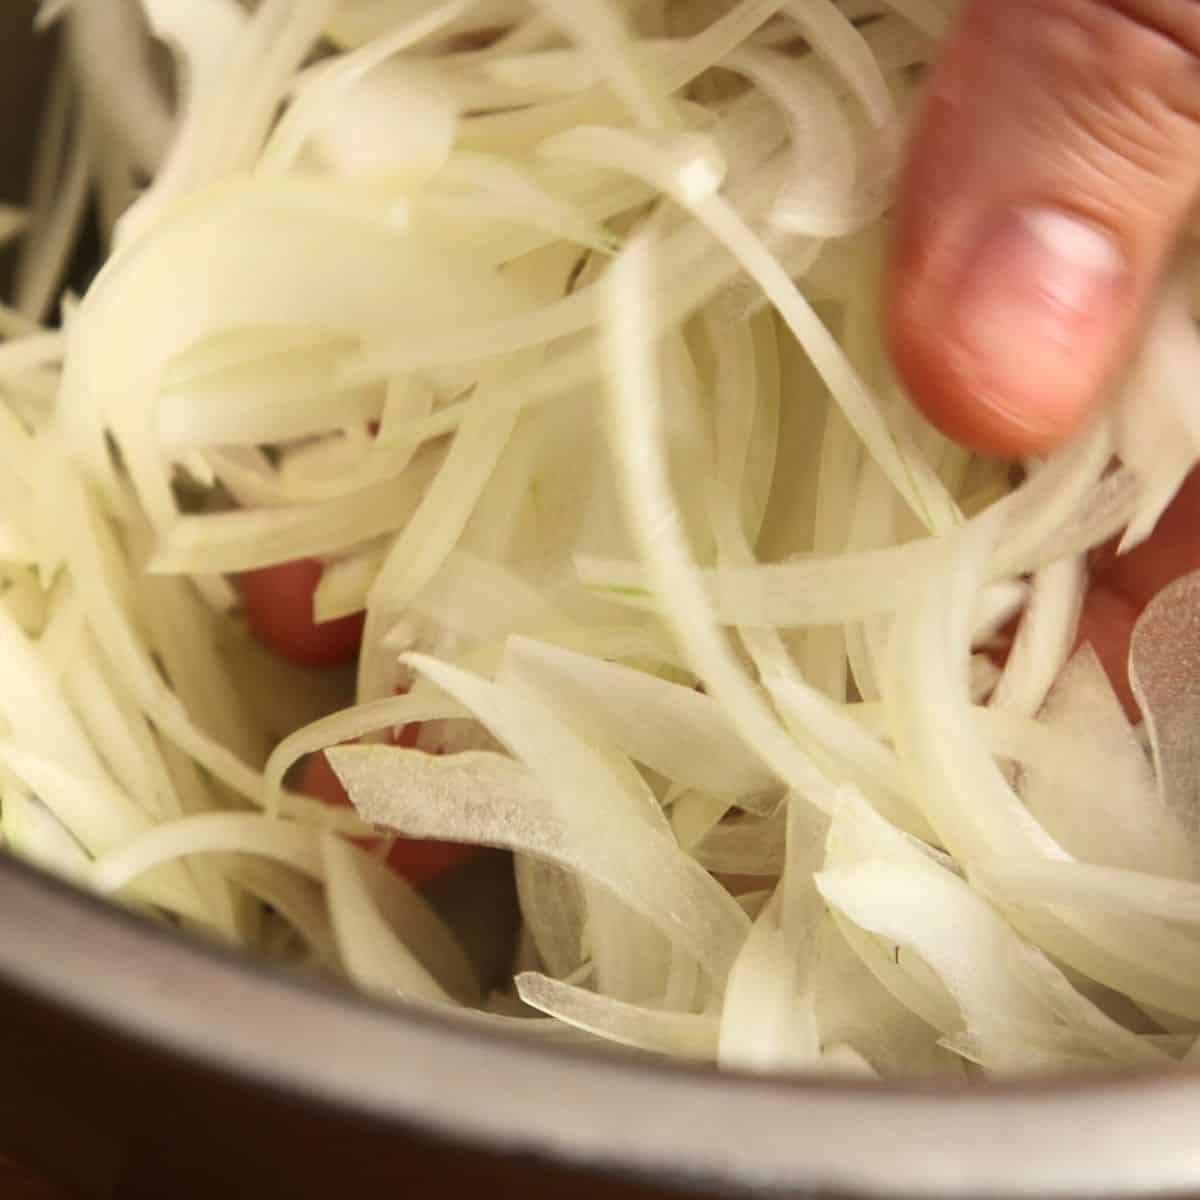
- Step 1: Thinly slice onions into uniform pieces for even frying.
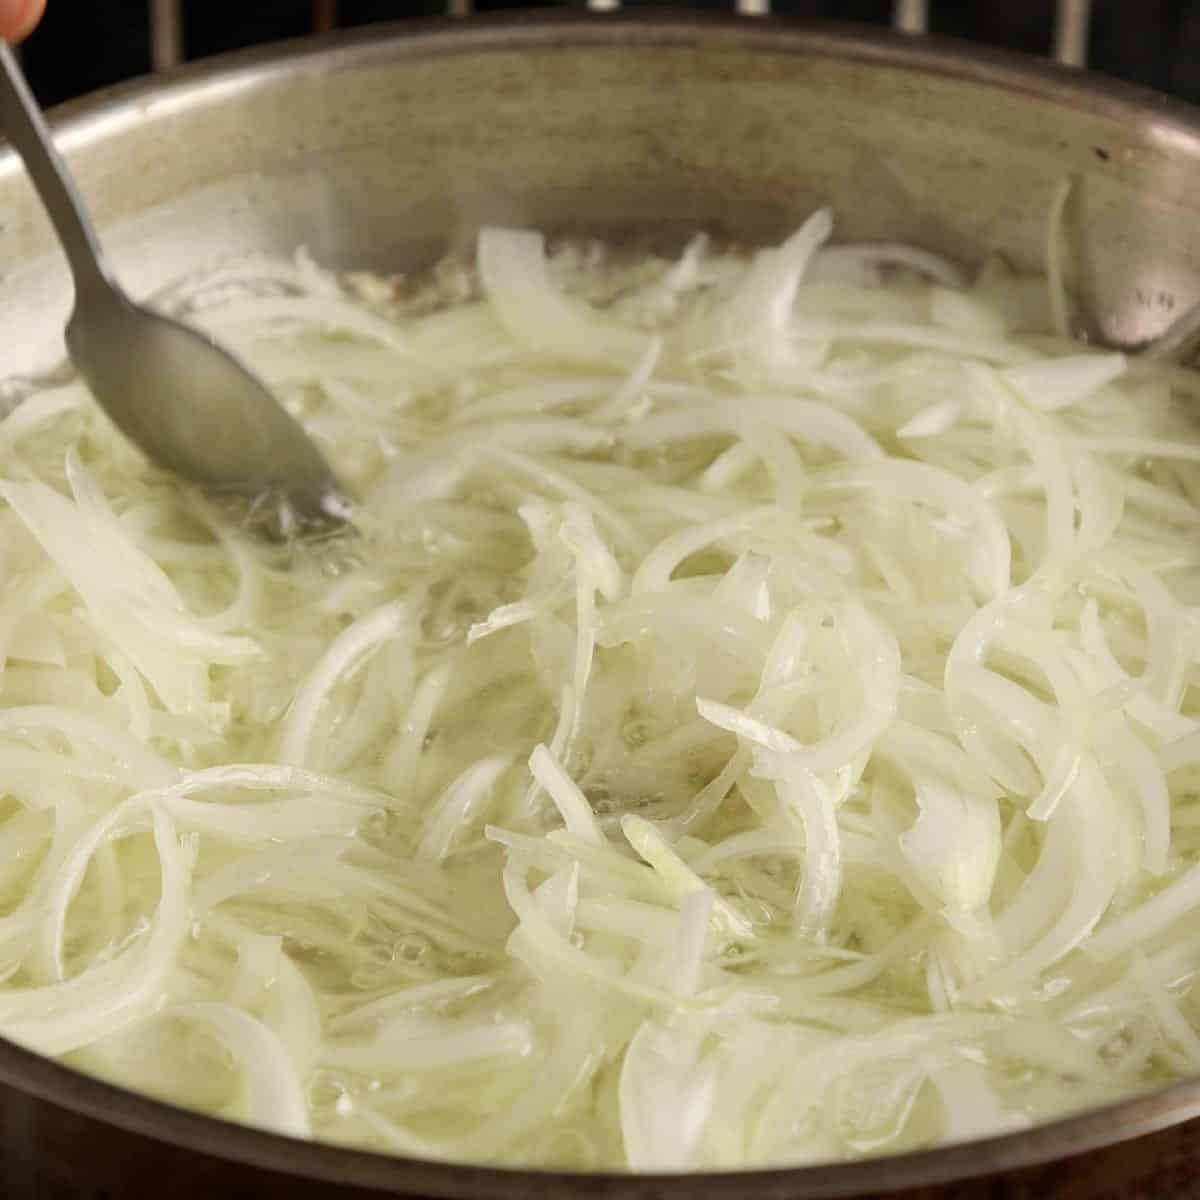
- Step 2: Heat vegetable oil in a large pan or fryer over medium heat.
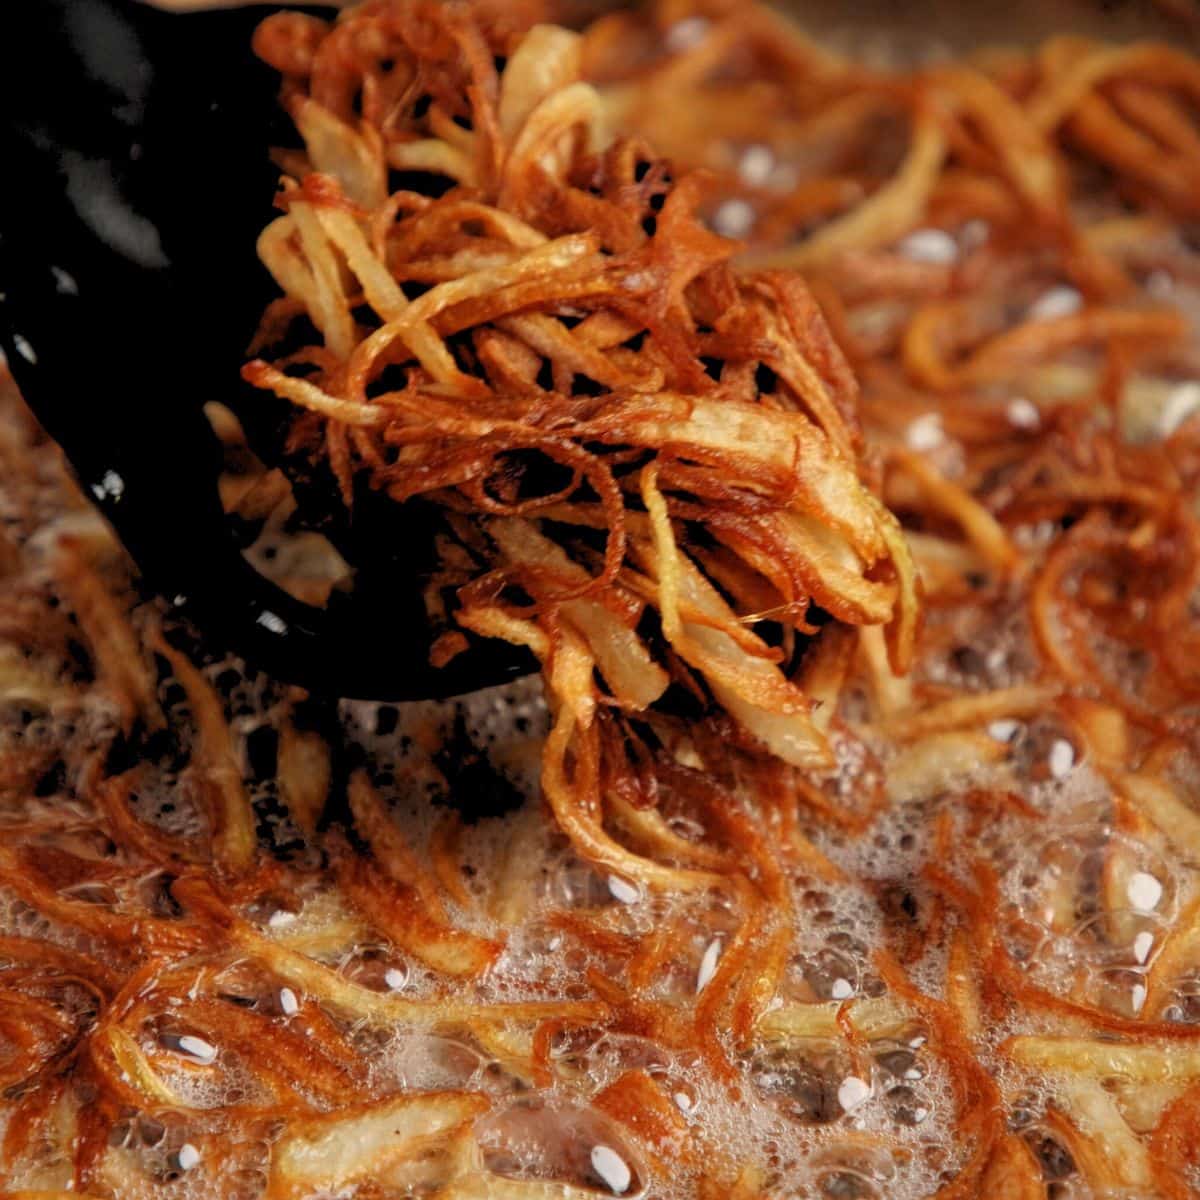
- Step 3: Fry the sliced onions, stirring constantly, until they turn dark golden brown. Take care not to burn them, as this can make them bitter.
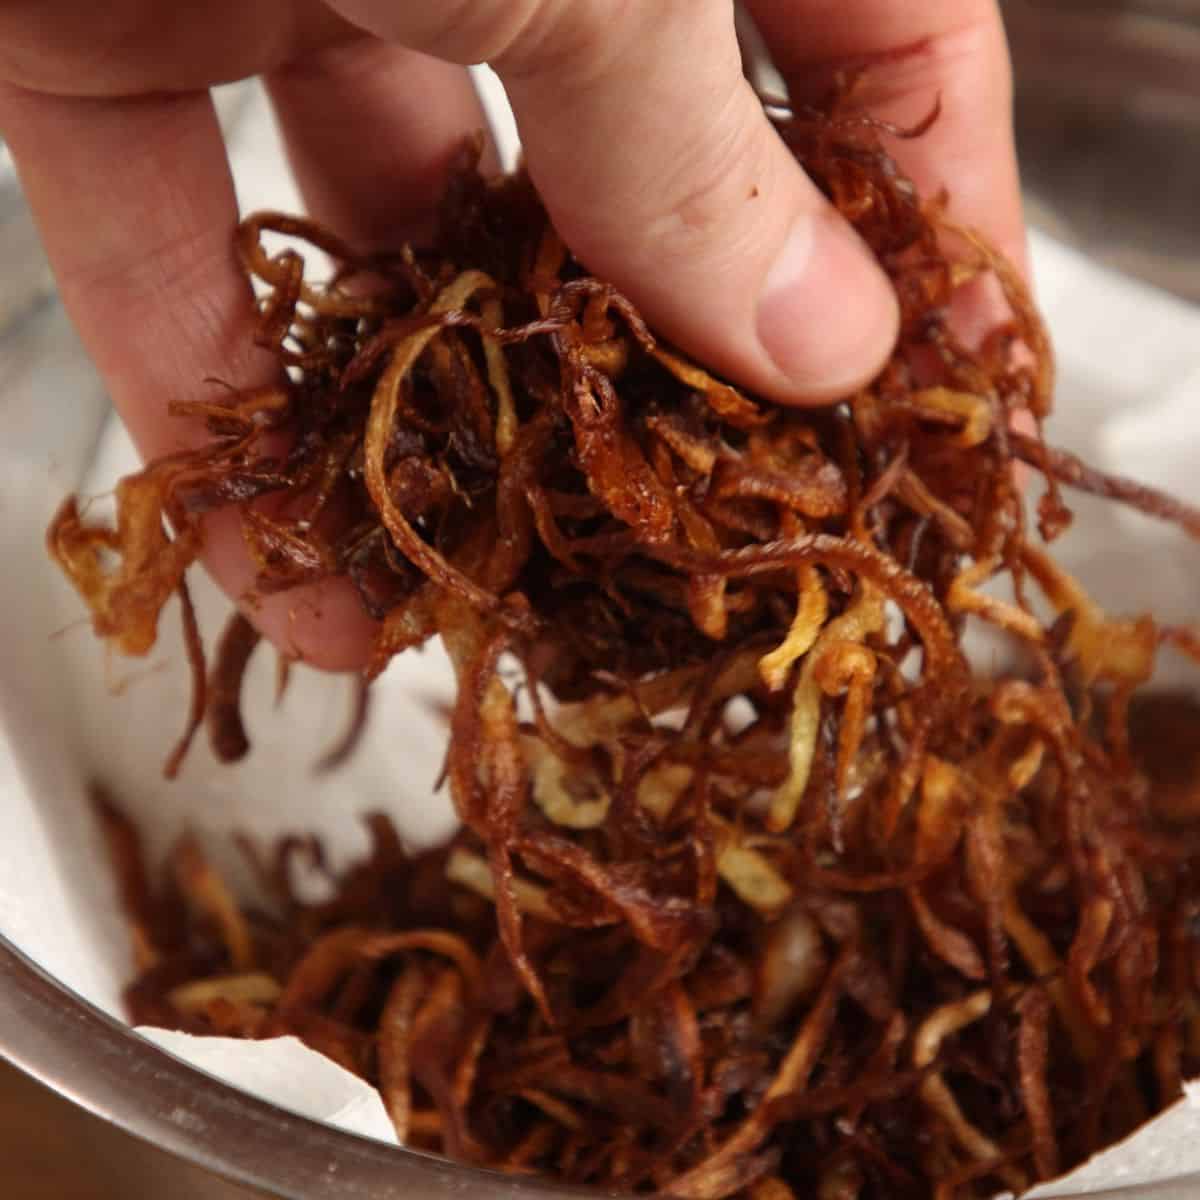
- Step 4: Remove the onions with a slotted spoon and drain on a kitchen towel.
Tip: Reserve the leftover oil for cooking the chicken gravy to enhance the flavor. Use it for other dishes that require food to be seared in oil. Keep it in the fridge to avoid the oil going rancid.
Preparing the Rice
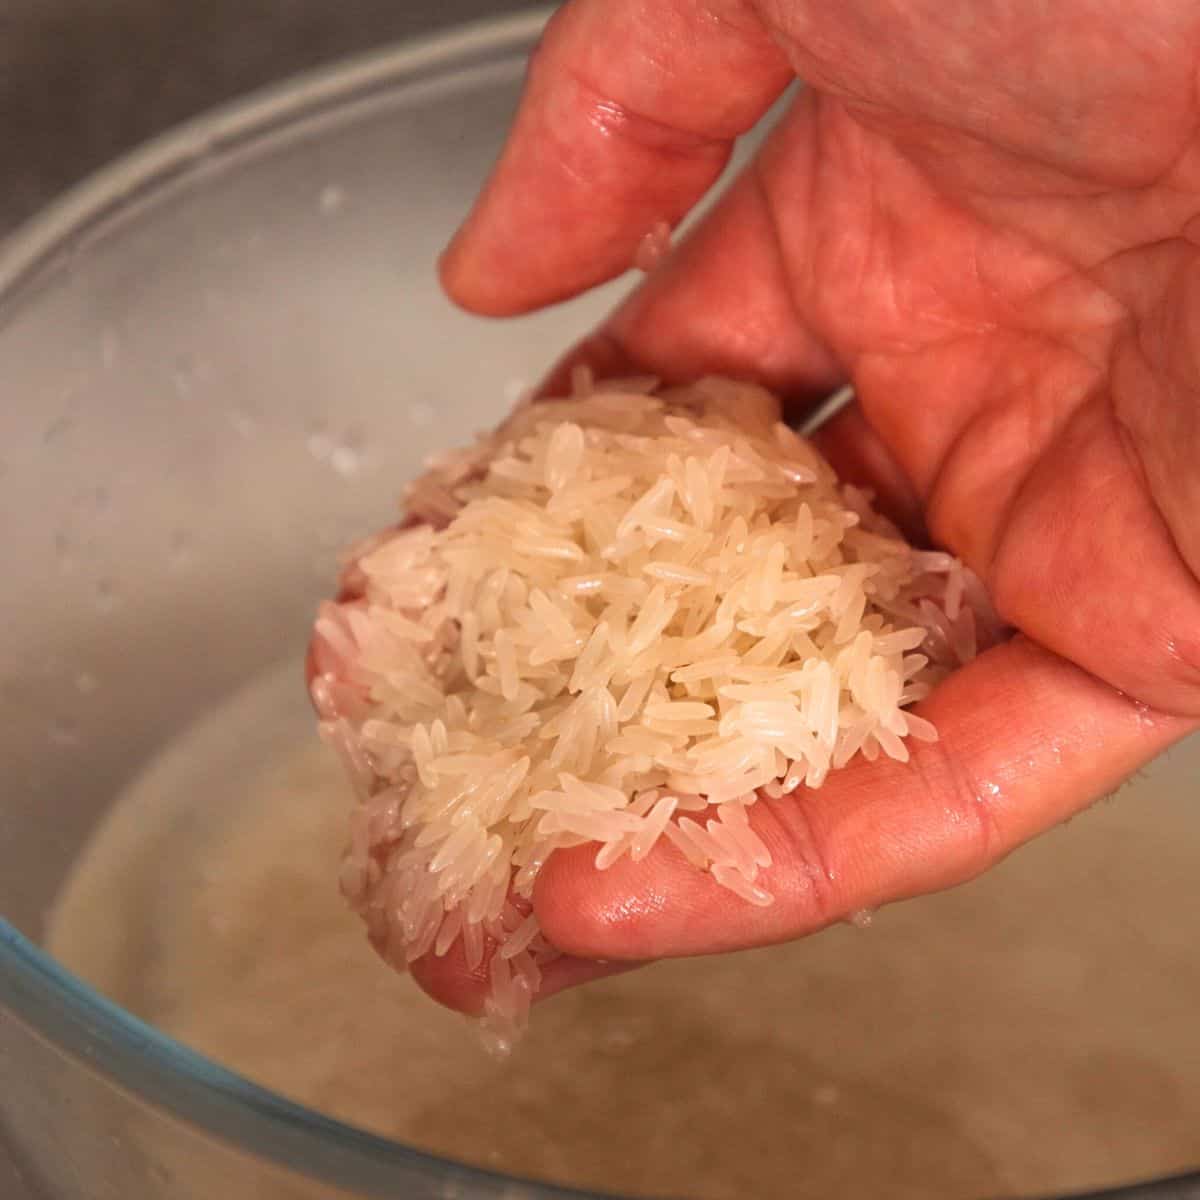
- Step 1: Rinse basmati rice under cold water three times to remove excess starch. Soak the rinsed rice in fresh water for 30 minutes, then drain thoroughly.
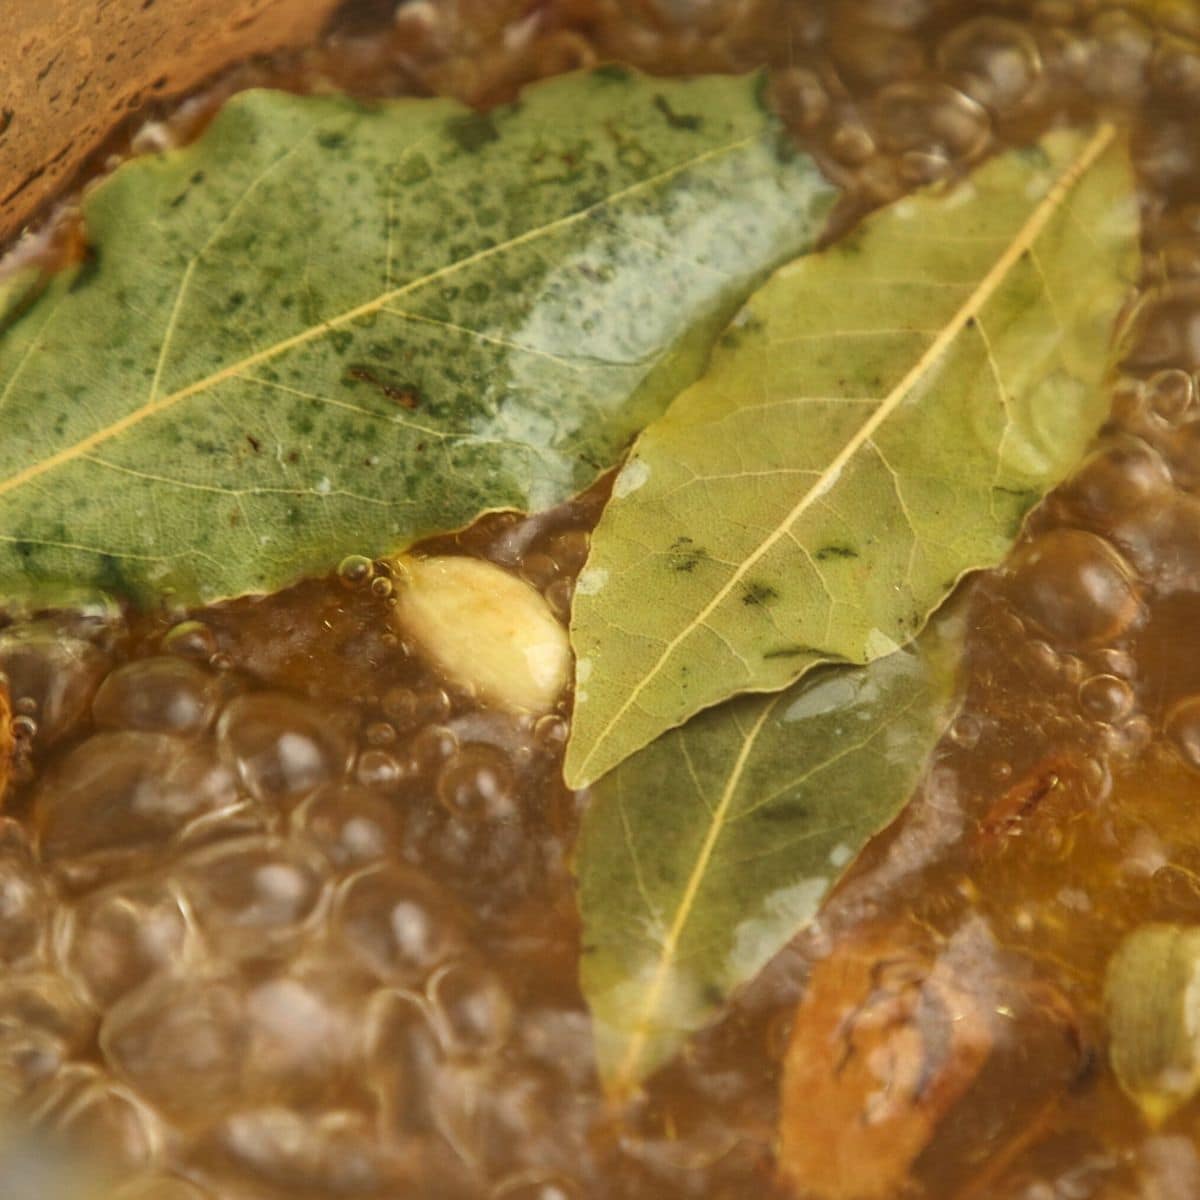
- Step 2: In a medium pot, combine chicken stock, ghee, salt, cardamom pods, star anise, cloves, bay leaves, mace blades, and turmeric. Bring to a boil.
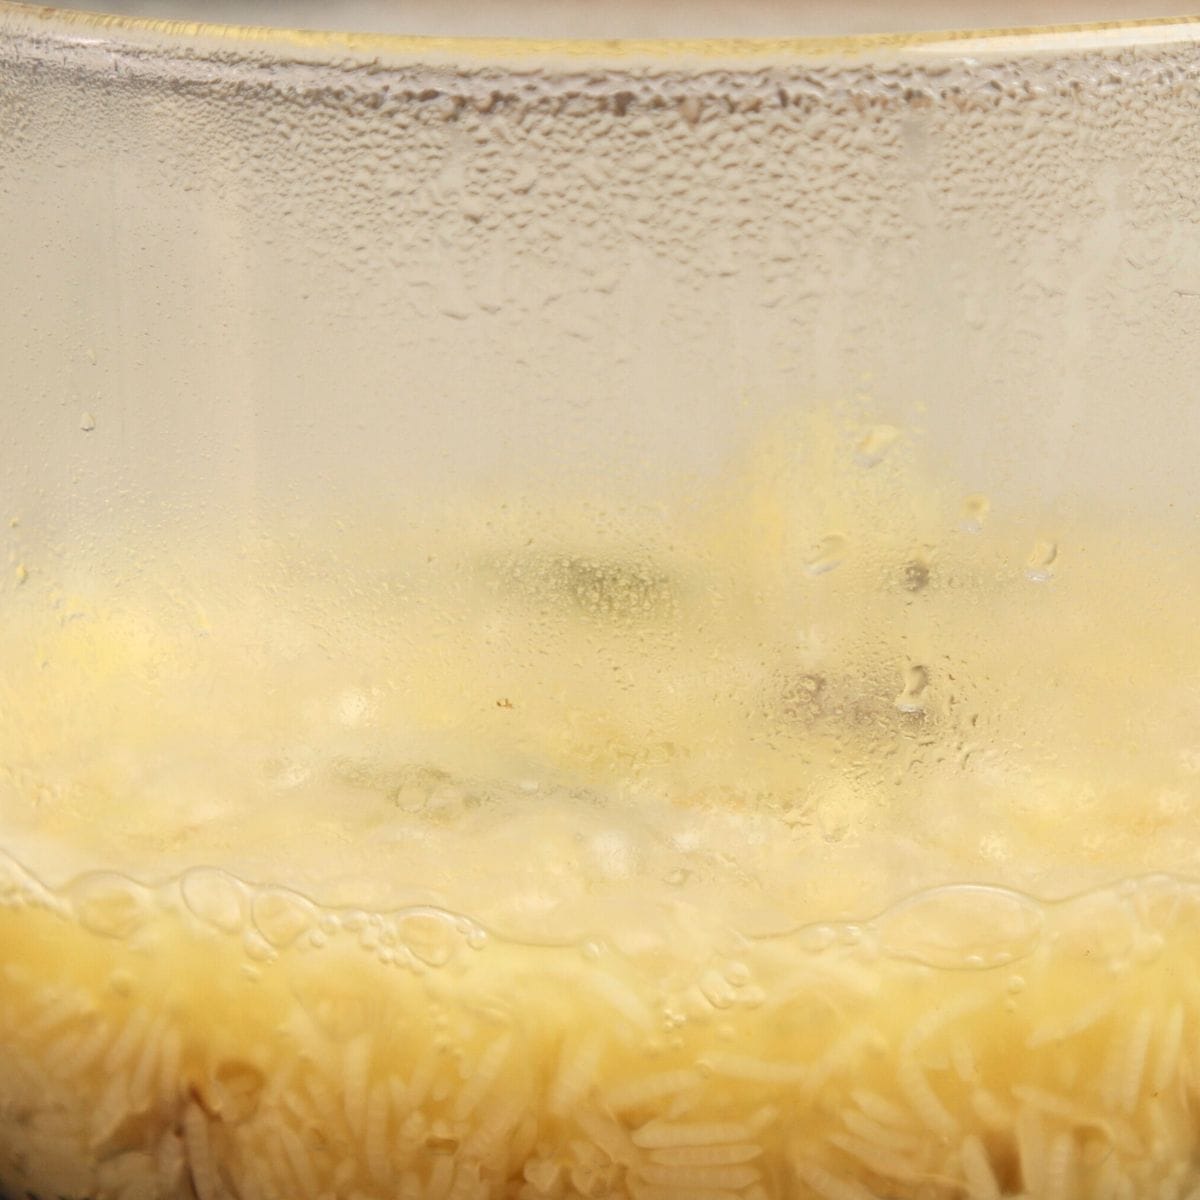
- Step 3: Strain the rice from the soaking water then add it to the boiling stock and cook for 2-3 minutes until 70% cooked (soft outside, firm center).

- Step 4: Drain the rice, reserving the stock if desired for later use. Test the rice by pressing a grain between your fingers-it should break easily but retain a slight bite.
Making the Chicken Gravy
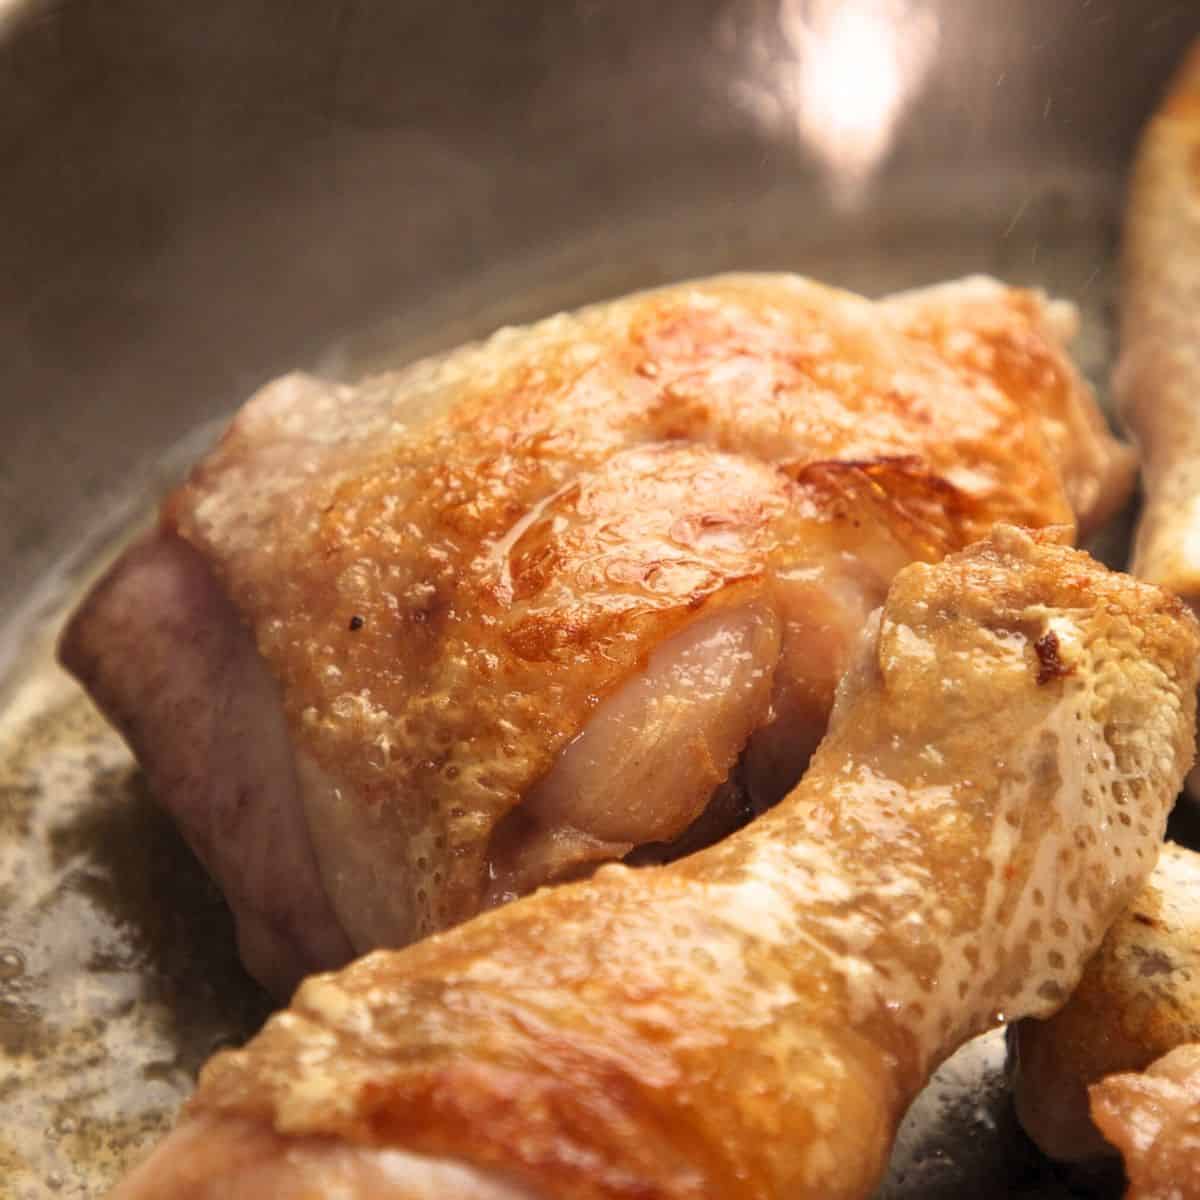
- Step 1: Heat ghee or reserved onion oil in a large pan over medium-high heat. Sear chicken drumsticks and thighs until golden brown on all sides (5-7 minutes). Remove and set aside.
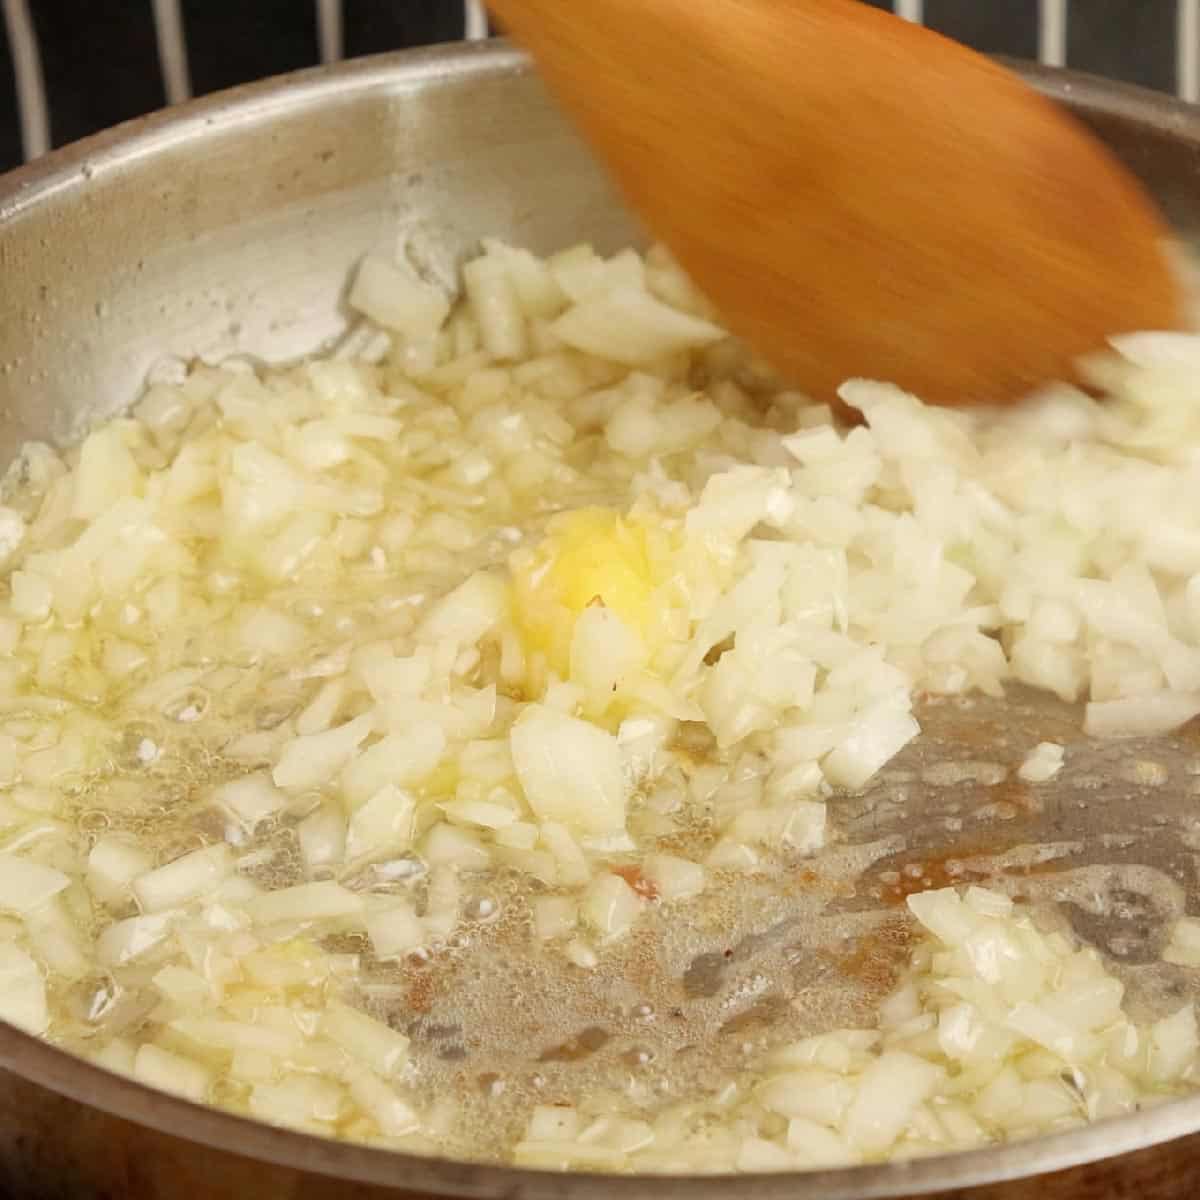
- Step 2: In the same pan, cook chopped onion until golden brown (8-10 minutes). Do not add salt yet to allow proper caramelization.
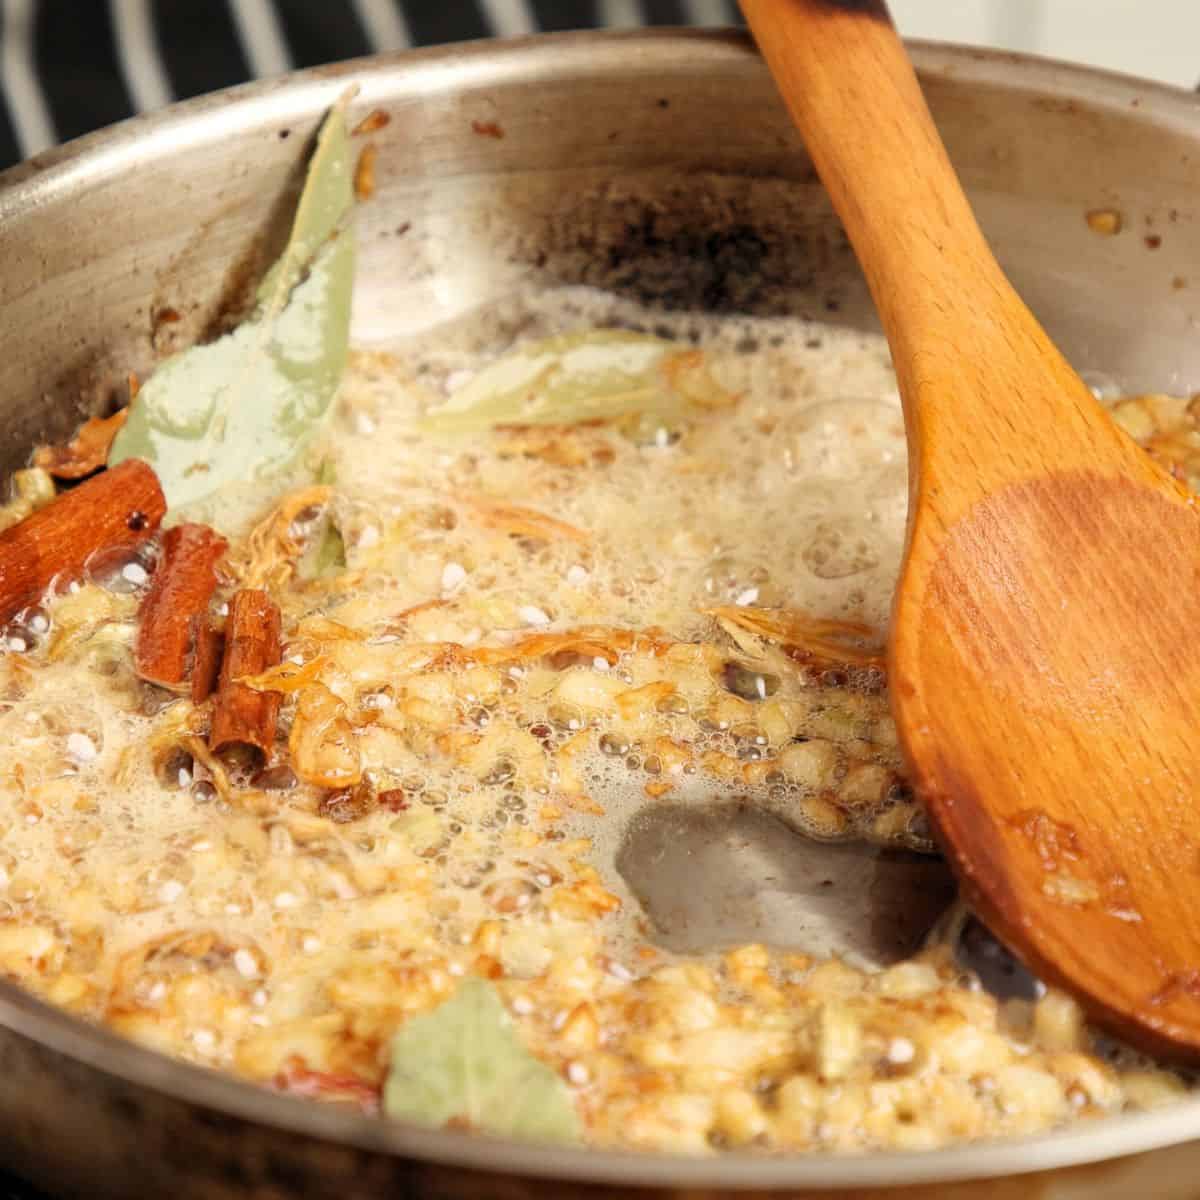
- Step 3: Add cardamom pods, bay leaves, mace blades, cinnamon sticks, and fenugreek seeds. Fry for 2-3 minutes until aromatic.
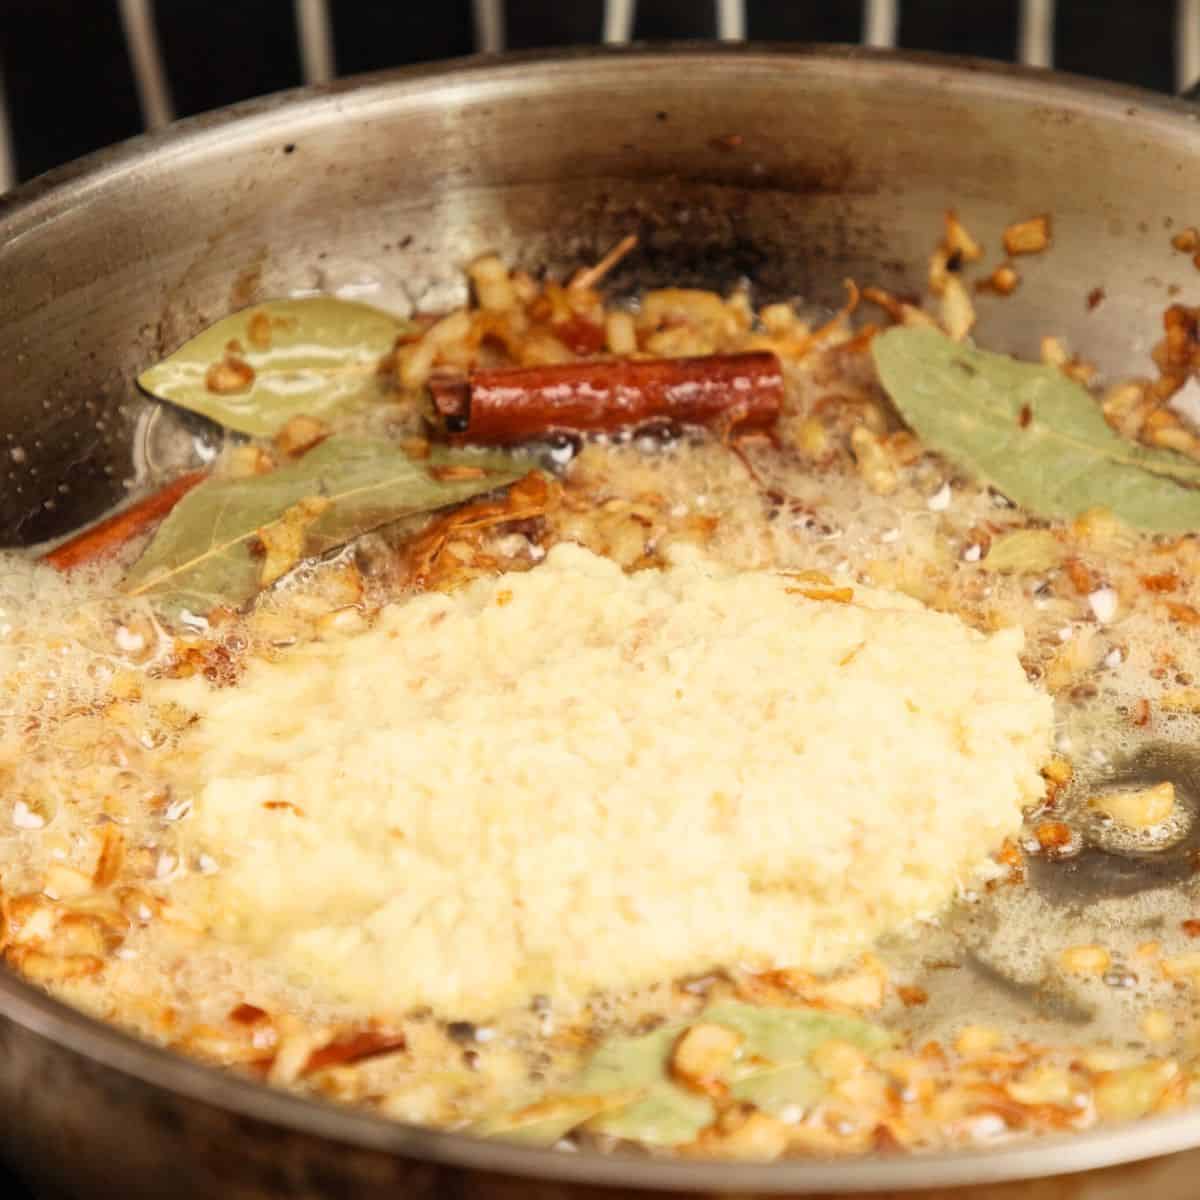
- Step 4: Stir in garlic ginger paste and cook until the raw aroma fades (2 -3 minutes).
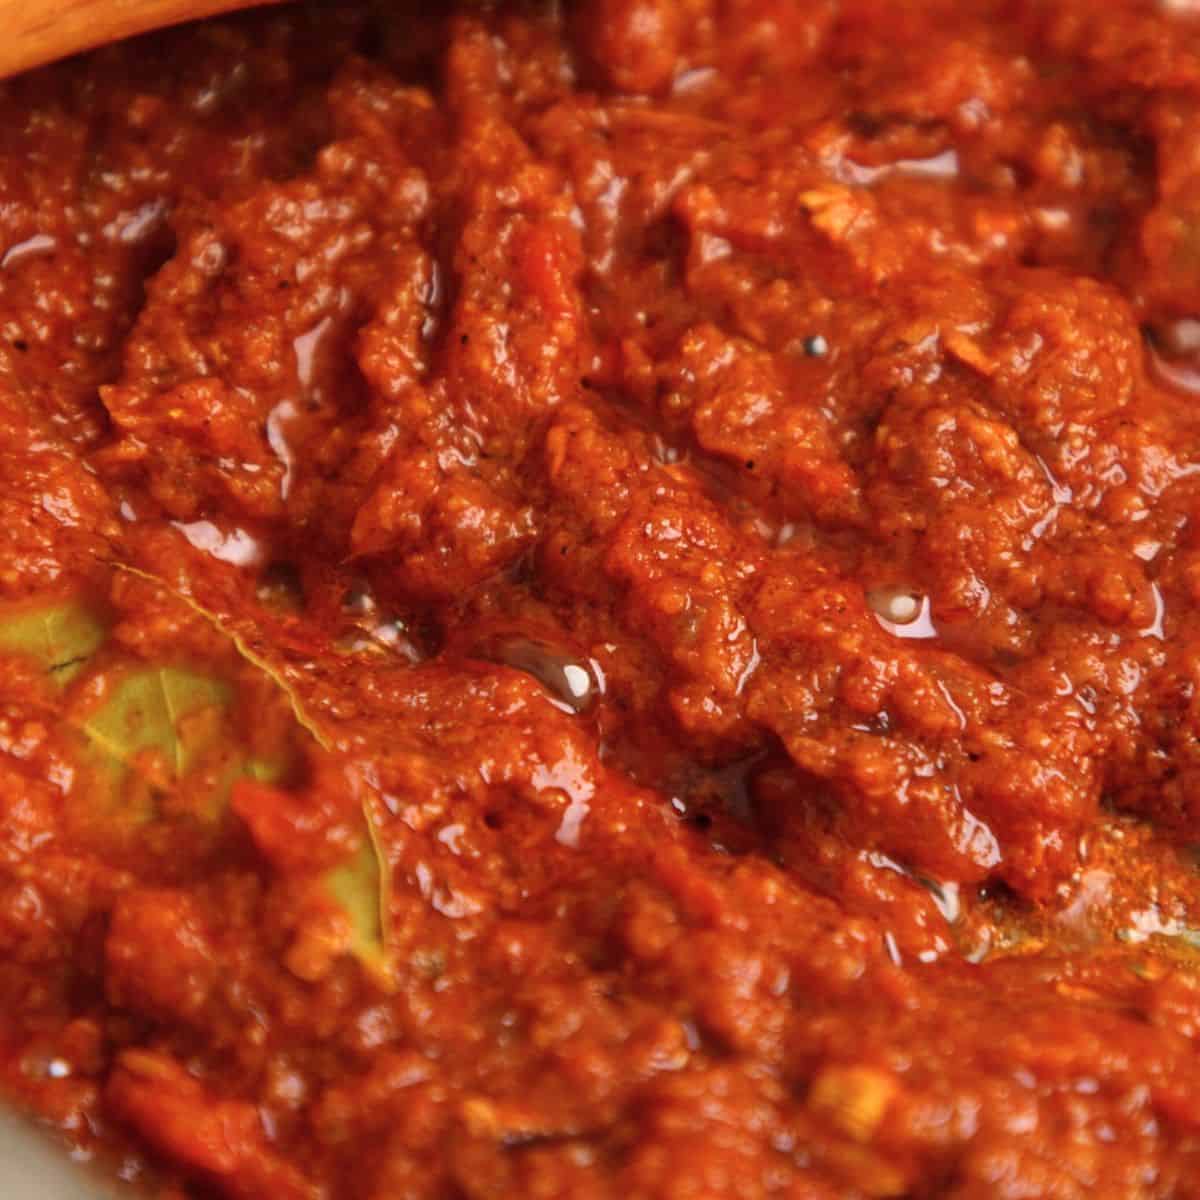
- Step 5: Mix in tomato paste, garam masala, and Kashmiri chili powder. Cook for 1 minute, then add chopped tomatoes. Simmer for 5 minutes, adding a splash of water or stock if it thickens too much. Season with salt and a pinch of sugar to balance the tomatoes' acidity.
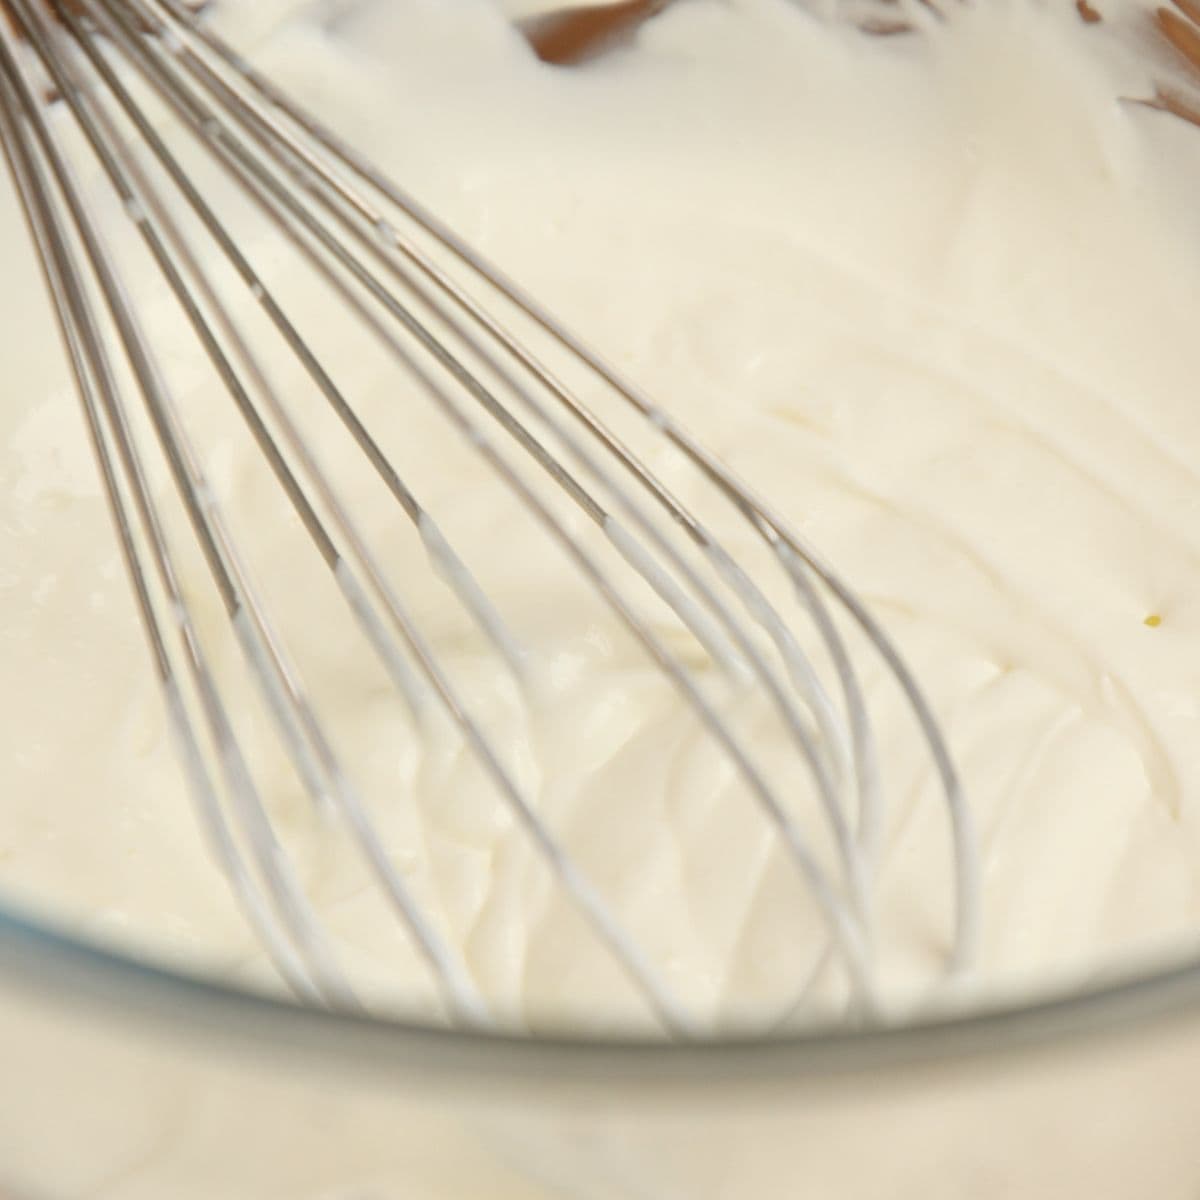
- Step 6: In a bowl, whisk Greek yogurt, double cream, and cornstarch to prevent curdling.
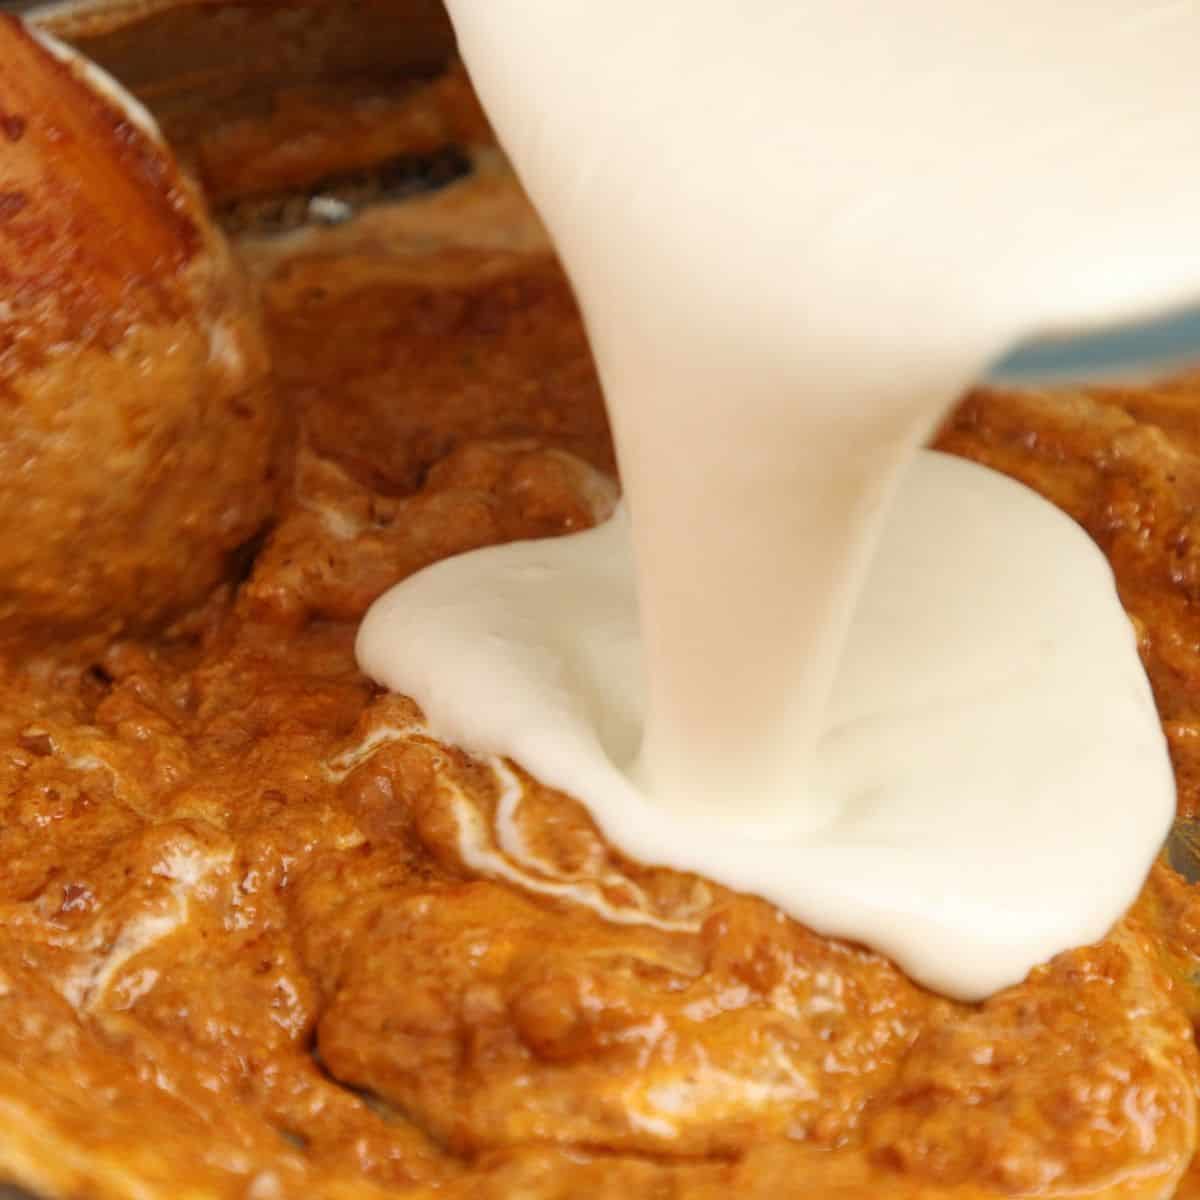
- Step 7: Remove the pan from heat, and gradually stir in the yogurt mixture.
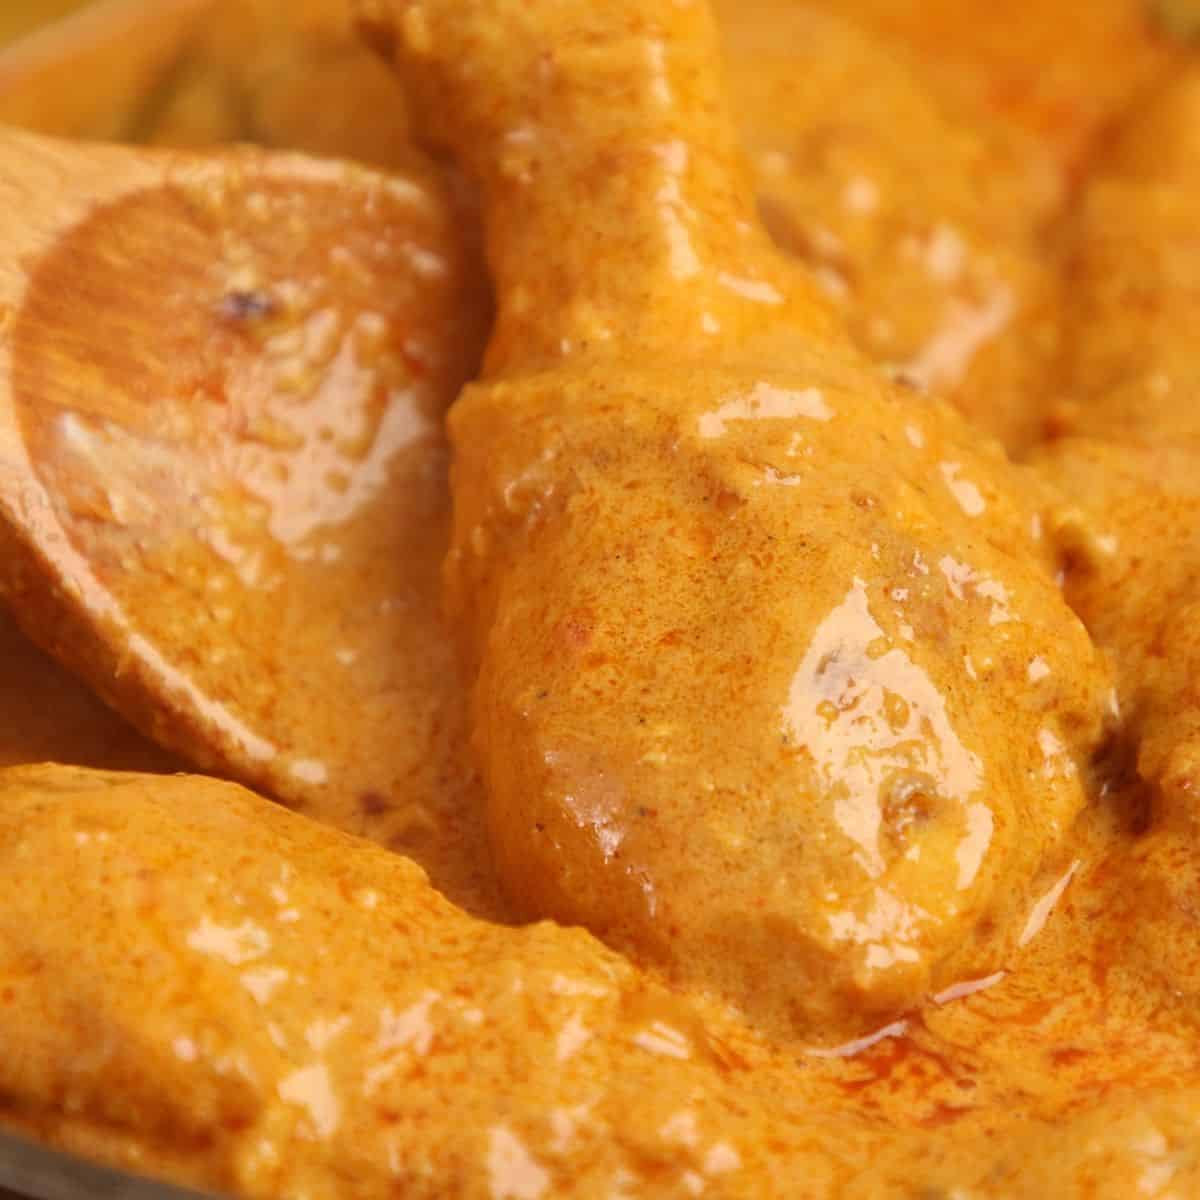
- Step 8: Add back the chicken and slowly simmer for 10 minutes, making sure it doesn't burn on the bottom.
Tip: For a non-yogurt option, use a small amount of cream, though this will reduce the tangy flavor.
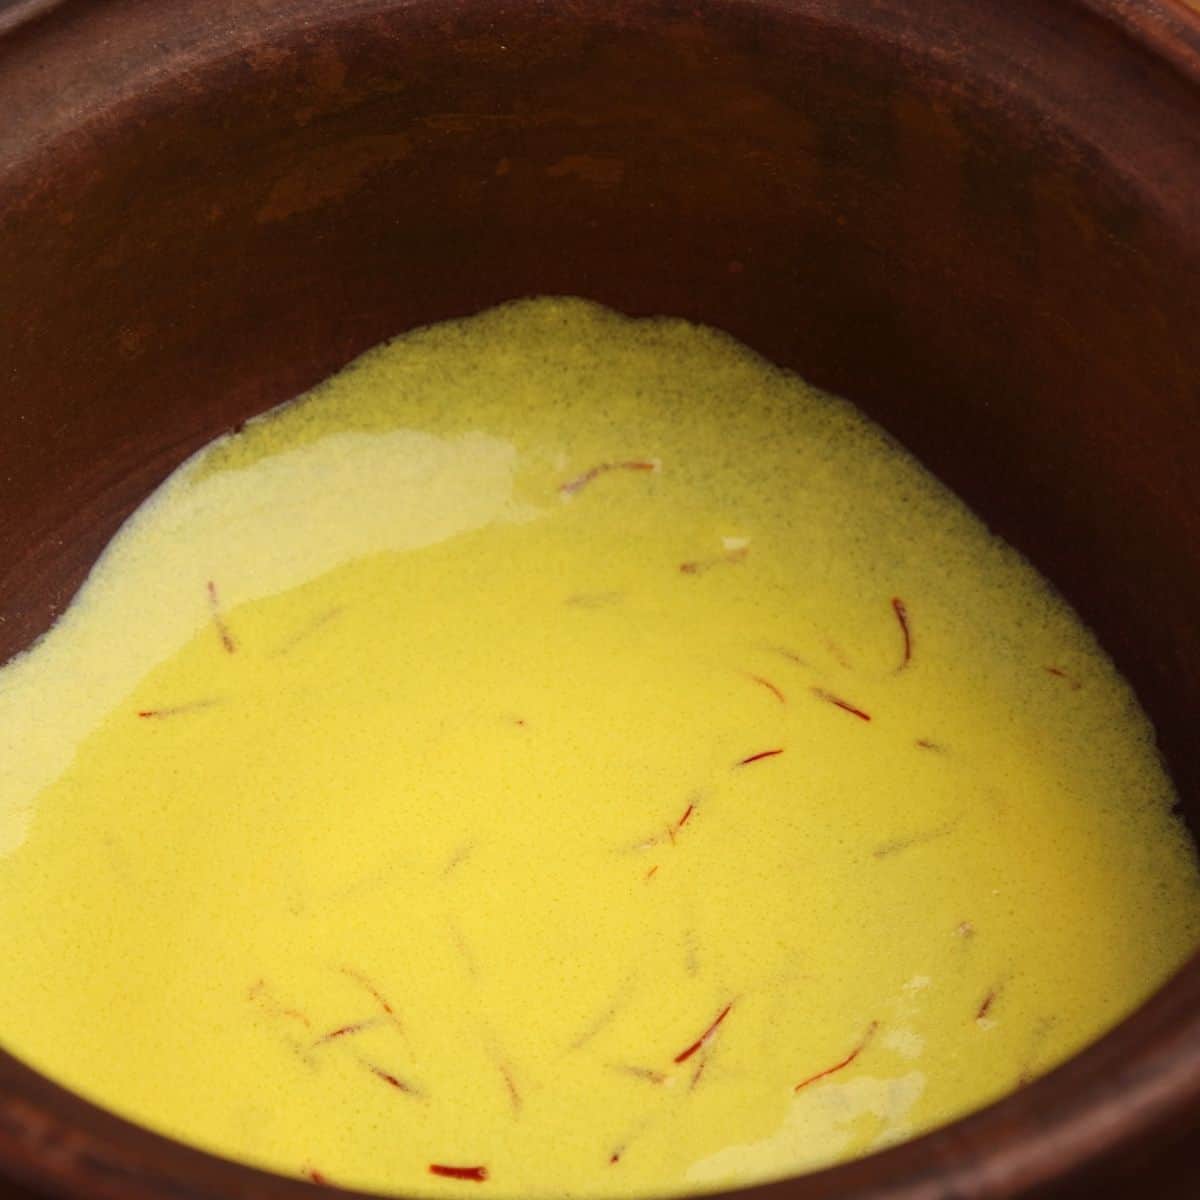
Preparing the Saffron Sauce
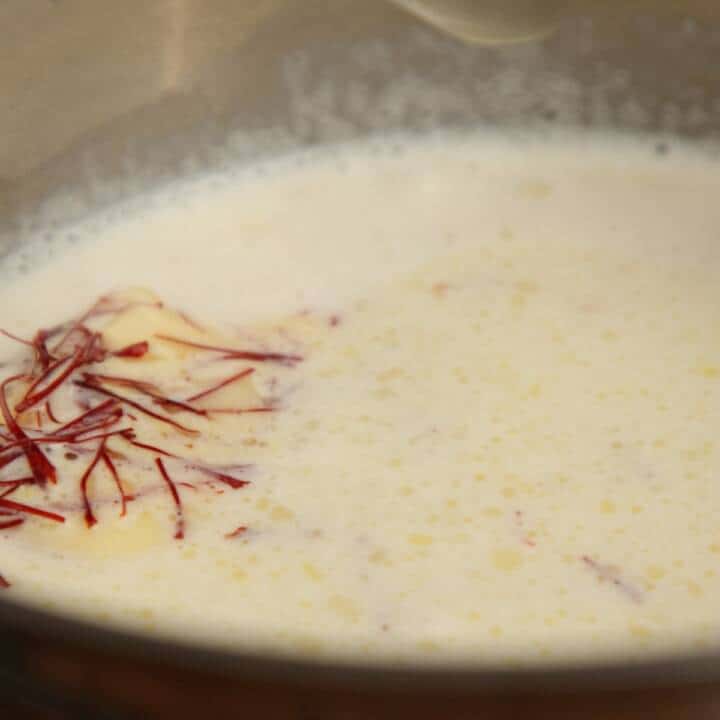
- In a small pan, combine double cream, butter, and saffron strands.

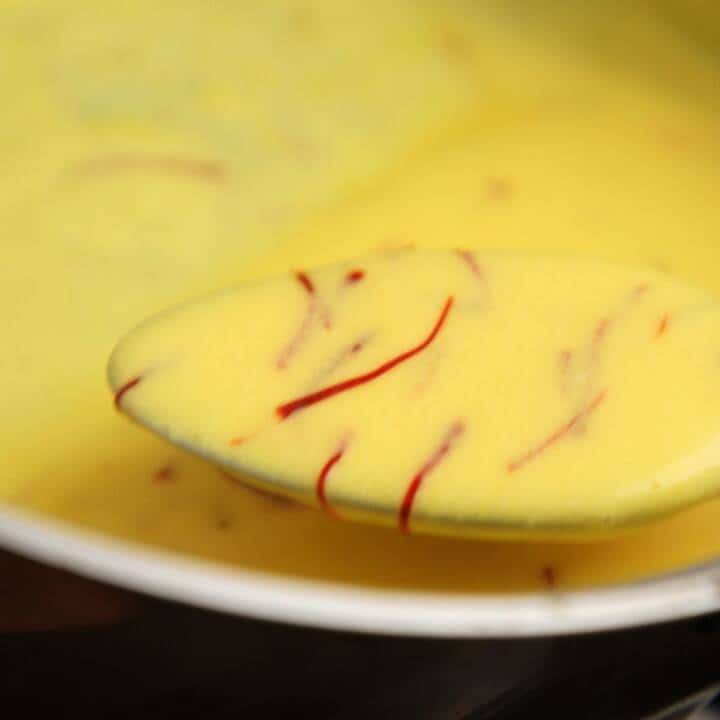
- Simmer over low heat for 3-5 minutes until the sauce turns golden and the saffron infuses fully.
- Keep the sauce warm for layering.
Tip: If saffron is unavailable, substitute with a pinch of turmeric and a drop of honey for color and sweetness.
Making the Dough Seal (Optional)
The dough seal is used in traditional dum cooking to trap steam which cooks the ingredients inside whilst keeping the moisture and flavor locked in.
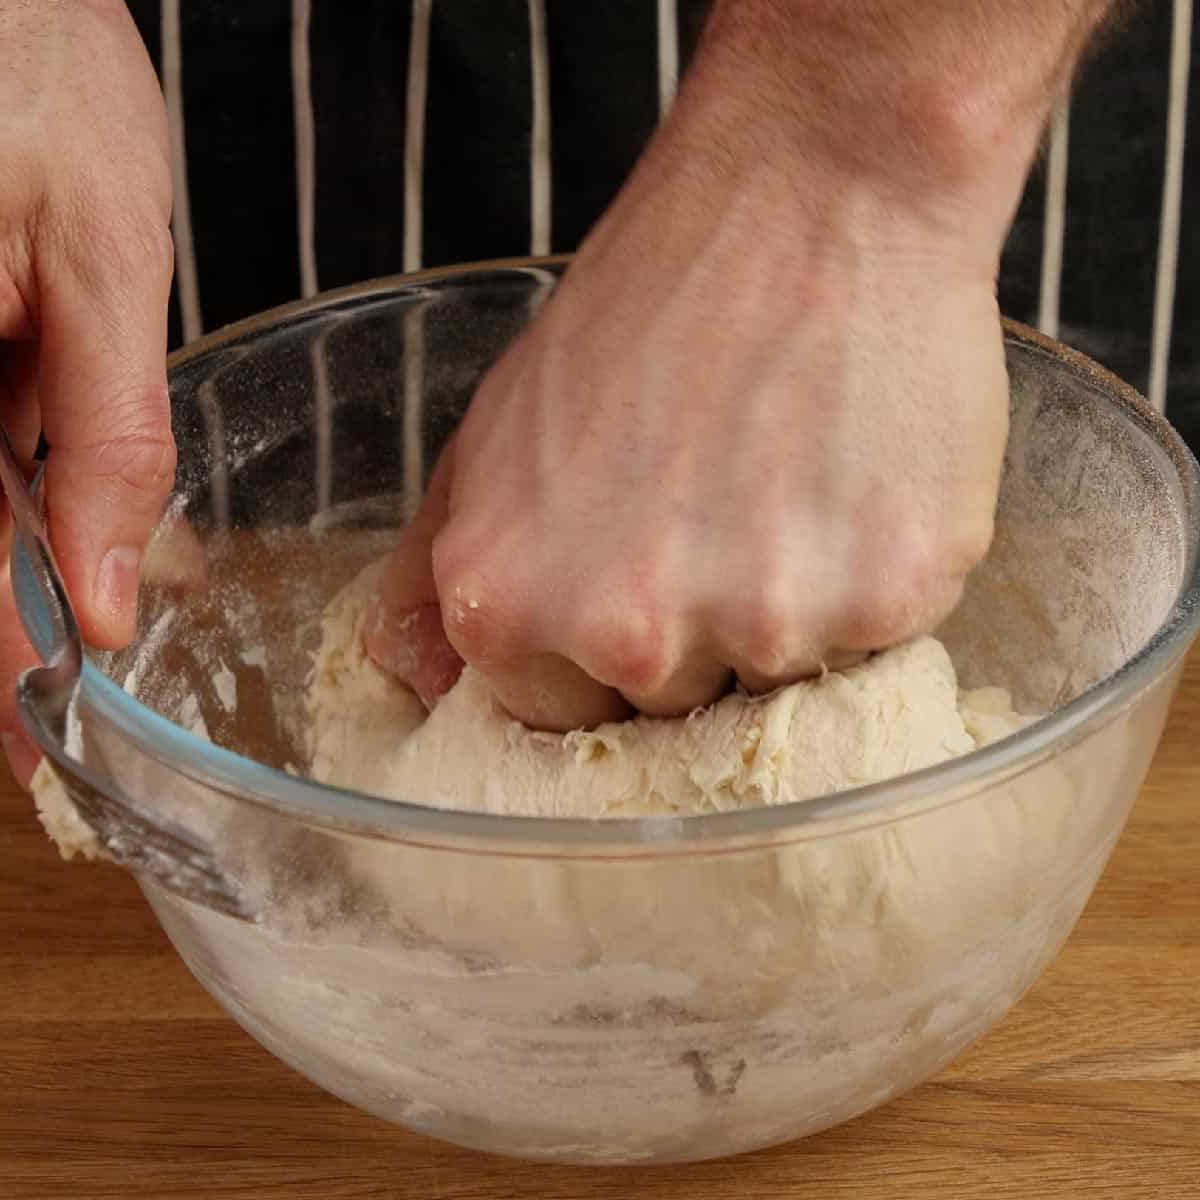
- Step 1: Combine all-purpose flour, water, oil, and salt to form a smooth dough.

- Step 2: Knead briefly until pliable, then cover with a damp cloth until needed.
Tip: Aluminum foil can replace the dough for a simpler sealing option.
Layering the Biryani
Layering distributes the flavors evenly throughout the dish.
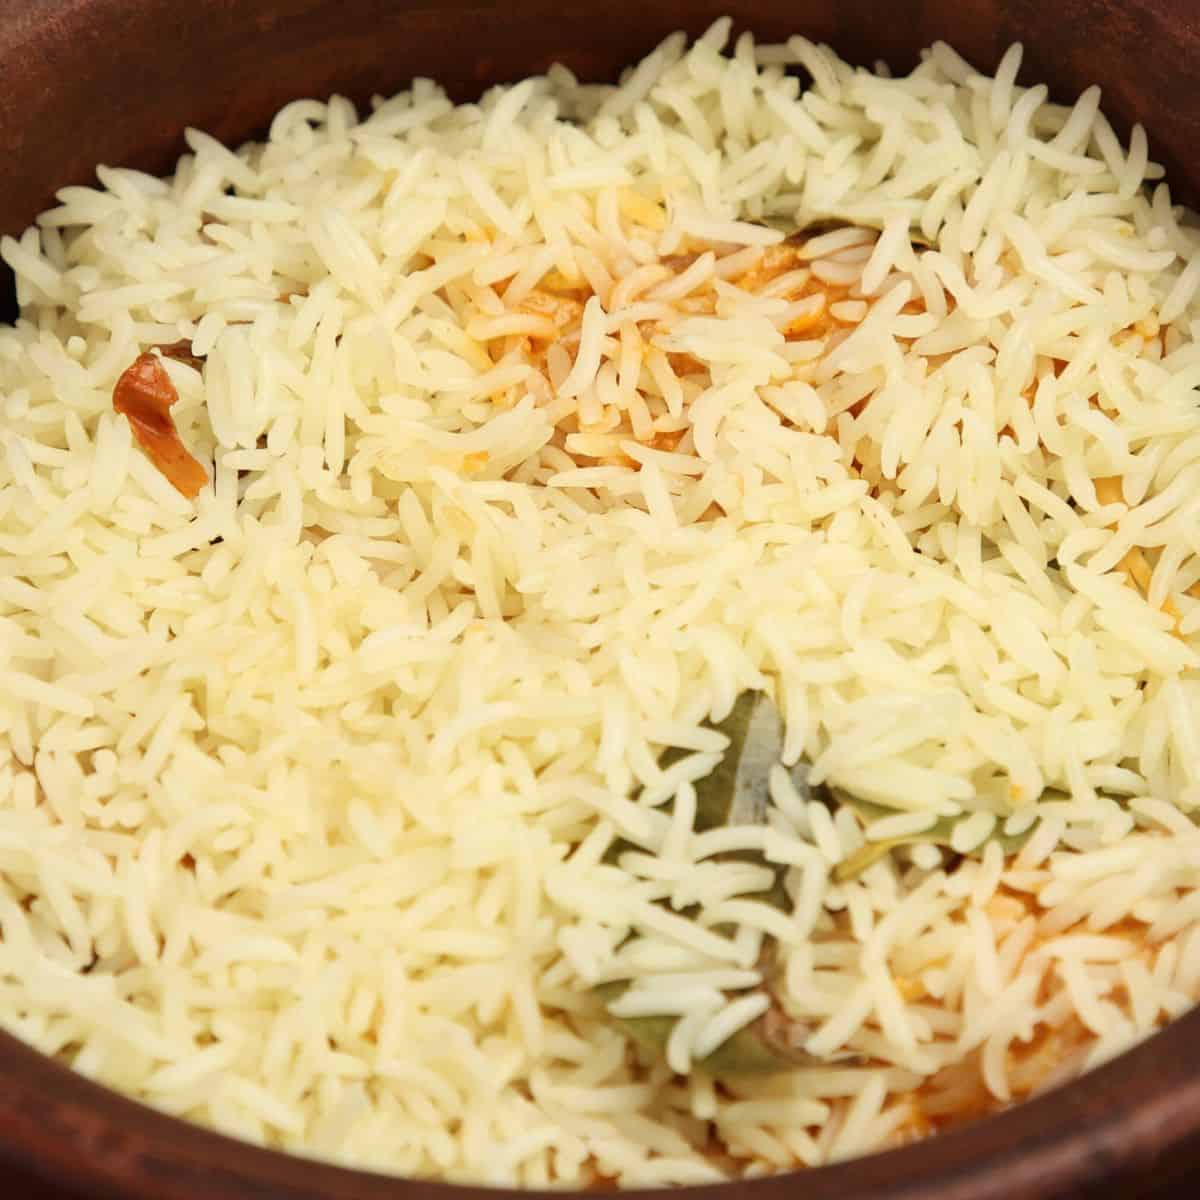
- Step 1: Preheat your oven to 230 °C (446 °F). In an oven-safe pot (or clay pot), spread a thin layer of saffron sauce at the bottom.
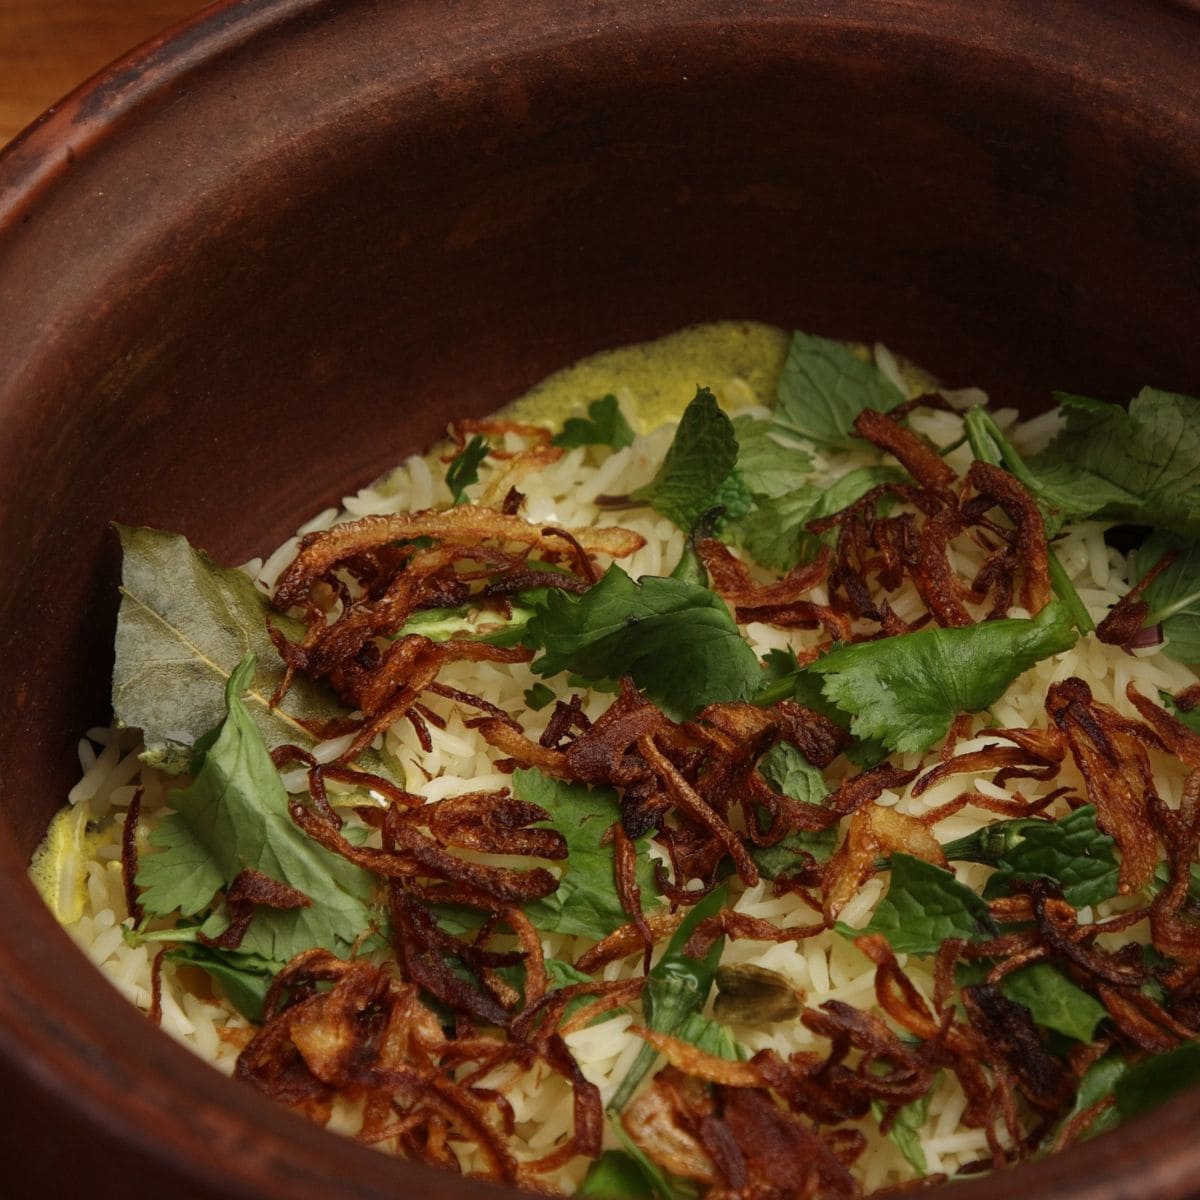
- Step 2: Spread a layer of par-cooked rice evenly over the sauce and sprinkle with torn cilantro, mint, and crispy onions. If you like heat, add sliced green chilies.
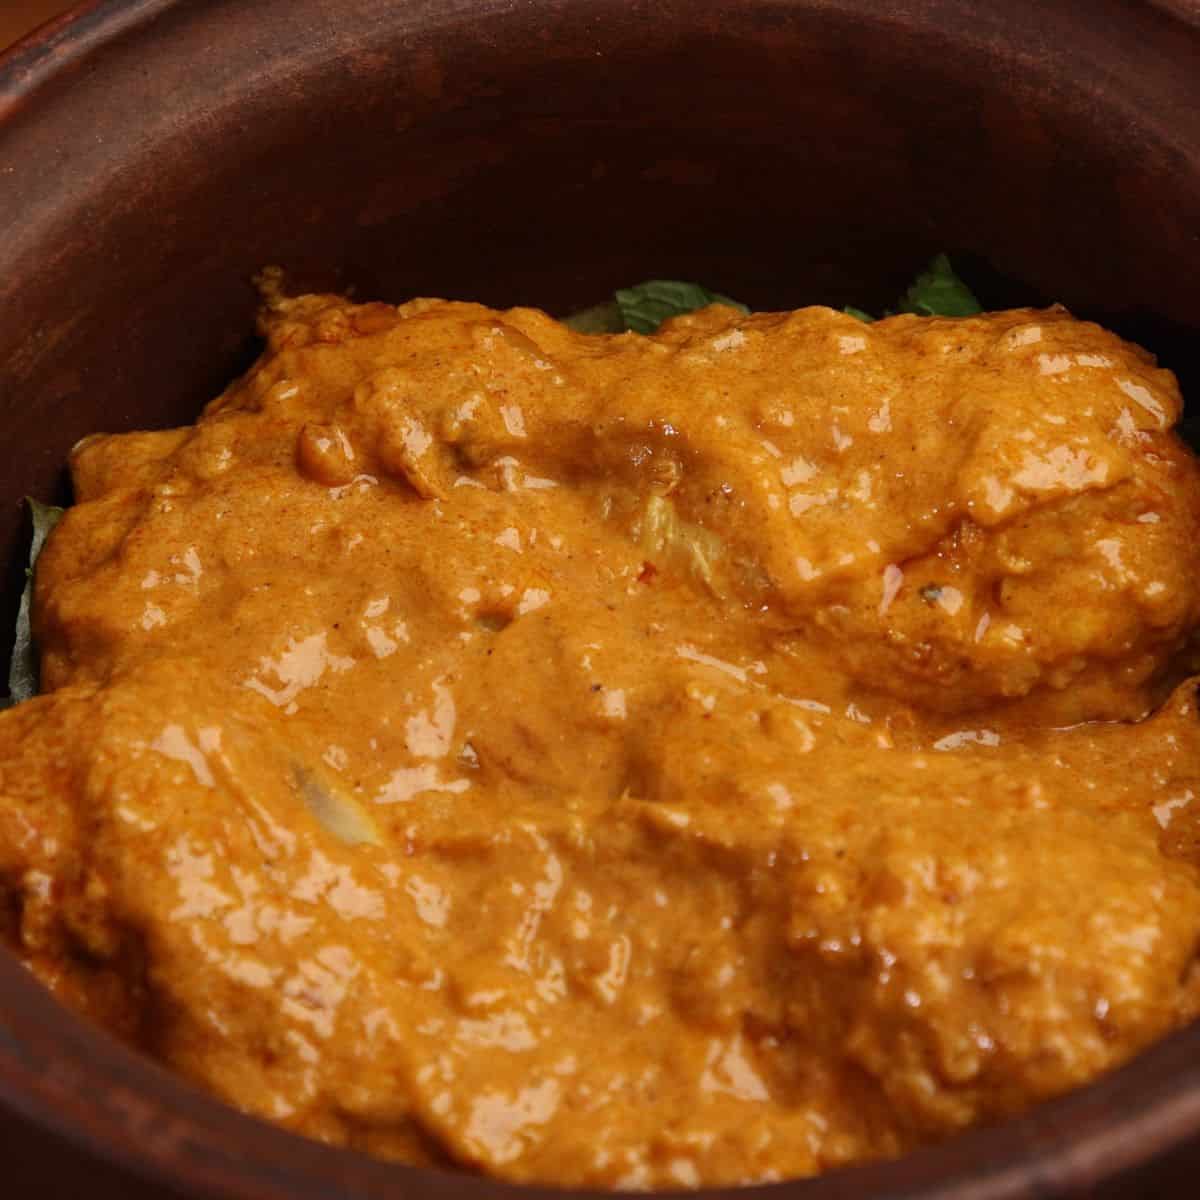
- Step 3: Place a few pieces of chicken and a small amount of gravy over the rice, avoiding excess liquid to keep it fluffy.
- Step 4: Spread more rice on top of the chicken.
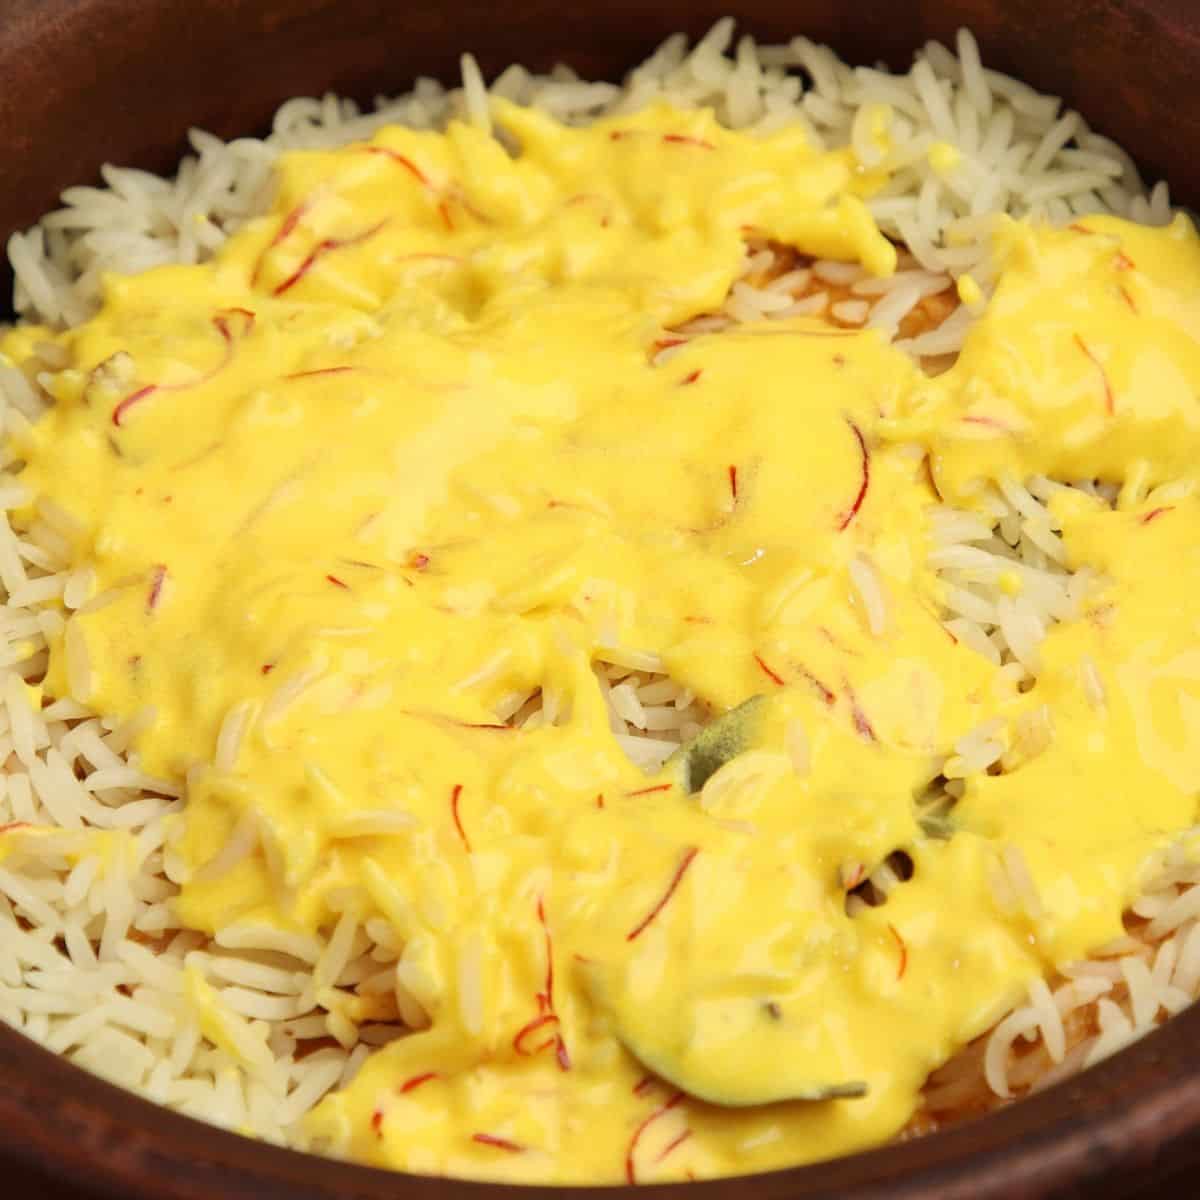
- Step 5: Repeat the layers-saffron sauce, herbs, onions, chicken, and gravy.

- Step 6: Repeat once more and finish with plenty of herbs and crispy onions.
Tip: Avoid compacting the layers too much for a light texture and proper cooking.
Dum Cooking the Biryani
Dum cooking seals in steam, allowing the flavors to meld. Choose between the classic clay pot method or the easy pot method.
Classic Clay Pot Method (Dough Seal)

- Step 1: Roll the dough into a long strip.
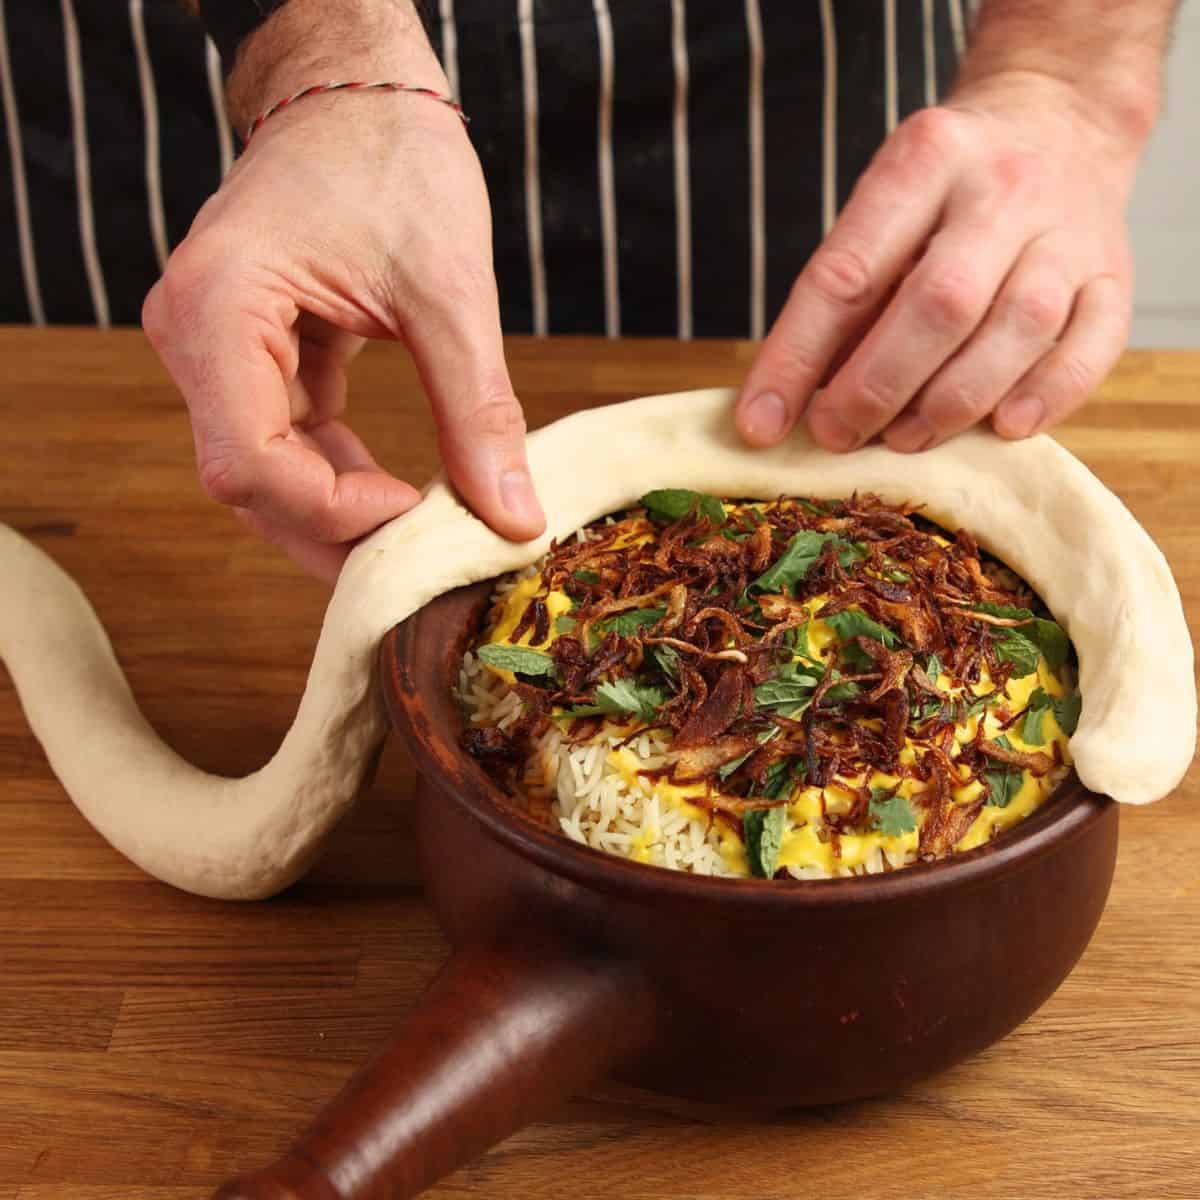
- Step 2: Press it firmly around the edge of the clay pot's lid to seal it airtight.
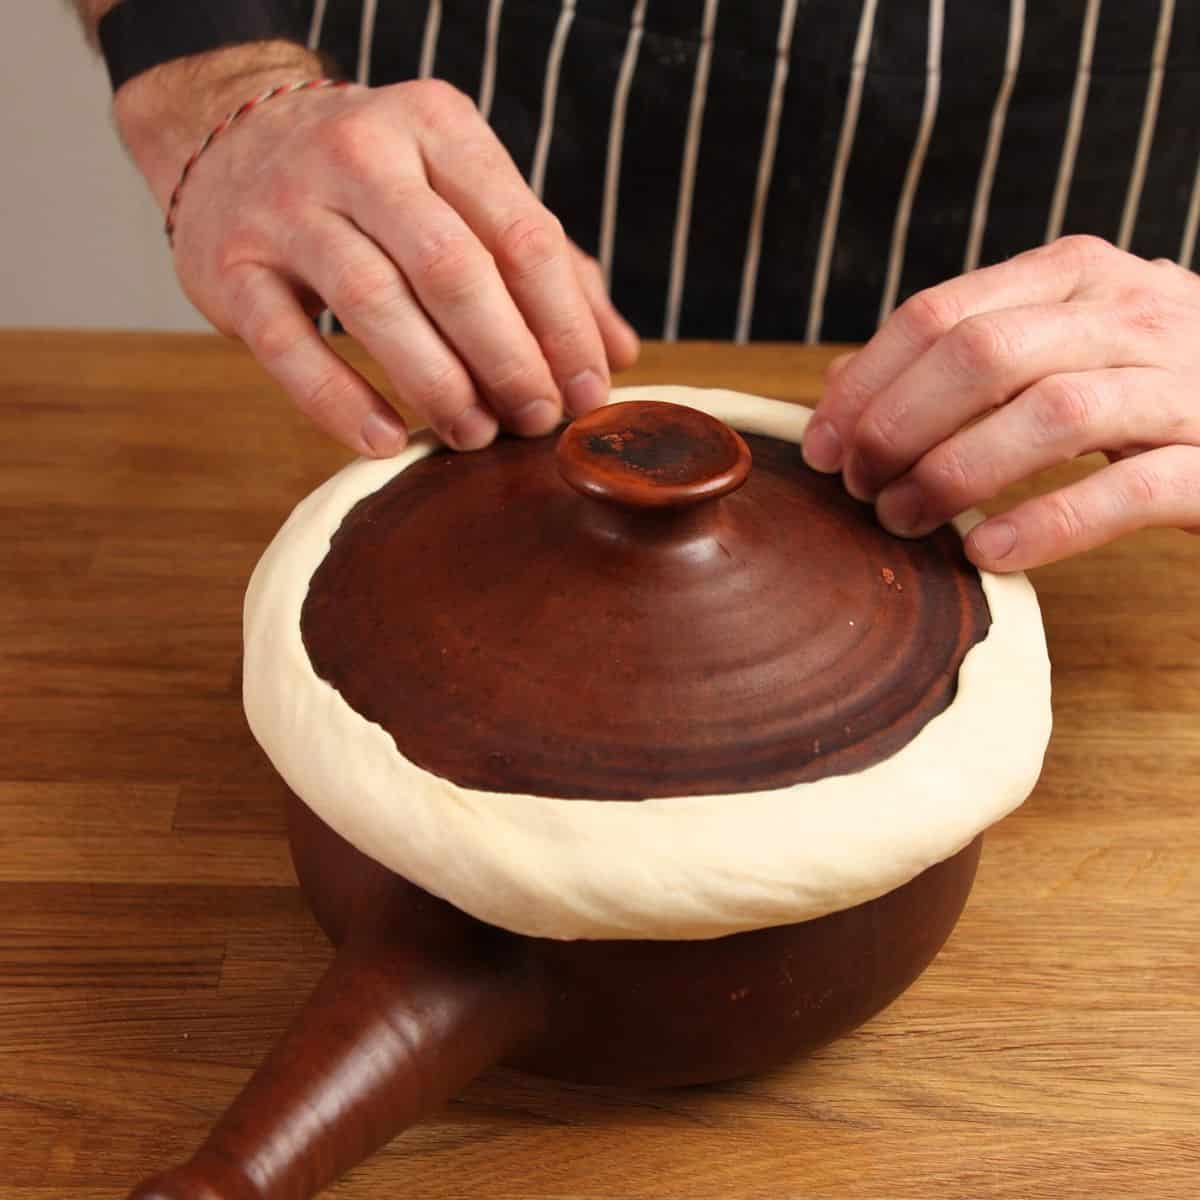
- Step 3: Close the lid and seal the dough around the lid tightly.
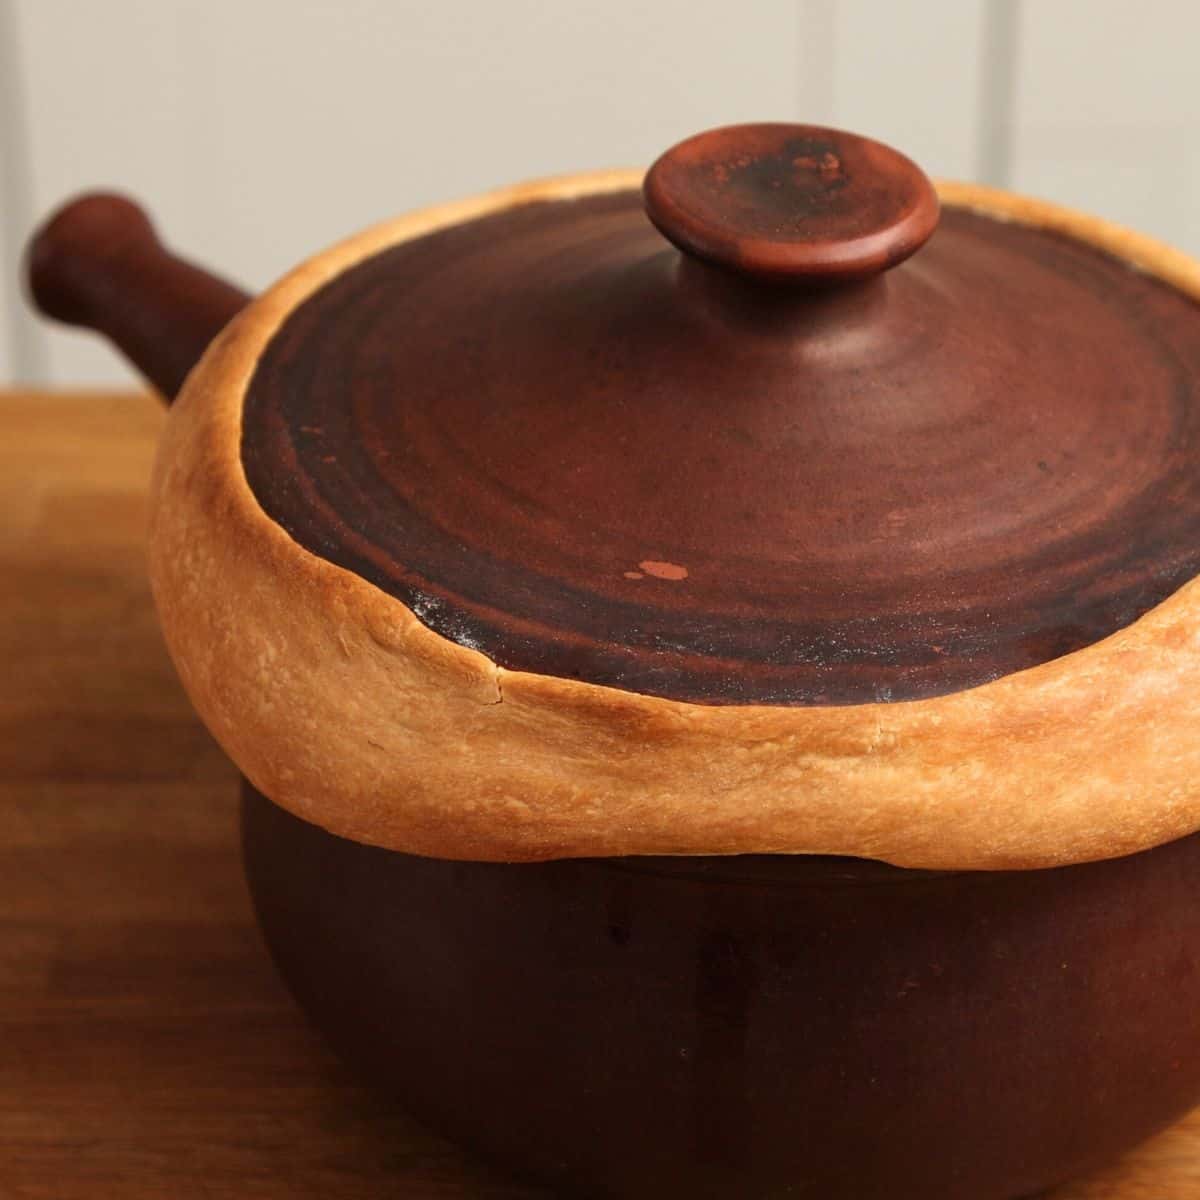
- Step 4: Cook in the oven for 25-30 minutes.
Easy Pot Method (Foil and Lid)
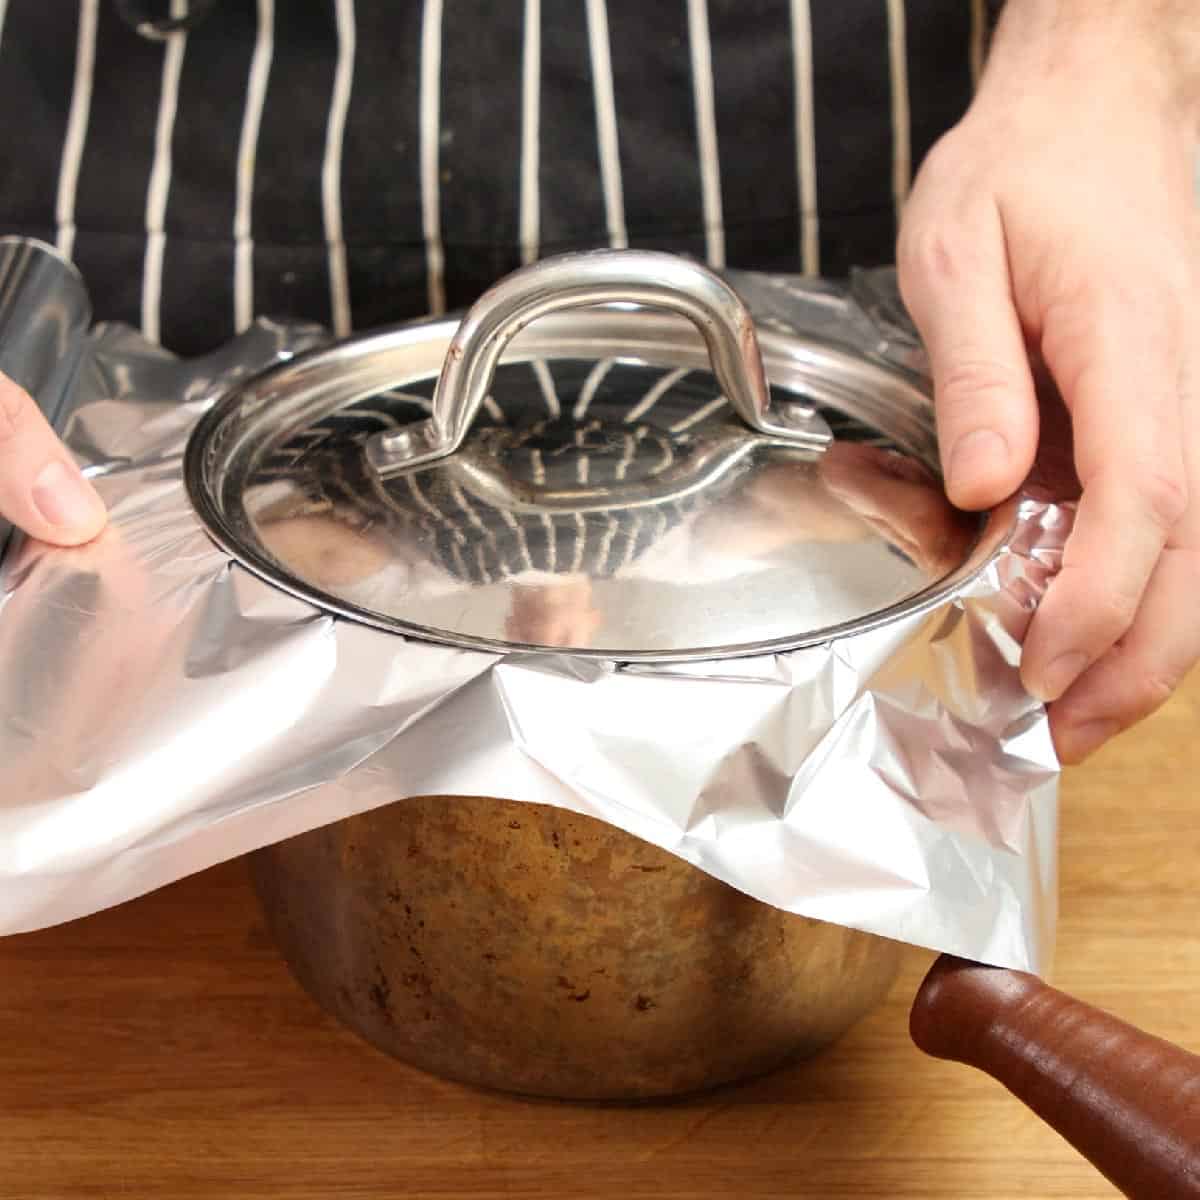
- Cover the pot tightly with aluminum foil.
- Secure the lid over the foil to reinforce the seal.
- Cook in the oven for 25-30 minutes.
Tip: Use a flat pan(tawa)or skillet under the pot on the stovetop in case you don't have an oven. Cook it on low heat for even heat distribution and to prevent the bottom from burning.
Serving the Biryani
- Step 1: Remove the pot from the oven and let it rest for 5 minutes. Carefully remove the dough or foil, watching out for hot steam.
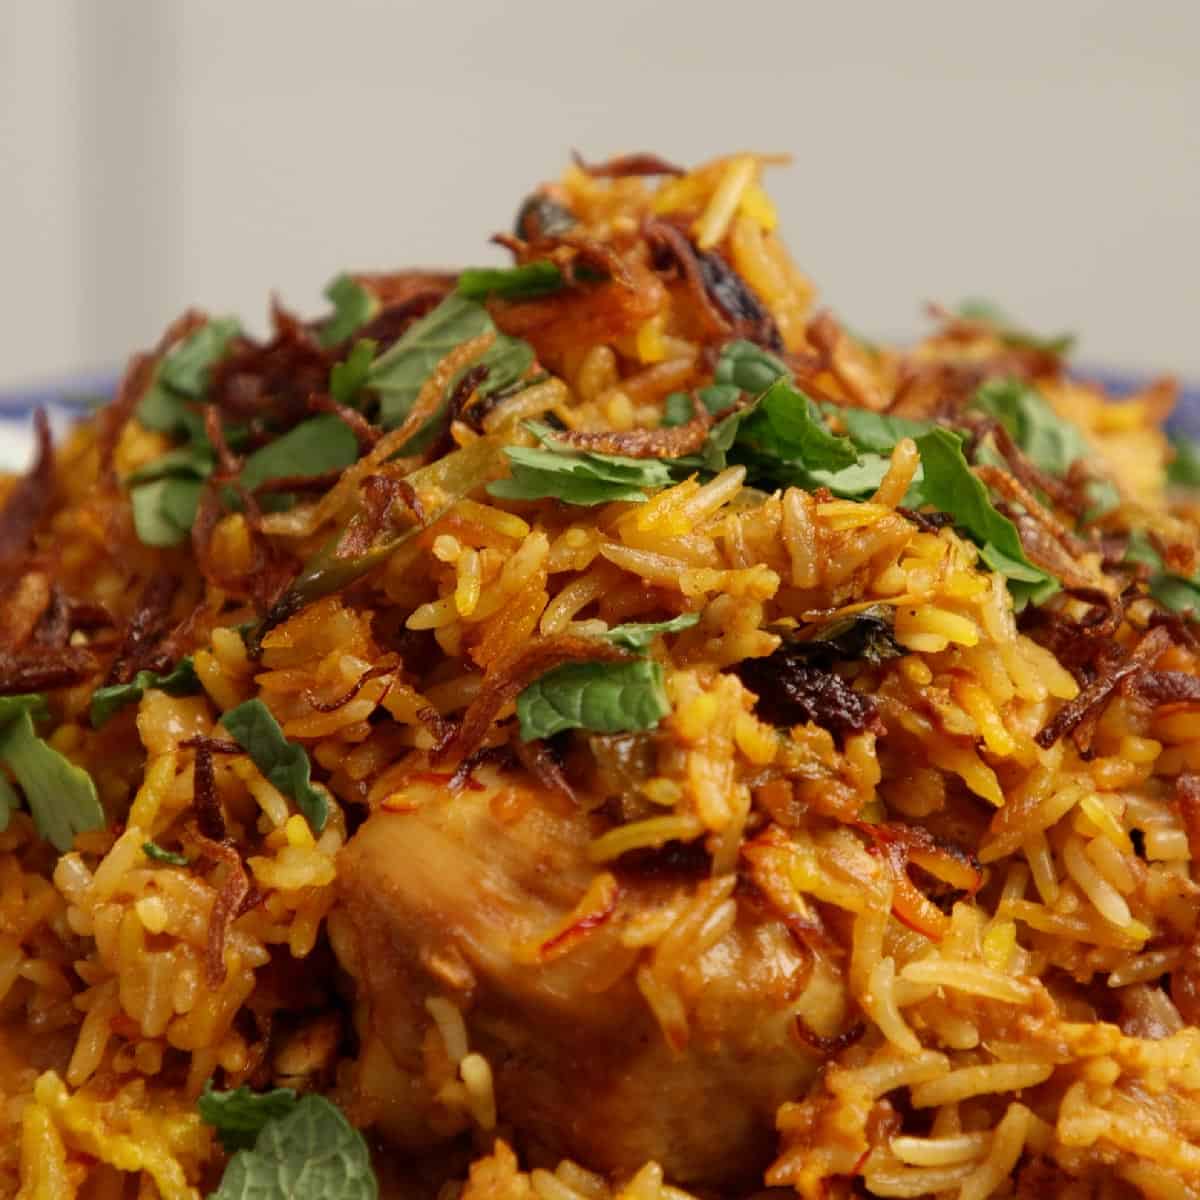
- Step 2: Serve on a large plate and garnish with extra crispy onions, cilantro, and mint.
Bonus: Making Flatbread (Optional)
Turn leftover dough into flatbreads to serve with your biryani.

- Divide the dough into small balls and roll each into a thin, round sheet on a floured surface.

- Heat a skillet over high heat and dry-roast each flatbread for 1-2 minutes per side, pressing with a damp cloth to puff it up.

- Brush with melted ghee or butter while warm to keep it soft.
Tips for success
- Rinse and soak the rice - Wash basmati rice three times to remove excess starch, then soak it in water for 30 minutes. This is important to get the correct texture.
- Sear the chicken - Brown the chicken pieces and cook the gravy in the same pan for maximum flavor.
- Stabilize the yogurt - Whisk yogurt with a bit of cream and cornstarch, and add it to the gravy off the heat. This prevents it from splitting.
- Layer loosely - When assembling, alternate layers of rice, chicken, and garnishes without pressing down. Loose layering keeps the biryani light and airy.
- Seal the pot tightly - During the dum cooking stage (slow steaming), seal the pot with dough or foil. This traps steam, locking in moisture and aromas.
- Keep everything warm - Make sure to have your rice, chicken, and saffron sauce warm when layer the biryani. Layering and cooking it from cold, will not give good results.
Substitutions
- Protein - Substitute the chicken for lamb, or beef. When you do it with lamb or beef, make sure to cook the meat until completely tender before layering the biryani. If you don't, it will be tough as the rice cooks quickly.
- Spices - Instead of using lots of individual spices you can double up on the garam masala or use Madras curry powder.
- Saffron - Saffron is important for the traditional flavor of biryani, but you can substitute it with a touch of turmeric instead.
- Rice - If you don't want to use rice you can use other grains like lentils, buckwheat, or even quinoa. Make sure to parboil them just as you would with rice.
Variations
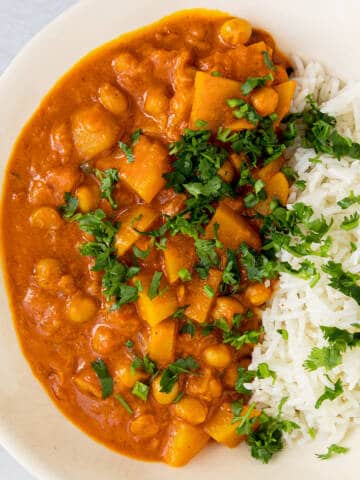
- Vegan biryani - Substitute the dairy for coconut oil and coconut milk. Use vegetables like pumpkin, potato, sweet potato, and bell peppers instead.
- Seafood biryani - This is far from traditional but it is delicious. Use calamari, mussels, and shrimp instead of meat. Do not cook it for too long in the gravy, to avoid it from becoming rubbery. Half a minute is enough.
Equipment
The most important thing you need, is a pot to cook your biryani in.
This could be a clay pot, Dutch oven, or simple stainless steel pot with a lid.
Storage and reheating
Biryani is best eaten on the day but you can store leftovers in the fridge for up to 3 days sealed airtight. It's best to keep the chicken and rice separate in order to reheat them easily.
Reheat in a pan with a touch of water to make up for moisture loss. Reheat the chicken separately from the rice as that will take much longer, then combine.
FAQ
Hyderabadi biryani skips tomatoes and often marinates the meat, while Kerala styles include tomatoes and lean toward lighter spicing, and often include coconut milk. This recipe blends both for a balanced, unique flavor.
Yes, use foil and a tight lid instead. The dough adds authenticity but isn't mandatory.
High heat or low-fat yogurt can cause it. Use full-fat yogurt(6%+). Whisk it before adding it and slowly add it off the heat. Stabilize it with a teaspoon of cornstarch and a dash of cream to guarantee it won't split.
It's worth seeking out, but a pinch of turmeric and a drop of honey can mimic the color and slight sweetness.
More Indian recipes


If you found this post helpful or have learned something, please comment, subscribe, and follow me on social media for more delicious recipes.
This site contains affiliate links. I may earn a tiny commission on qualifying purchases at no extra cost to you. By bookmarking these links you help support the upkeep of this site.
Recipe

Biryani - Indian Chicken And Rice (Video)
Ingredients
For the Crispy Onions:
- 220 grams (1 cups) vegetable oil
- 300 grams (1 ½ cups) onions - red or white - thinly sliced
For the Rice:
- 280 grams (1 ½ cups) basmati rice
- 600 milliliters (2 ½ cups) chicken stock - or water
- 30 grams (2 tablespoon) ghee - butter or oil
- 6 grams (1 teaspoon) salt
- 5 (5) cardamom pods
- 2 (2) star anise
- 4 (4) cloves
- 4 (4) bay leaves
- 2 (2) mace
- ¼ teaspoon (¼ teaspoon) turmeric
For the Chicken Gravy:
- 680 grams (1 ½ lb) chicken drumsticks and thighs - bone-in or boneless
- 45 grams (3 tablespoon) ghee - or oil from frying the onions
- 180 grams (1 cups) onion - chopped
- 75 grams (5 tablespoon) garlic ginger paste - 50/50 blend of garlic and ginger
- 25 grams (1 ½ tablespoon) tomato paste
- 200 grams (1 cups) chopped tomatoes - fresh or tinned
- 12 grams (2 teaspoon) salt
- 20 grams (4 tablespoon) garam masala
- 2 grams (1 teaspoon) chili powder
- 4 (4) bay leaves
- 8 (8) cardamom pods
- 2 (2) mace
- 1 (1) cinnamon stick
- 1 grams (½ teaspoon) fenugreek seeds
- 250 grams (1 cups) Greek yogurt - 6% fat at least
For the Saffron Sauce:
- 120 grams (½ cups) cream - double cream
- 60 grams (¼ cups) butter
- 1 grams (3 pinches) saffron strands
For the Dough Seal:
- 300 grams (2 ½ cups) all-purpose flour
- 200 grams (¾ cups) water
- 12 grams (1 tablespoon) oil
- 2 grams (⅓ teaspoon) salt
For Garnish:
- 12 grams (¾ cups) fresh cilantro - leaves and soft stalks torn
- 6 grams (¼ cups) fresh mint - leaves torn
- 3 (3) whole green chilies - optional
Instructions
Crispy Onions:
- Slice the onions thinly. Heat vegetable oil in a pan or fryer over medium heat.220 grams vegetable oil, 300 grams onions
- Fry the onions until dark golden brown (not black), stirring frequently. Drain on a kitchen towel. Reserve the leftover oil for cooking.
Dough Seal (optional):
- Mix all-purpose flour, water, oil, and salt to form a smooth dough. Knead briefly and cover with a damp cloth for 30 minutes until ready to use.300 grams all-purpose flour, 200 grams water, 12 grams oil, 2 grams salt
Rice:
- Rinse the rice under cold water 3 times until the water runs clear. Soak for 30 minutes, then drain.280 grams basmati rice
- In a pot, combine chicken stock, ghee, salt, cardamom pods, star anise, cloves, bay leaves, mace, and turmeric. Bring to a boil.600 milliliters chicken stock, 30 grams ghee, 6 grams salt, 5 cardamom pods, 2 star anise, 4 cloves, 4 bay leaves, 2 mace, ¼ teaspoon turmeric
- Add the soaked rice and boil for 2-3 minutes. The rice should break between your fingers but still have a firm center. Drain, saving the liquid for soups or curries if desired.
Chicken Gravy:
- In a large pan, heat ghee or onion oil over medium-high heat. Sear the chicken drumsticks and thighs until golden brown on all sides, about 5-7 minutes. Remove and set aside.45 grams ghee, 680 grams chicken drumsticks and thighs
- In the same pan, cook chopped onion in the chicken fond (the brown bits) until golden, about 6-8 minutes. Add the whole spices if using them and cook for 3-4 minutes.180 grams onion, 4 bay leaves, 8 cardamom pods, 2 mace, 1 cinnamon stick, 1 grams fenugreek seeds
- Add garlic ginger paste and cook for 2-3 minutes, then stir in tomato paste and cook for 1 minute.75 grams garlic ginger paste, 25 grams tomato paste
- Stir in garam masala, chili powder, and cook for 2-3 minutes to release the aromas. Add chopped tomatoes and simmer for 2 minutes. Remove from the heat.200 grams chopped tomatoes, 20 grams garam masala, 2 grams chili powder, 12 grams salt
- Add Greek yogurt (whisked with cream and cornstarch) off the heat to prevent curdling. Return the chicken to the pan and simmer for 10-15 minutes until the chicken is cooked through (internal temperature 75 °C or 167 °F).250 grams Greek yogurt
Saffron Sauce:
- In a small pan, combine cream, butter, and saffron strands. Simmer over low heat for 3-5 minutes until golden and fragrant. Set aside.120 grams cream, 60 grams butter, 1 grams saffron strands
Layering and Baking:
- Preheat your oven to 230 °C (446 °F). Start by layering the bottom of your oven-safe pot with saffron sauce.
- Add a layer of rice, followed by cilantro, mint, green chilies (if using), crispy onions, chicken pieces, and a drizzle of gravy. Repeat the layers, finishing with a final layer of rice, saffron sauce, herbs, and crispy onions.12 grams fresh cilantro, 6 grams fresh mint, 3 whole green chilies
- Roll out the dough into a long strip and use it to seal the pot's lid. Press it firmly around the edges (you can also use foil if you prefer).
- Place in the oven and bake for 25-30 minutes. Let it rest for 5 minutes before opening.
Flatbread Bonus (Optional):
- Roll any leftover dough into balls, then flatten into thin rounds on a floured surface. Dry-roast the flatbreads in a hot skillet, pressing with a damp cloth to puff them up. Brush with melted ghee while warm.
Video
Notes
-
Scaling the Recipe:
If you decide to scale the recipe up or down, make sure to adjust your pot size accordingly. This will help ensure even cooking and that your layers hold up properly. -
Chicken Selection:
Always use bone-in chicken thighs for the best flavor and tenderness. The bone adds moisture during cooking, keeping the chicken juicy. If you prefer boneless, chicken thighs are your best option. Avoid using chicken breast, as it tends to dry out during cooking. If you must use breast, cook it separately in the marinade, and be sure to follow the instructions for keeping it juicy. -
Garam Masala:
Garam masala is an essential spice mix in this recipe and can be found in most supermarkets. If you prefer not to buy individual whole spices, you can use extra garam masala to simplify the process. If you're concerned about the whole spices in the biryani, feel free to either tie them in a small piece of muslin or cheesecloth or remove them before serving. -
Rice Variety:
While basmati rice is traditional for biryani, jasmine rice can be used as a substitute. Just be mindful that jasmine rice tends to overcook more easily than basmati, so keep an eye on it while cooking. -
Crispy Onions Alternative:
If you prefer not to fry onions, you can use store-bought crispy fried shallots or onions. To enhance their flavor, toast them lightly in a dry pan to caramelize them further before using them in the biryani. These can be found in the Asian food section of most supermarkets. -
Saffron:
Saffron is the traditional choice for biryani. If it's outside your budget, a small amount of turmeric can be used as a substitute. While the flavor and aroma won't be the same, turmeric will still give the rice a lovely golden color. -
Ghee & Oil:
For frying, use regular vegetable oil. For the rice and saffron sauce, you'll need butter to achieve that rich, authentic flavor. -
Yogurt:
Be sure to use full-fat yogurt (6% and up) for the best results. Whisk the yogurt before adding it to the gravy, and add it bit by bit off the heat to prevent it from splitting. To further ensure it doesn't split, stabilize the yogurt by mixing it with a little cream and cornstarch before incorporating it into the sauce. -
Vegetarian Biryani:
For a vegan biryani, you can substitute the chicken with a variety of vegetables such as cauliflower, pumpkin, carrot, and potatoes. Follow the same cooking steps for the rice, saffron sauce, and gravy, but replace the chicken with your chosen vegetables. -
Protein Alternatives:
If you'd like to try a different protein, this recipe can easily be adapted for lamb, goat, or beef. Follow the same cooking instructions, but you will need to simmer the meat longer to become tender. - Scaling the Recipe: If you're adjusting the recipe for more or fewer servings, make sure to adjust your pot size so that the layers cook evenly and all ingredients are well-cooked.
- Fresh Spices: Always use fresh spices for the best flavor. If your spices have been sitting around for too long, it's worth replacing them for a better result.
- Spiciness: If you like a bit more heat, you can up the amount of fresh chili or use Kashmiri chili powder.
- Leftovers: Leftover biryani will keep well for 3-4 days in the fridge. Reheat gently with a splash of water or stock to add moisture back into the rice. Keep the chicken separate from the rice because they reheat at different speeds.
- Freezing: Not ideal as it will alter the texture once thawed.
- Make Ahead: Everything needs to be warm when layering the biryani to ensure proper cooking. I do not recommend making this ahead of time, as that will cause cooking issues and extended cooking times that could lead to mushy rice.
- Rice Stock:
Don't throw away the rice stock you used to boil the rice! It's packed with flavor and can be used for soups, sauces, or to cook other dishes. It's a great way to get the most out of your ingredients.


Lollu says
Real nice recipe. Hadn’t been keen on chicken biryani when had in the past - tended to favour Lamb, but this recipe stacks up the flavour great. 4 steps but all easy. I even managed to make it for 10 people where one couldn’t have onion (!!!) so omitted from the gravy made separate for them and from the build but they still liked it a lot. Served with hot sauce and yoghurt mixed with the same herbs as main dish. Great for entertaining - a bit huge pot represented at the table with everyone able to tuck in, along with some breads.
susan says
absolutely delicious