
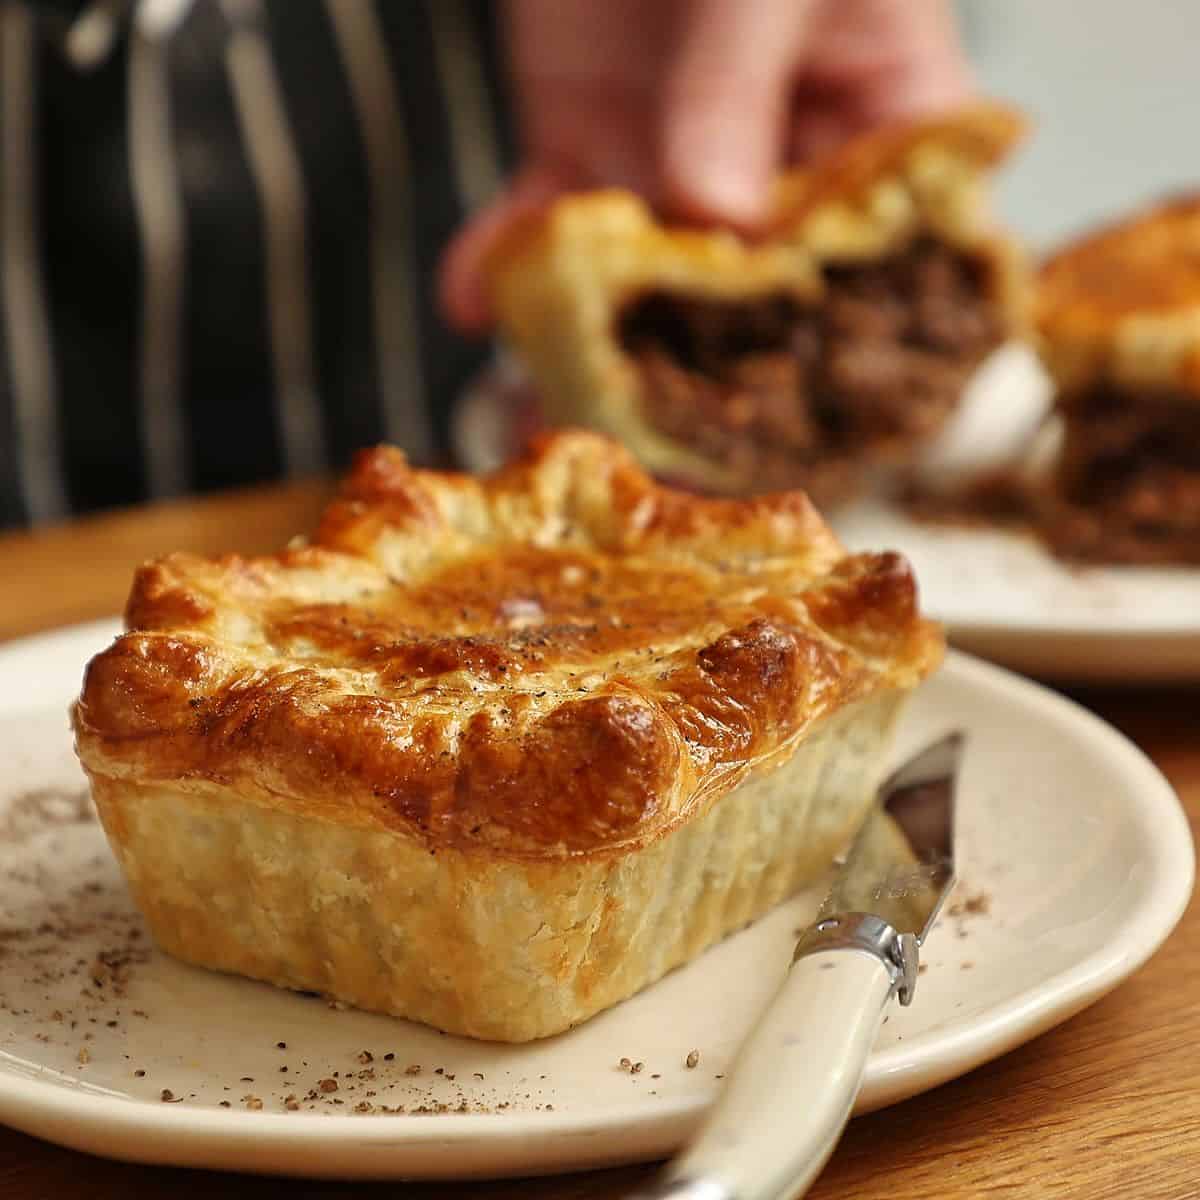
Pepper steak pie is one of the most iconic South African comfort foods. It's the kind of indulgent meal you can grab from a petrol station at 2 am after a night out, or at lunchtime as a quick meal on the go, still warm from the pie warmer, wrapped in a paper bag.
Garage pies come in a huge variety of fillings wrapped in flaky, buttery pastry. It's easily made from scratch with rough puff pastry, or you can simply use store-bought puff pastry. Making the pastry yourself is 100% worth the extra effort, though.
Even with a large, busy kitchen, I always insist we make everything from scratch, so my clients get the most authentic pepper steak pie possible. A little chef tip straight away is that you can make the pastry and filling in advance, then simply assemble and bake when you're ready. You can even freeze them raw and assembled, then egg wash and bake when needed.
Jump to:
Ingredients
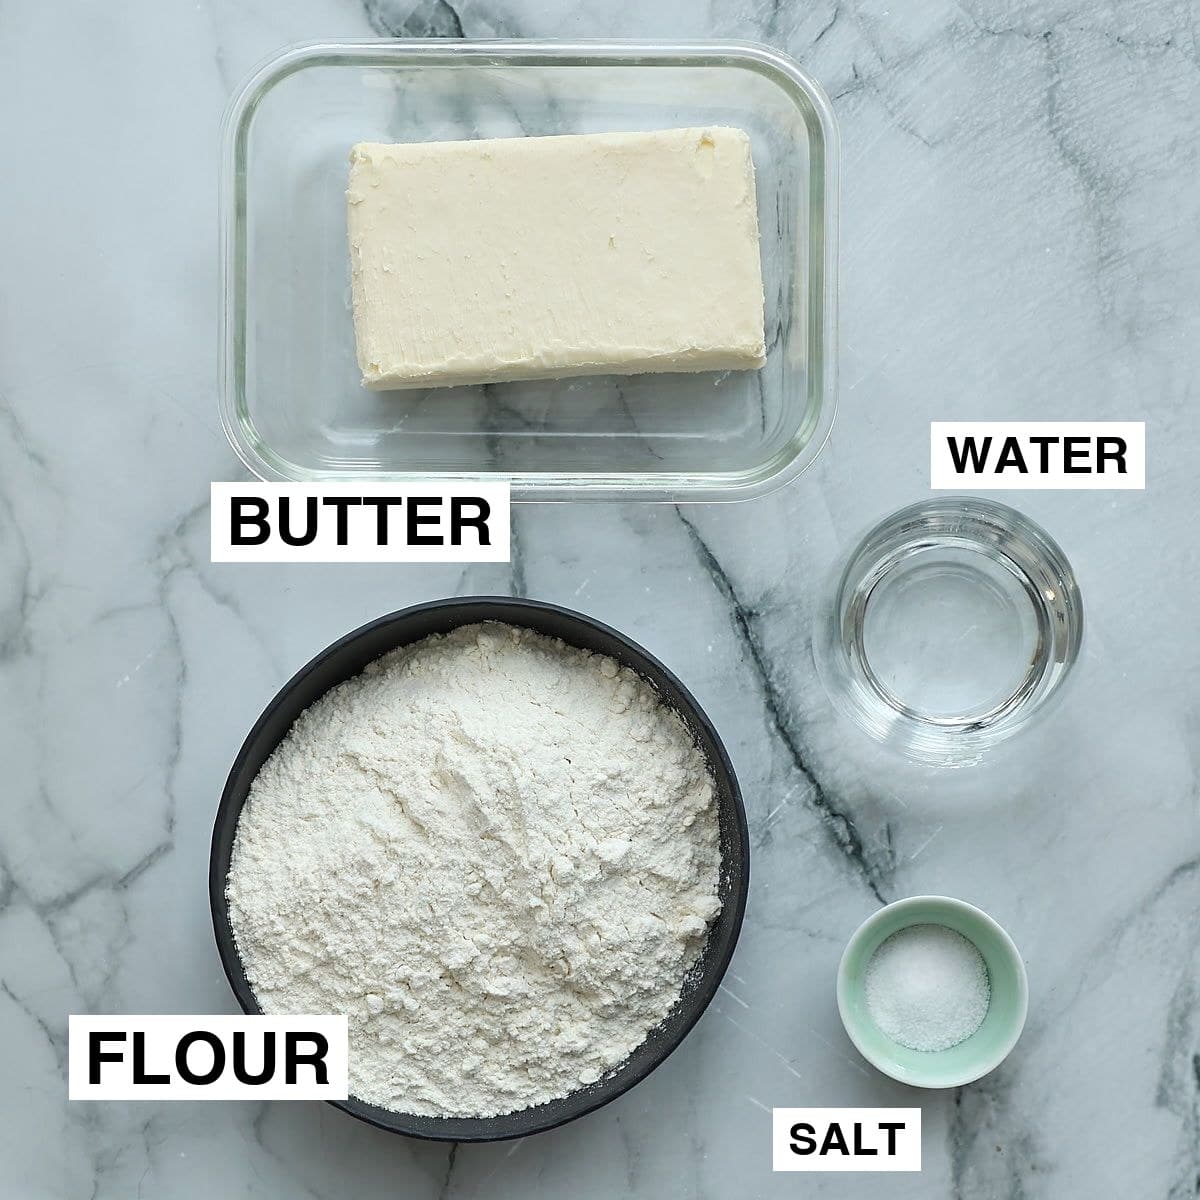
For the pastry
Flour - Use all-purpose flour (known as plain flour in the UK and South Africa). It doesn't matter too much, but if you use bread flour, you run the risk of developing gluten in the dough, which could result in a tough dough. All-purpose flour has less gluten, which means we'll be more likely to end up with a nice, light, and flaky dough when the process is correctly followed.
Butter - Use very cold, almost frozen butter. You could also use suet, which works great, or, if you were to experiment with vegan dough, margarine, although I personally stay away from that for quality and flavor reasons.
Ice Cold Water - This is so the butter stays cold and does not melt into the flour. Another little chefy trick is to place the flour, butter, and water into the freezer, so that everything is as cold as possible.
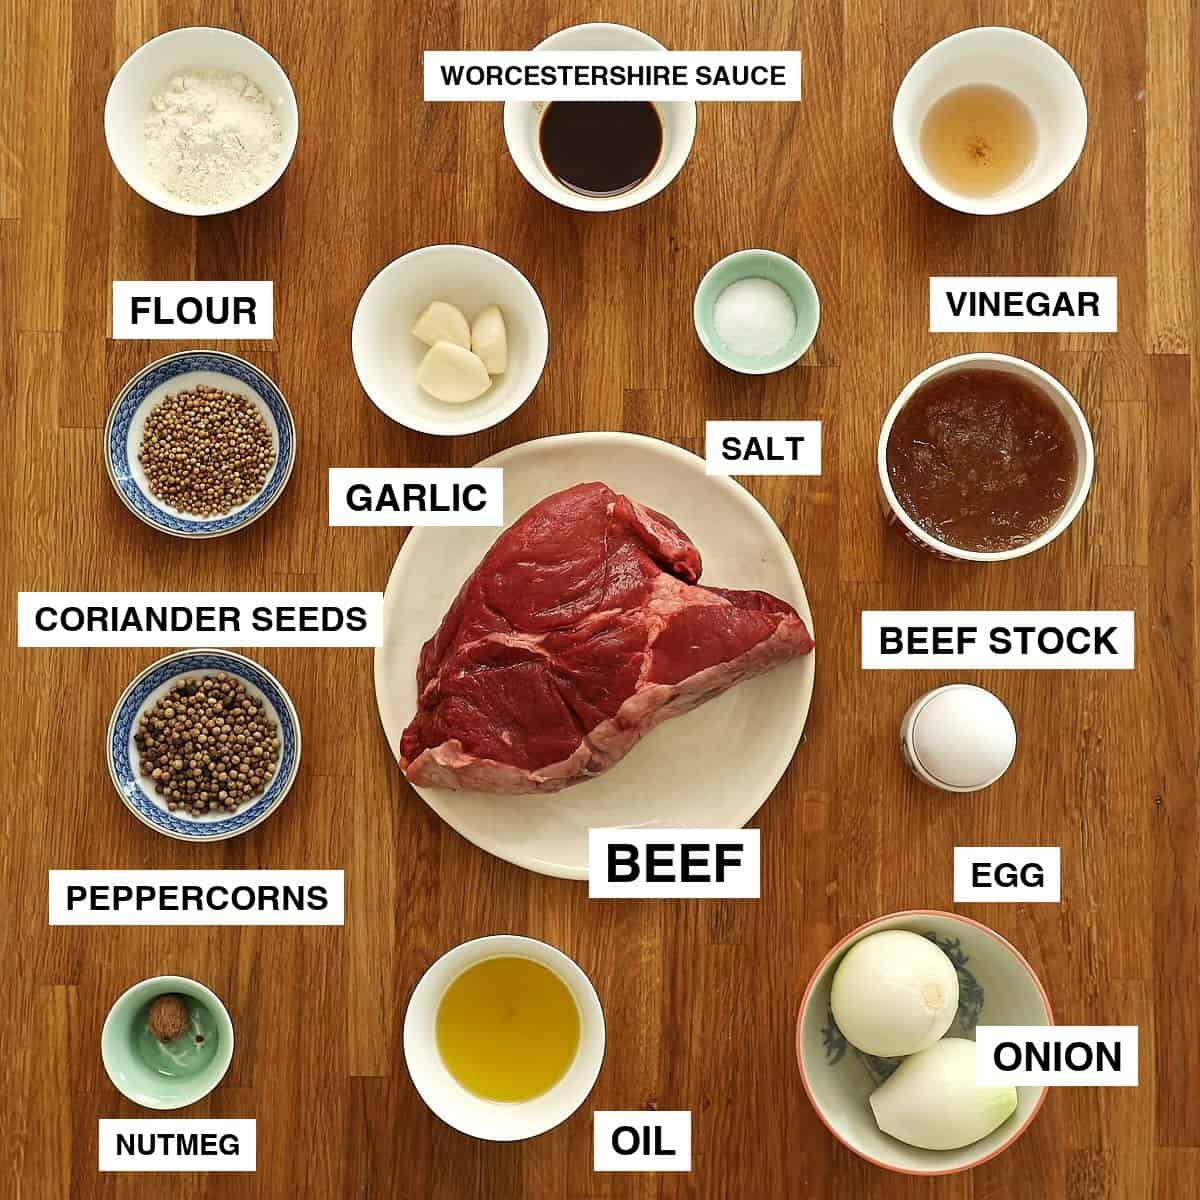
For the filling
Beef - Any braising cut with good marbling, such as chuck, will work well for this and it takes the same low, slow braise as my beef short ribs. Stay away from drier cuts like eye of round and fillet. Those are both inferior in flavor and more expensive.
Spices - We roast Peppercorns and coriander seeds whole, then grind them fresh for the best flavor. You could use black or white peppercorns, although my favorite is young Kampot pepper if you can find it. Nutmeg is added right at the end when the filling has cooled down to preserve the freshness.
Aromatics - Onion and garlic for the base. I use regular white onion, but if you can find them, shallots are a step above.
Beef Stock - Store-bought beef stock is fine for convenience. Or, for even better results, use homemade beef stock.
Umami and balance - Worcestershire Sauce is the classic way of adding that "you used something tasty in here" flavor, but a touch of soy sauce also works fine. Malt Vinegar or a splash of red wine vinegar balances the richness and is used sparingly.
Basic ingredients - Flour for tossing the meat in before frying, which also thickens the gravy. Egg for the egg wash and, of course, salt for seasoning.
See the recipe card for quantities.
Instructions
One batch makes 6 individual pies in 250 ml (1 cup) aluminum tins - the size close to the garage pies I grew up with - or one large 23 cm (9 inch) pie.
Making the pie pastry
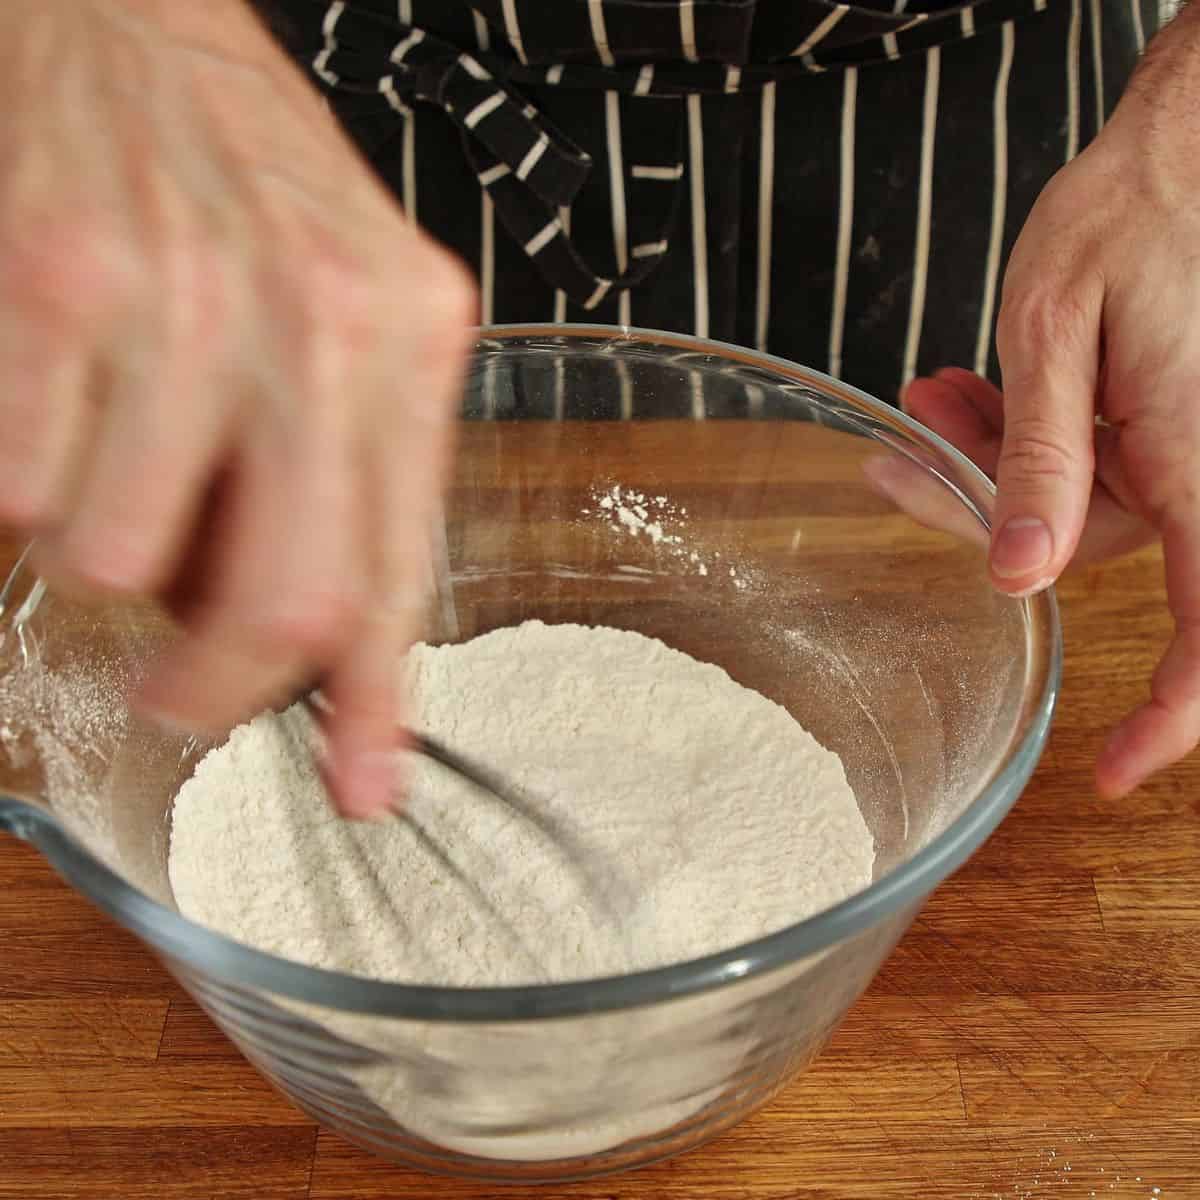
- Whisk the dry ingredients - Place the flour and salt into a large bowl and whisk together to combine.
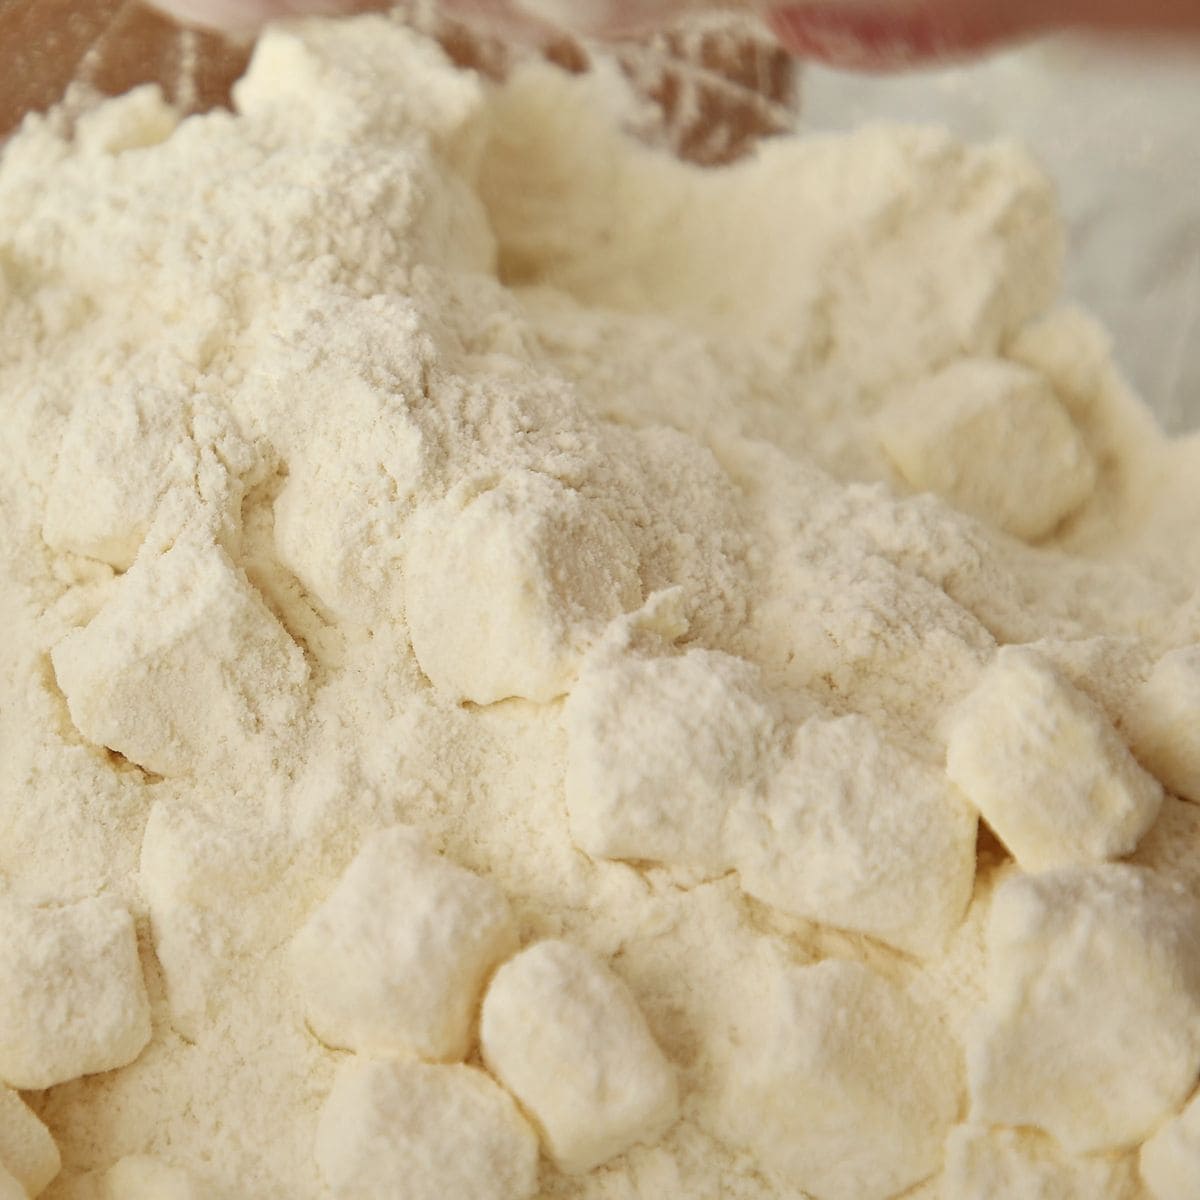
- Coat the butter cubes - Chill the butter cubes (15 minutes in the freezer). Toss the cubes through the flour until each piece is coated. Do not rub the butter into the flour. Keeping the pieces whole will create steam pockets during baking, which lift the layers apart and give you that flaky texture.
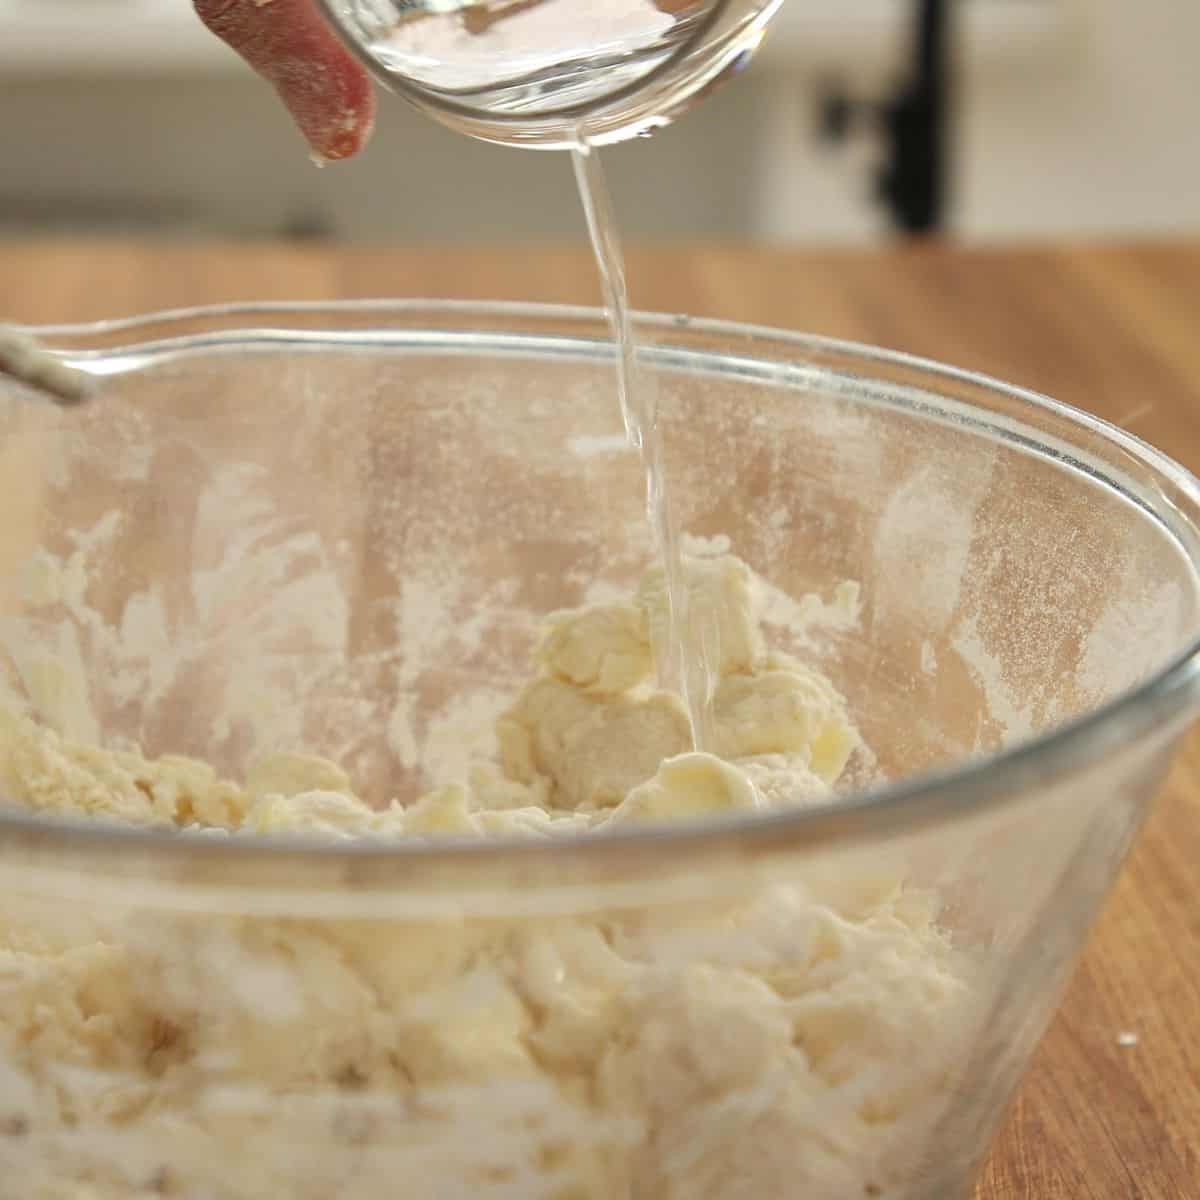
- Add ice-cold water - Pour in the ice-cold water and mix it gently with a fork or a pair of chopsticks until you have a shaggy-looking mess with butter lumps throughout. It is important to keep everything cold, so avoid using your hands during this step. Keep the mixing to a minimum, as we don't want to develop the gluten. Doing so could result in a tough, dense pastry instead of light and flaky.
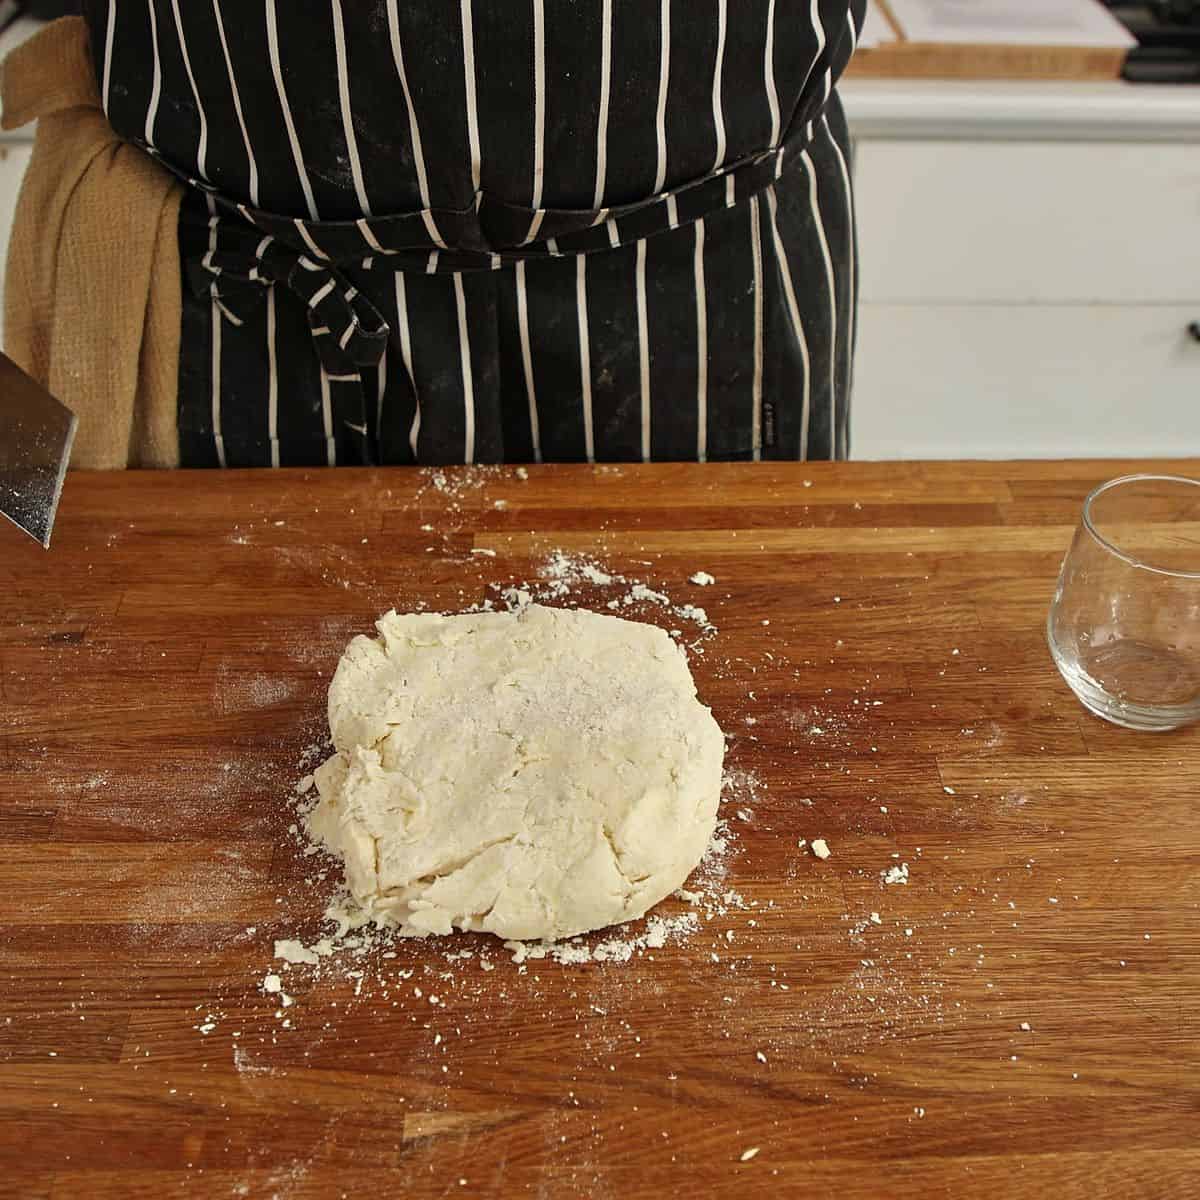
- Press the dough into a rough rectangle - Transfer the dough to a floured surface and press it further into a rough rectangle shape. The initial appearance will not be perfect, and it will look like you messed up. Don't worry, it's supposed to be like that. Simply press together until it roughly holds together.
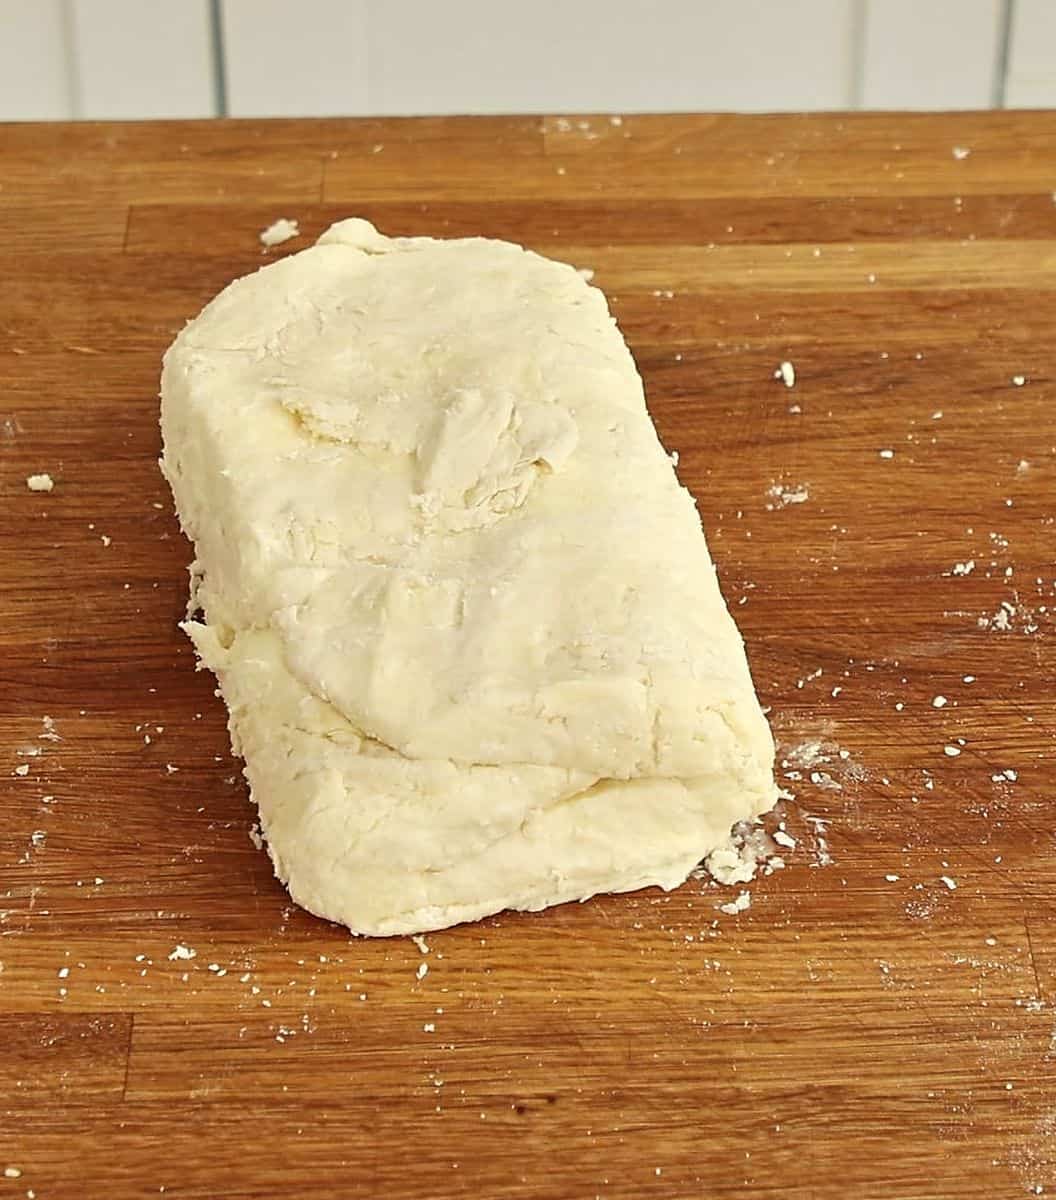
- Fold into thirds - Once the dough just about holds itself together, fold it into thirds similar to how you would fold a letter. Wrap the dough in parchment paper or a plastic bag and chill it in the refrigerator for at least 1 hour. This allows the dough to rest properly, which chills the butter and fully hydrates the flour, resulting in a flaky, buttery pastry later on.
Prepare the spices
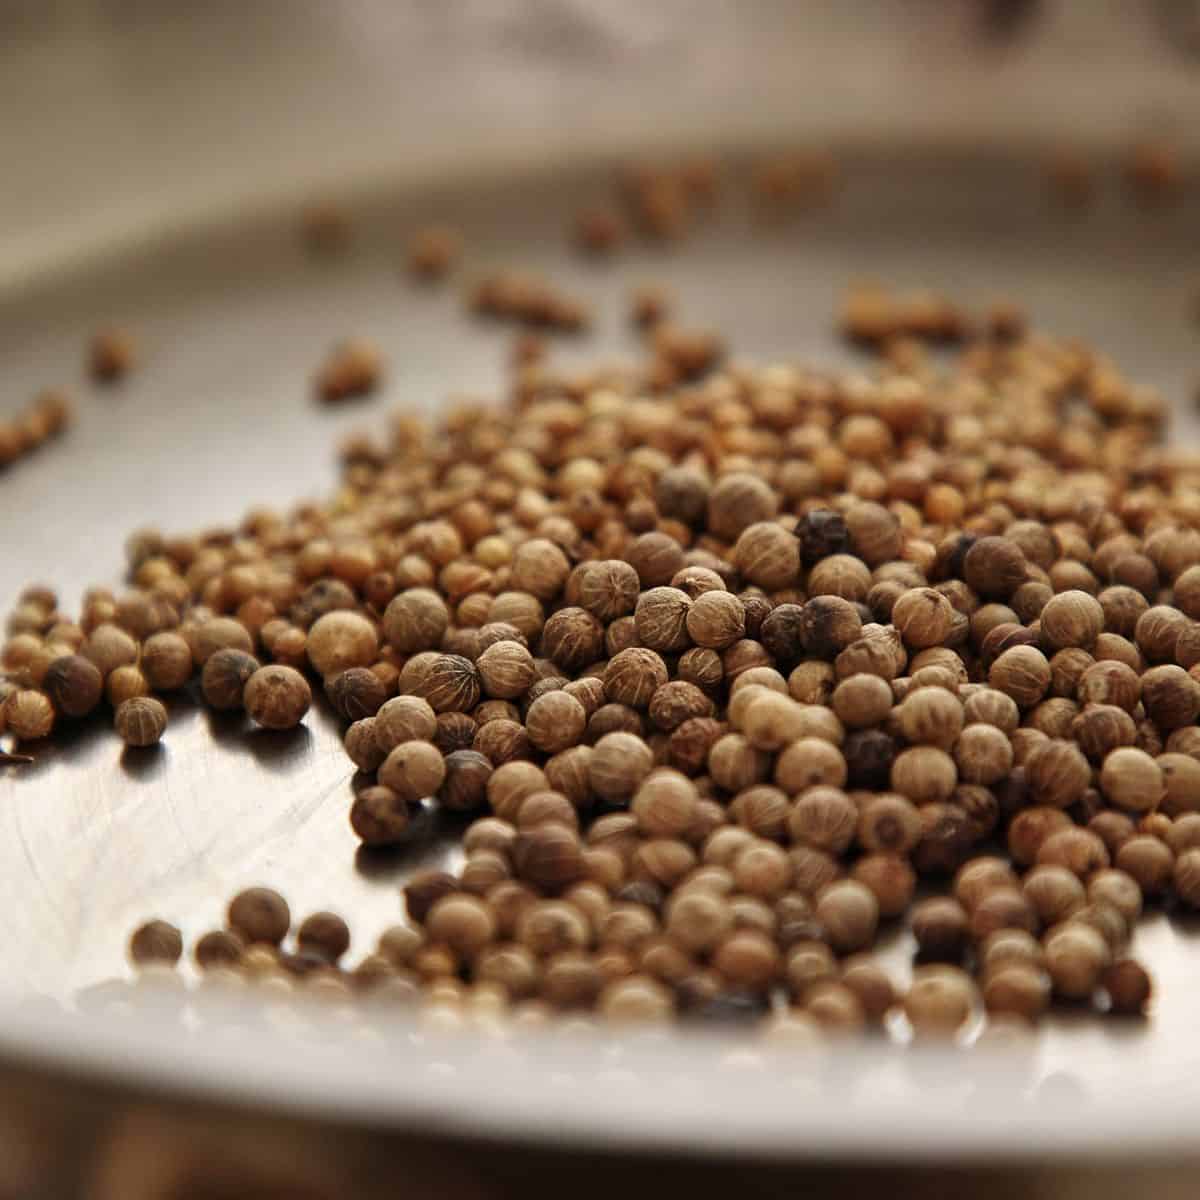
- Toast the spices - Place whole peppercorns and whole coriander seeds in a dry pan over medium heat. Toast for approximately 1 minute, stirring frequently, until the spices become fragrant. Ensure they do not burn. As soon as they start to smoke slightly, they are ready.
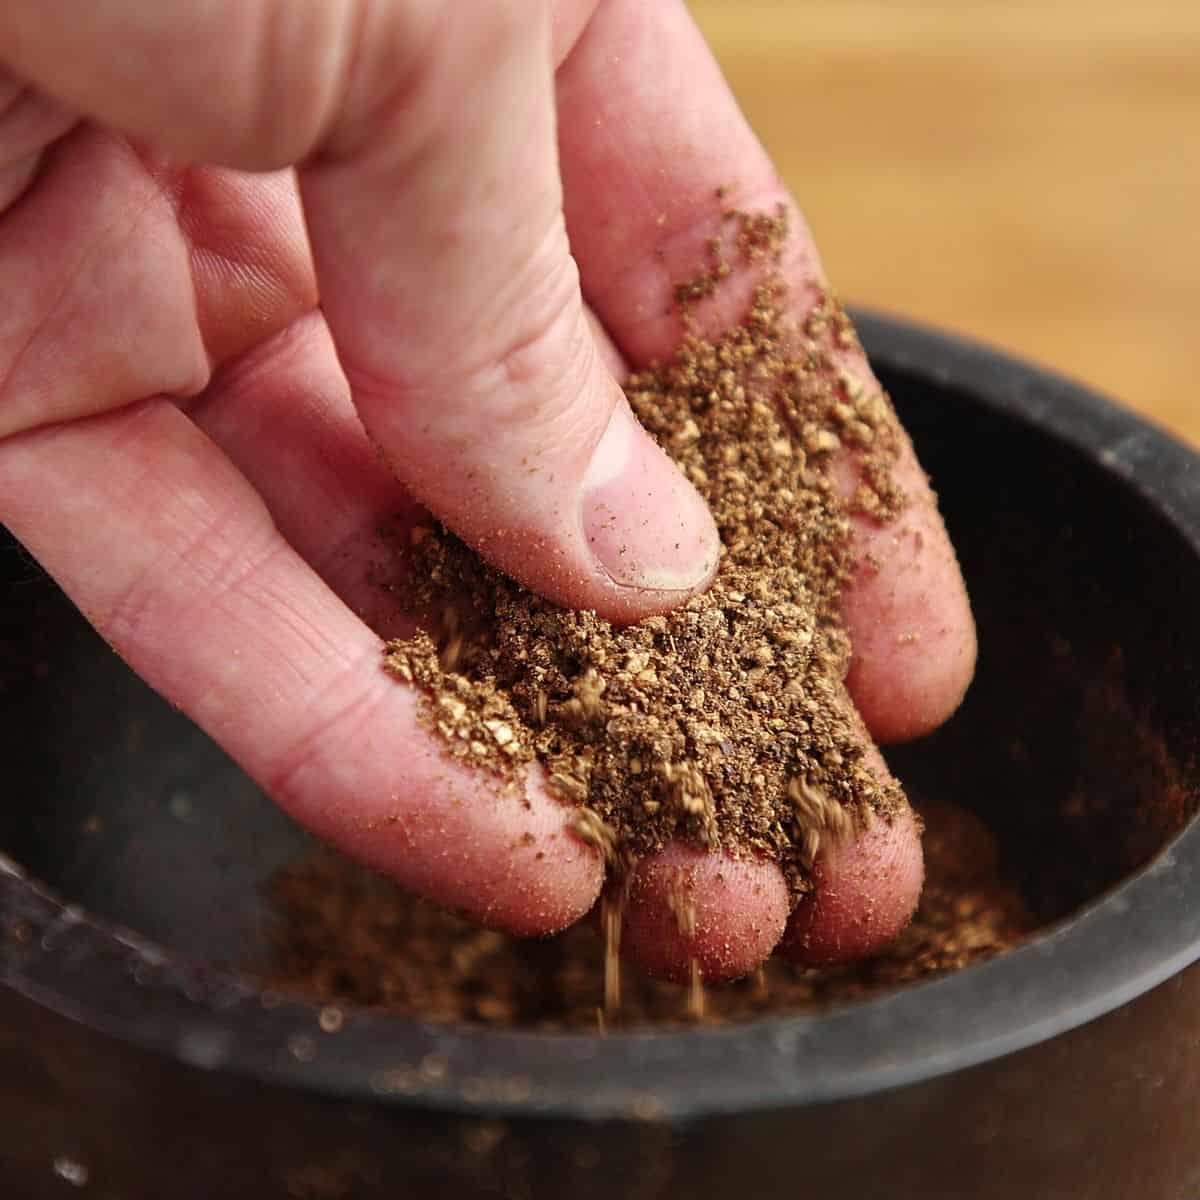
- Grind spices - Once toasted, grind in a mortar and pestle, a spice grinder, or under a heavy pan. Do not grind the spices to a powder-retain a slightly coarse texture. They will soften during cooking and should be visible in the filling.
Making the filling
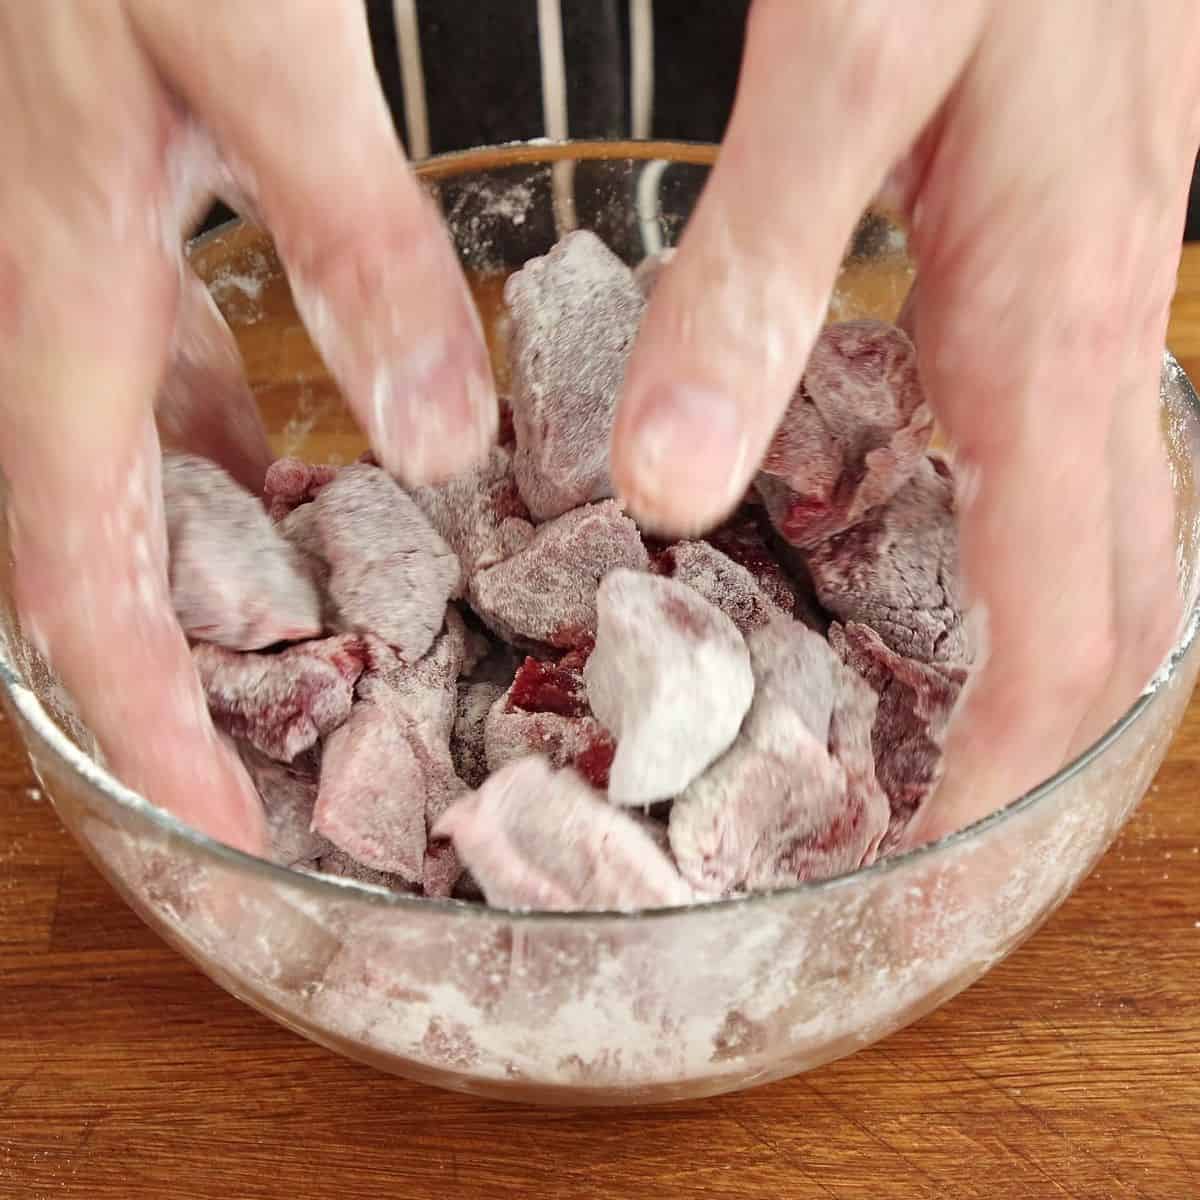
- Coat beef in flour - Cut the beef into pieces approximately 3 cm in size. Coat each piece of beef thoroughly with flour. This helps with browning and will thicken the gravy later.
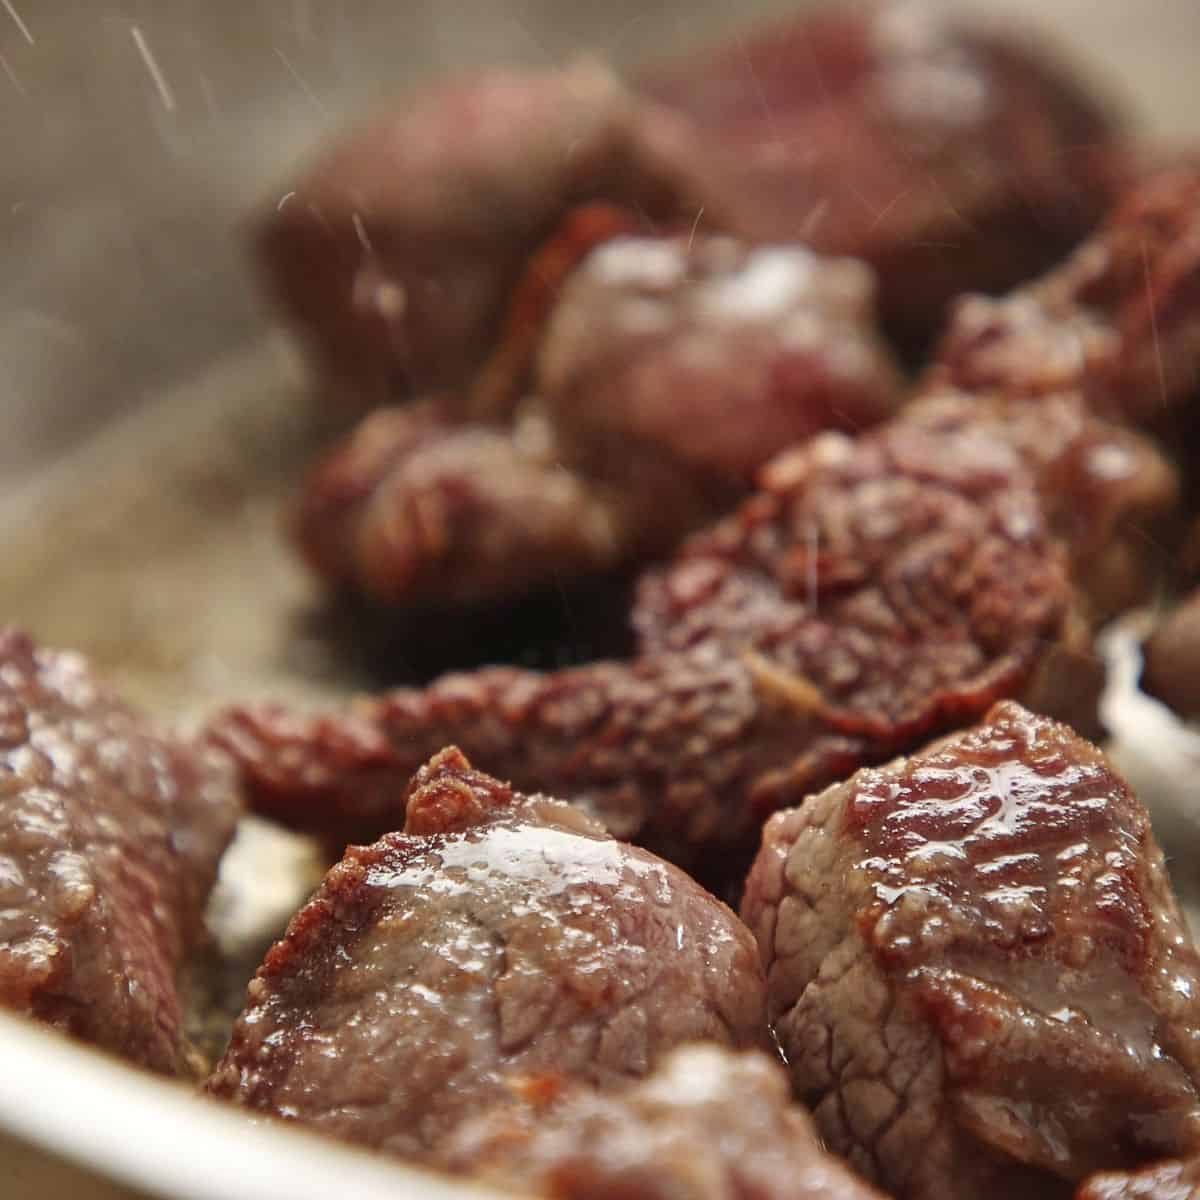
- Sear the beef in batches - Heat a heavy-bottomed pot over high heat with the beef tallow or oil. Sear the beef in batches until browned all over. Don't overcrowd the pan. The browning is crucial for flavor. Remove the beef and set it aside. Do not clean the pan. This brown crust at the bottom, known as the fond, is a golden layer of flavor and color.
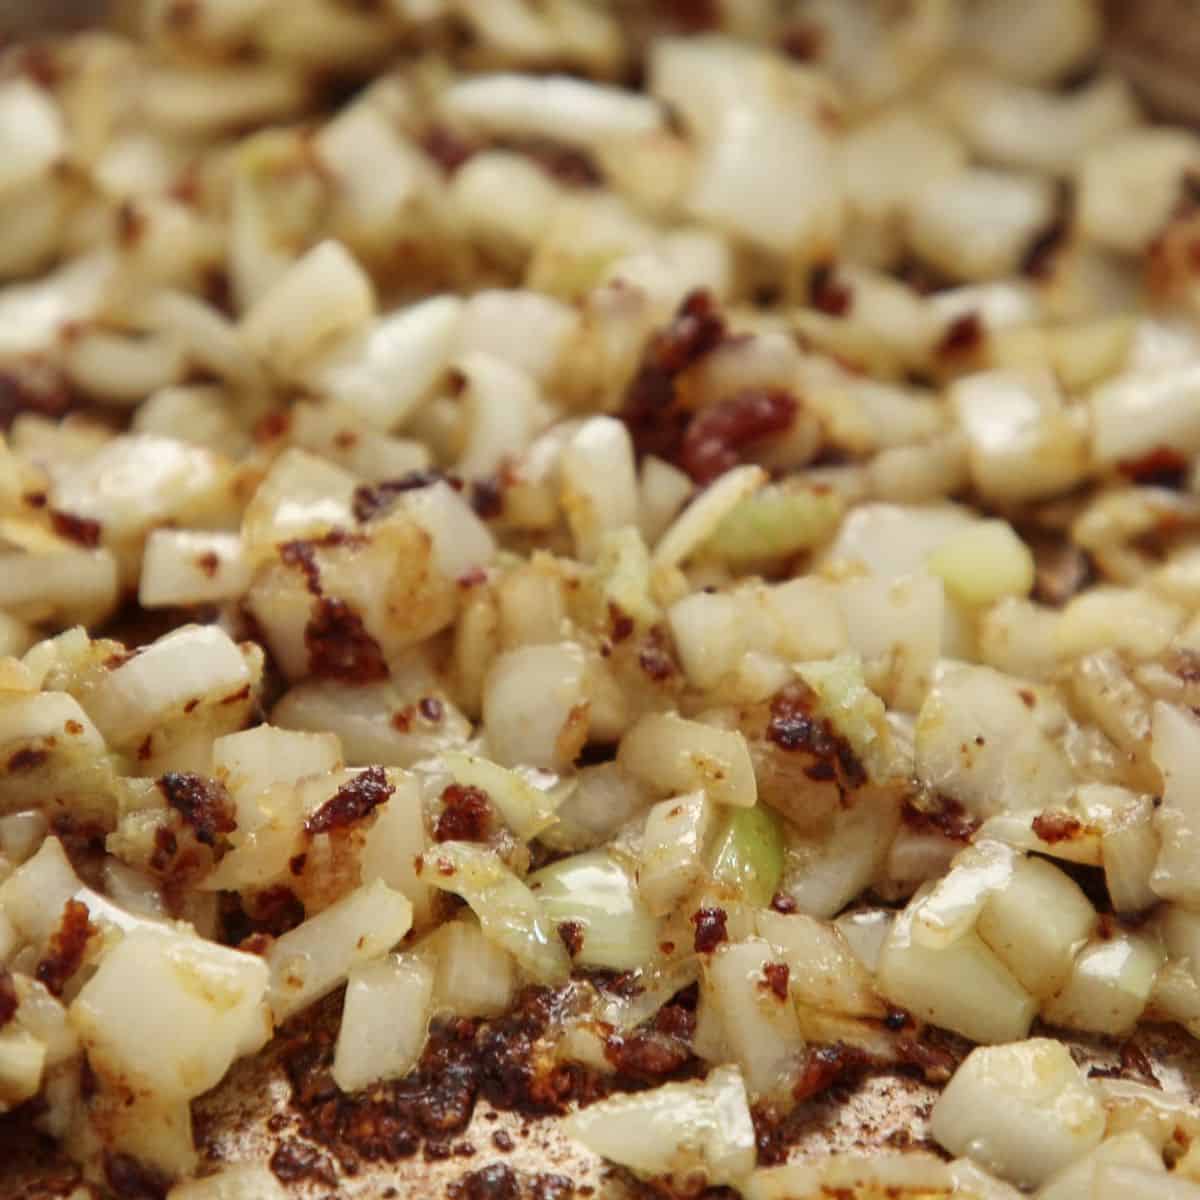
- Cook the onions and garlic - Reduce the heat to low. Add the chopped onions and minced garlic to the pan. Cook gently until the onions are soft and translucent, scraping up the fond from the bottom of the pan. Season with salt to help release the onions' moisture. Once the fond has been incorporated, add a small amount of water and allow the mixture to simmer for about 2 minutes.
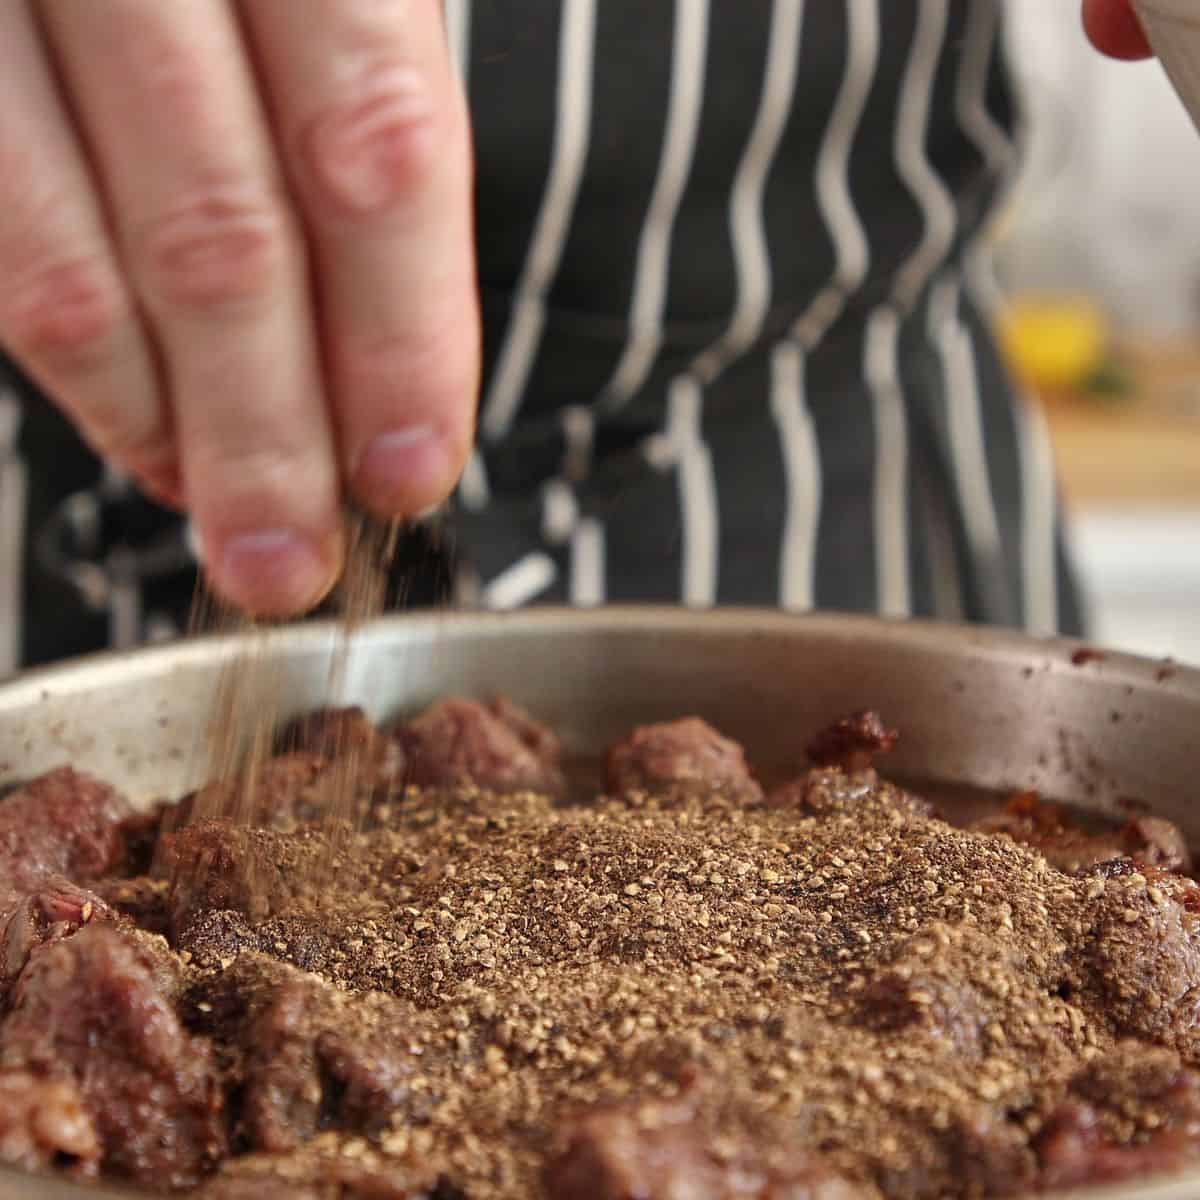
- Combine to cook - Add the beef back into the pot along with the stock, Worcestershire sauce, vinegar, and the cracked toasted spices. Stir well to combine. Keep the nutmeg to the side for now.
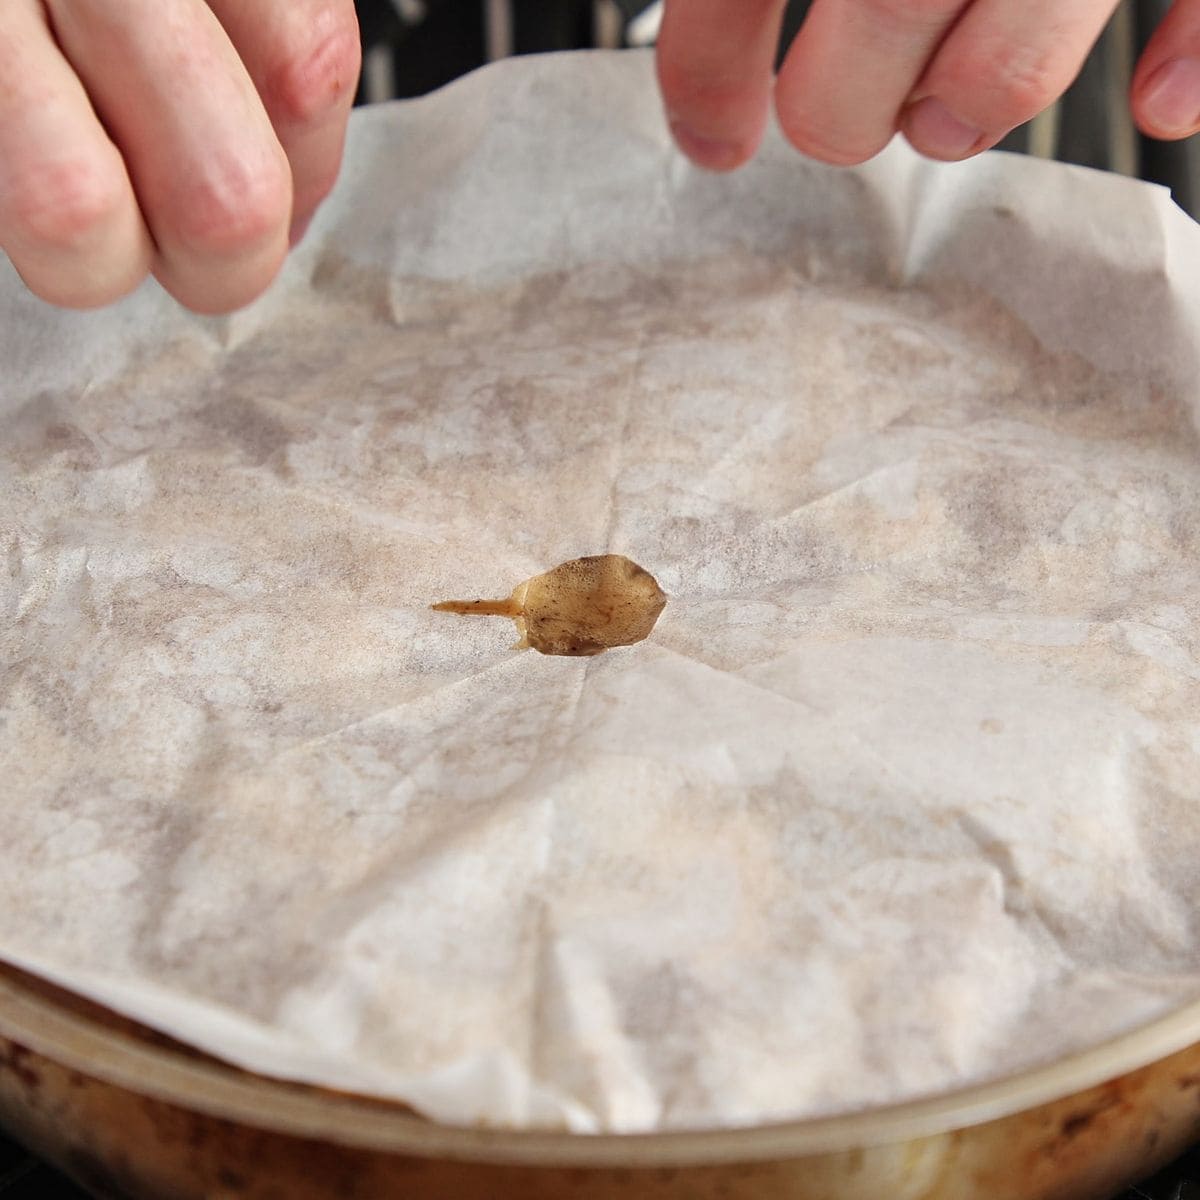
- Simmer low and slow under a cartouche - Bring the mixture to a gentle simmer, then reduce the heat to low. Cover with a cartouche (a piece of parchment paper cut to fit the pot). This method helps control evaporation. Alternatively, you can use foil or a lid. Simmer gently for 1.5 to 2 hours until the beef is tender. Stir occasionally to prevent sticking. Top up with stock or water when the filling gets too dry. For a hands-off approach, cook in the oven at 160°C (320°F) for 3.5 hours covered.
Rolling and folding the pastry (second session)
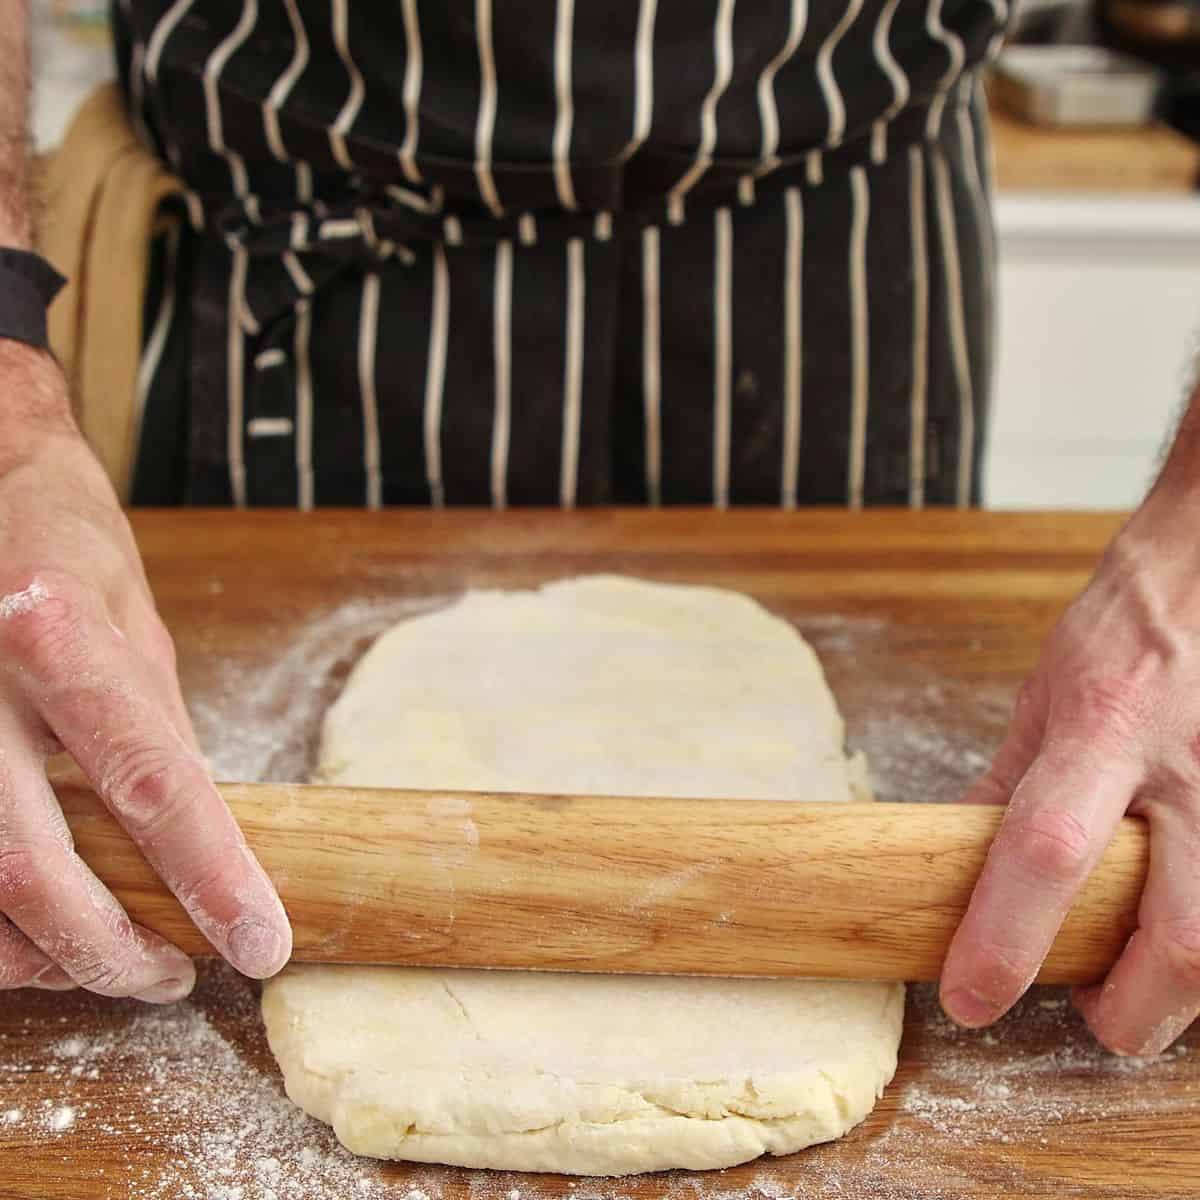
- Let the pastry come to temperature - While the beef cooks, roll out the pastry. Place the pastry slab on a floured surface. Allow it to sit for about 5 minutes to reach a slightly warmer temperature. This prevents it from cracking when we roll it out. Use a rolling pin to press the pastry a few times, then roll it gently from the center away from you and back towards you to stretch it out evenly. Bits of butter will be visible during this process, which is exactly how it should be.
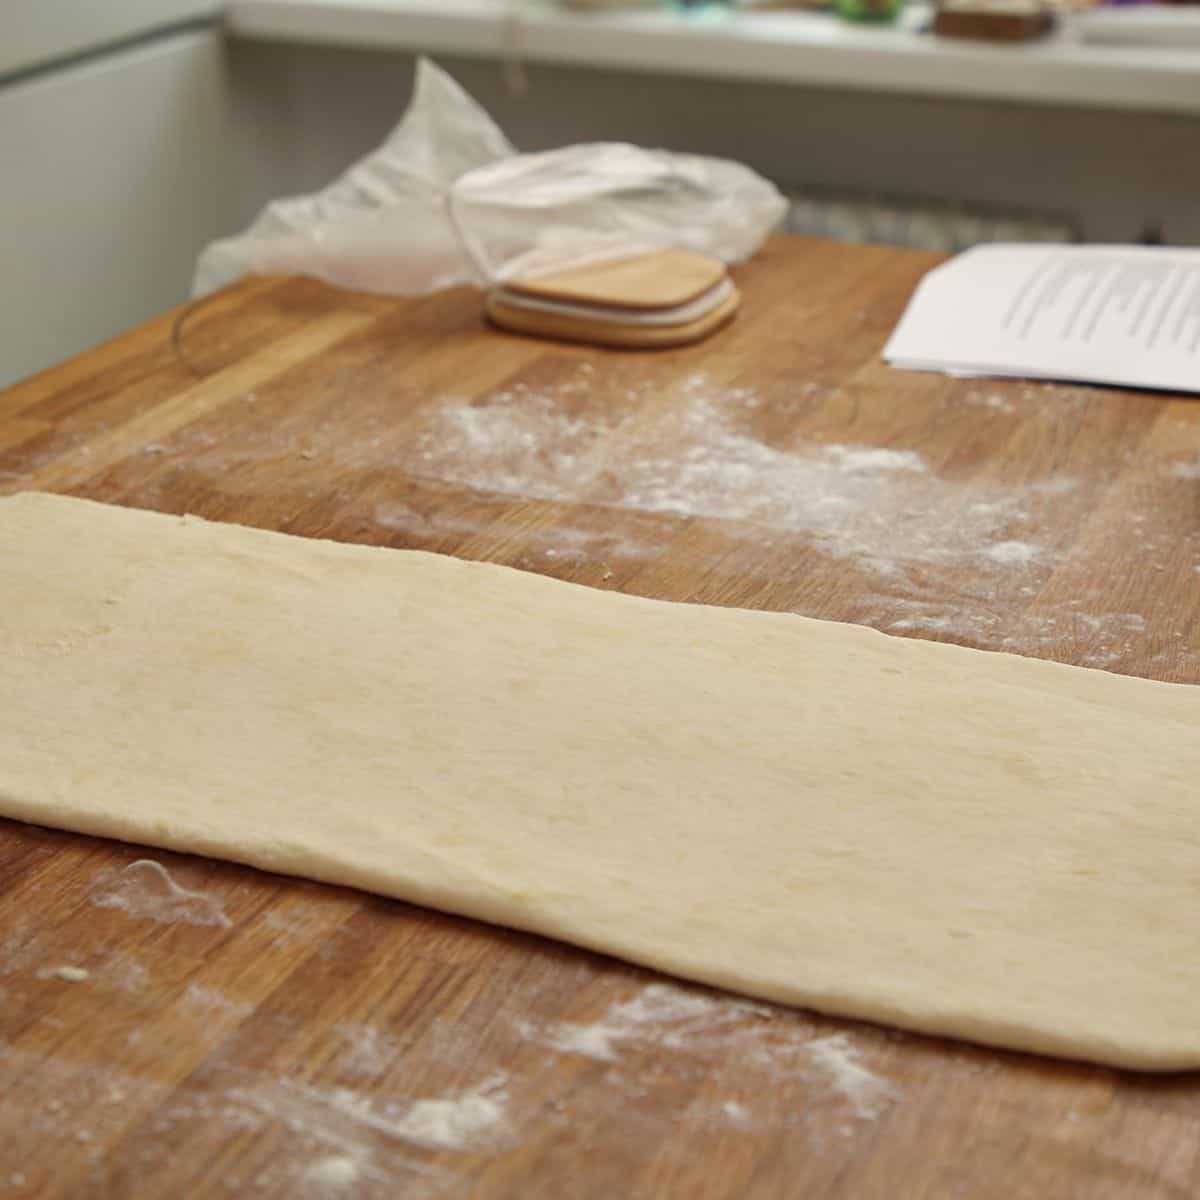
- Roll to a rectangle and letter-fold - Once you have formed a 40 x 20 cm (15 x 7 inch) rectangle, stop rolling and perform a letter fold. Fold one-third of the dough down, then fold the remaining two-thirds over it. Ensure your work surface is well-floured to prevent sticking.
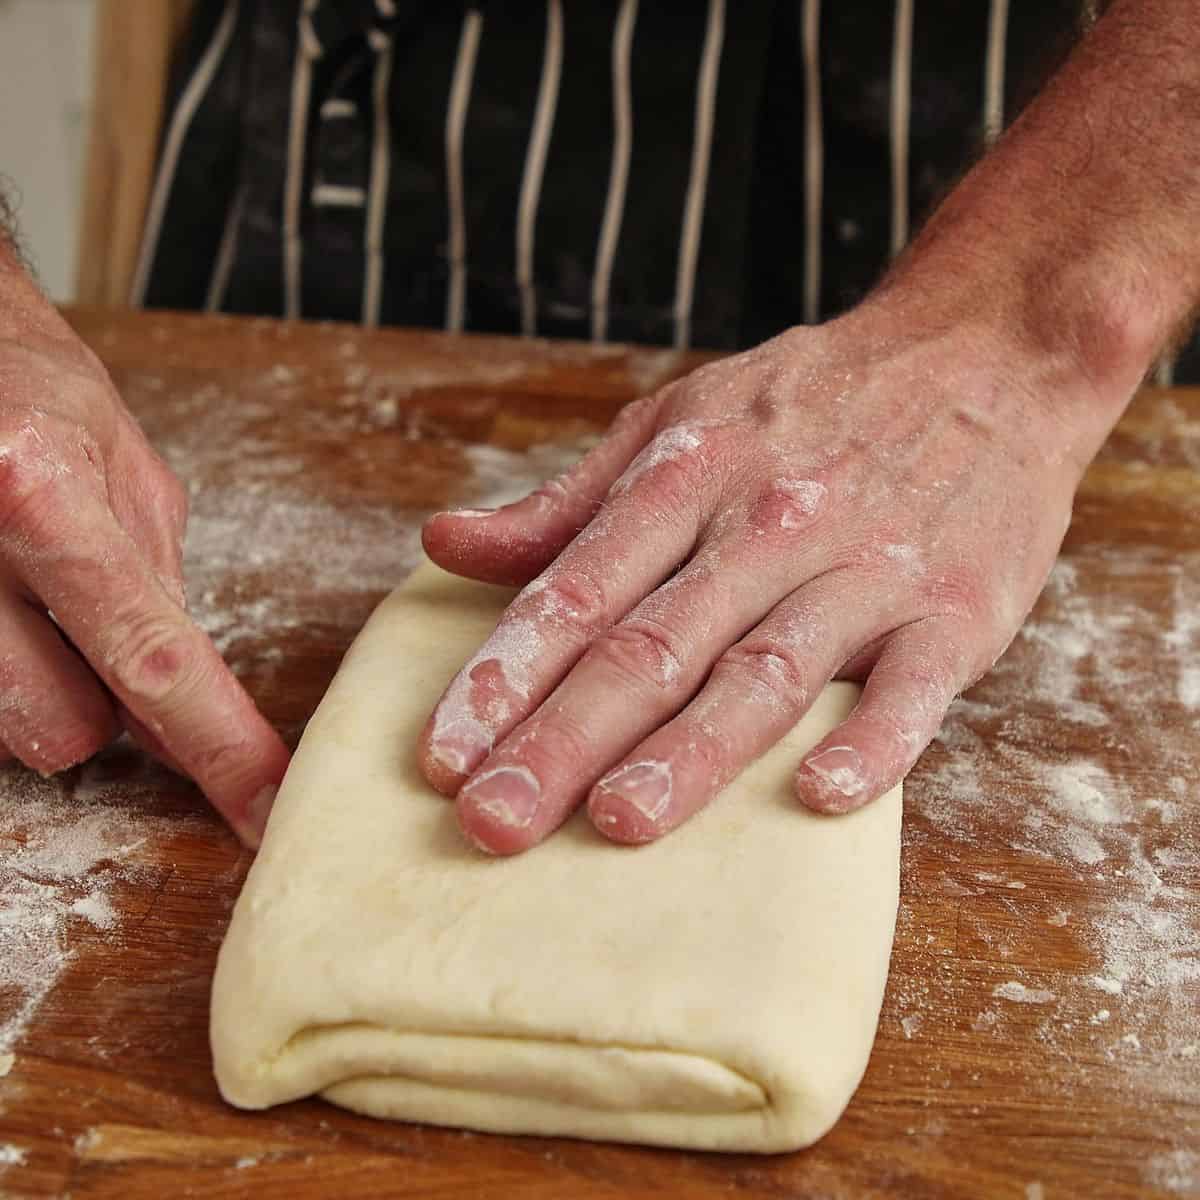
- Turn and repeat the folds two more times - Turn the pastry 90 degrees so the folded open ends are now facing you and away from you. Repeat the rolling and letter folding process two more times. Completing a total of three letter folds. Once finished, wrap the pastry in parchment paper and store it in the fridge until needed. It can also be frozen for later use. I find it particularly useful to have in the freezer, as it works with any pie, sausage roll, or even a sweet open tart with fruit.
Finishing the filling
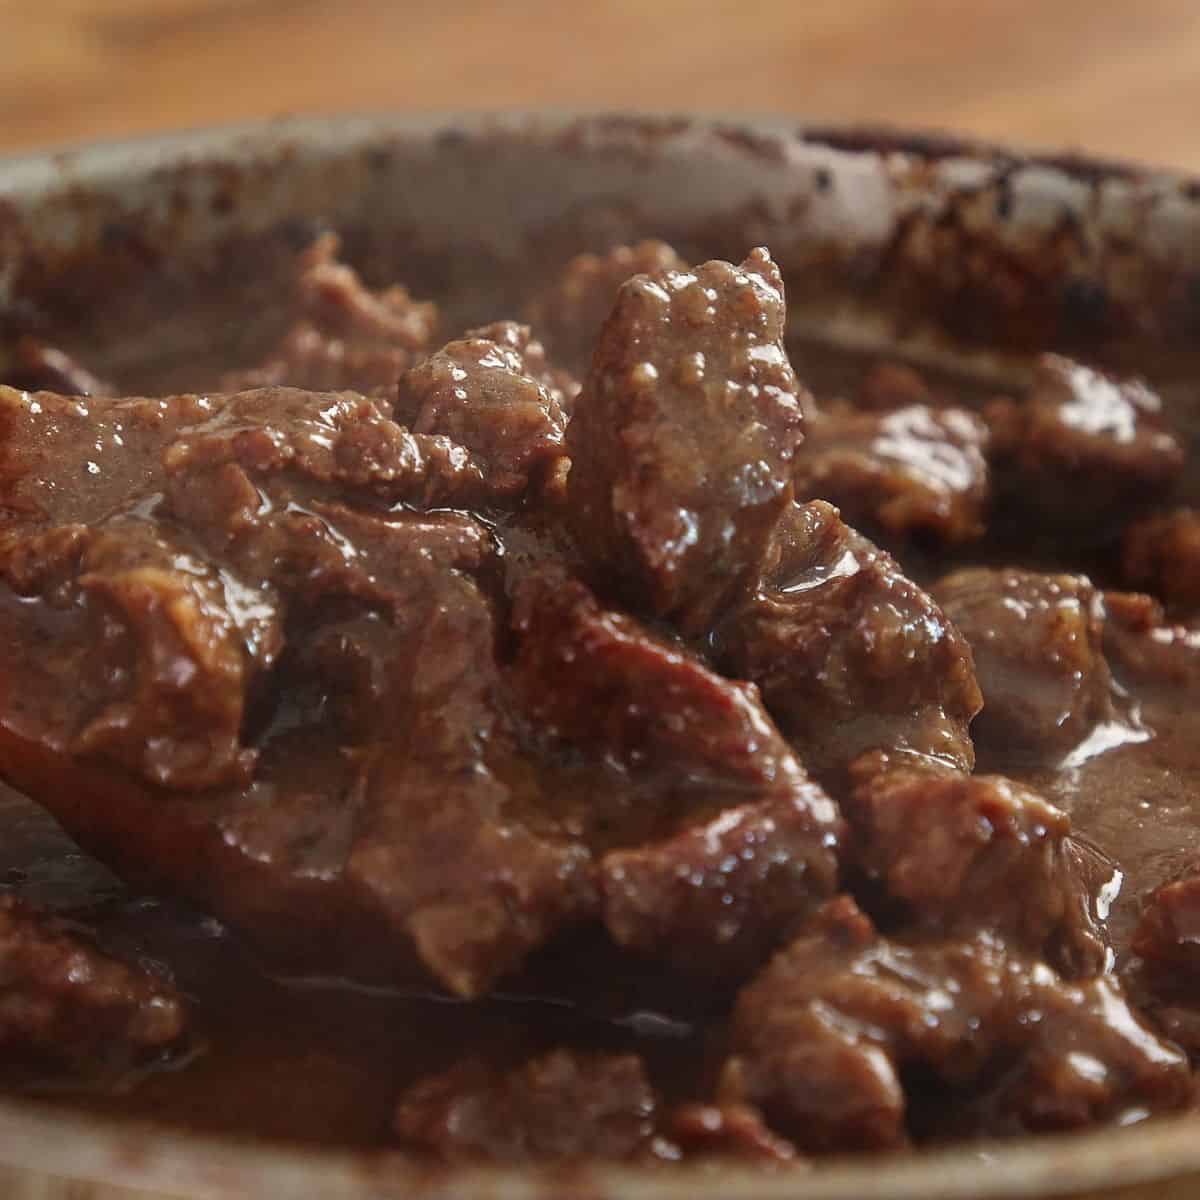
- Break up the meat texture - The meat should be fork-tender, without much resistance. Maintain some texture by breaking it up into medium-sized pieces rather than shredding it completely. Aim for a mixture that is neither too thin nor too thick, achieving a nice glossy balance of larger and smaller chunks.
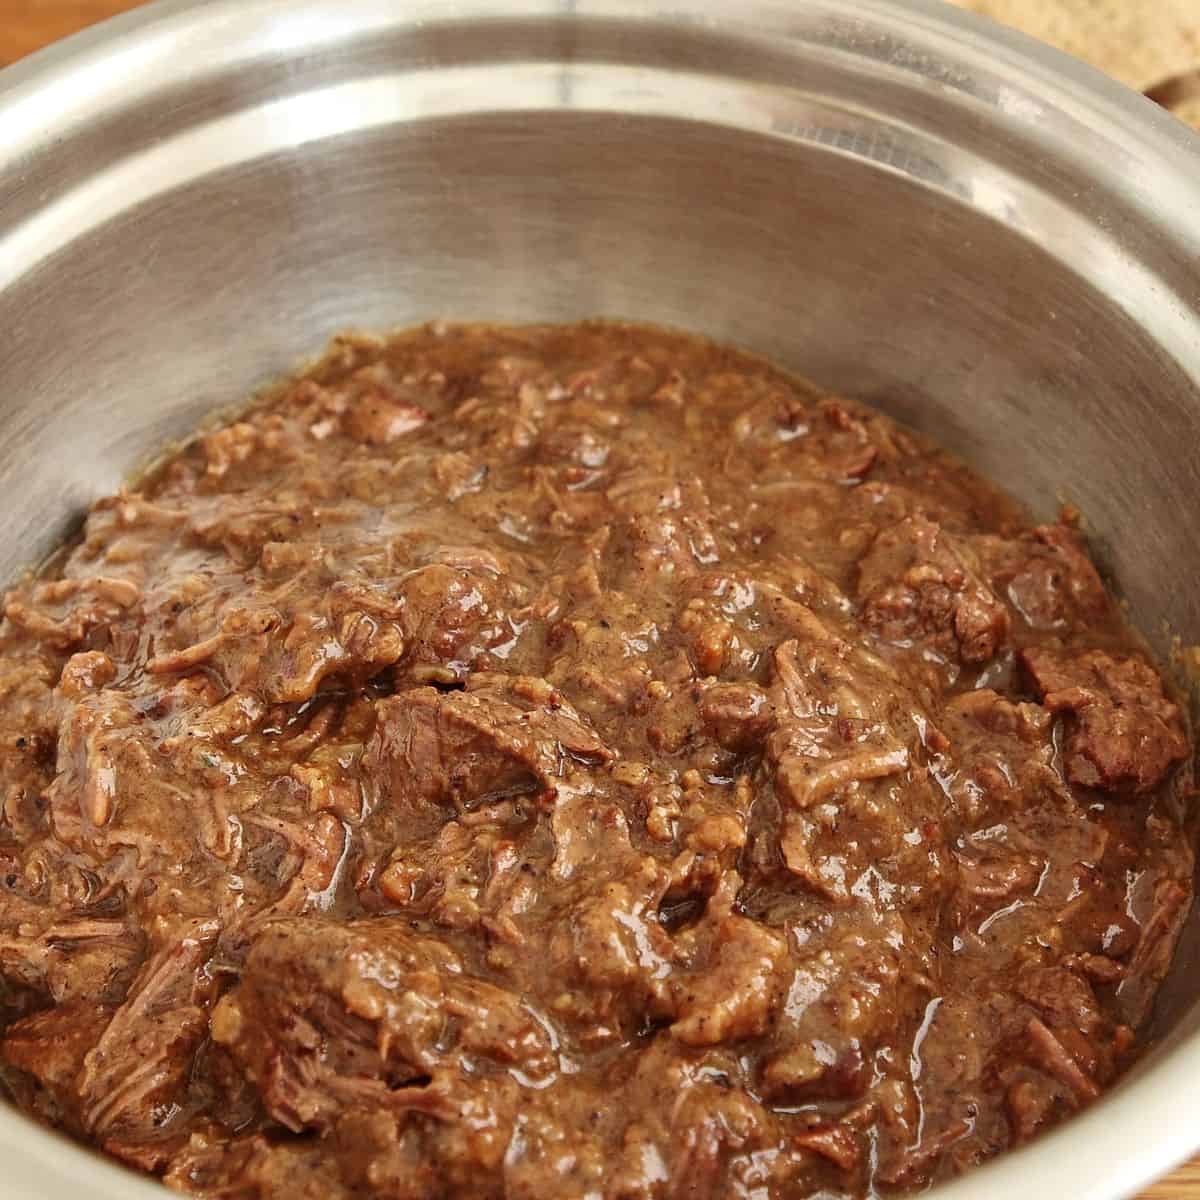
- Chill the filling completely - Place your mixture into a container and cover it with parchment paper. Cool it down quickly in the fridge. Warm filling and cold pastry do not mix well. Both the pastry and filling can be prepared in advance, which makes what seems like a big job, a very easy task on the day.
Assembling the pies and baking
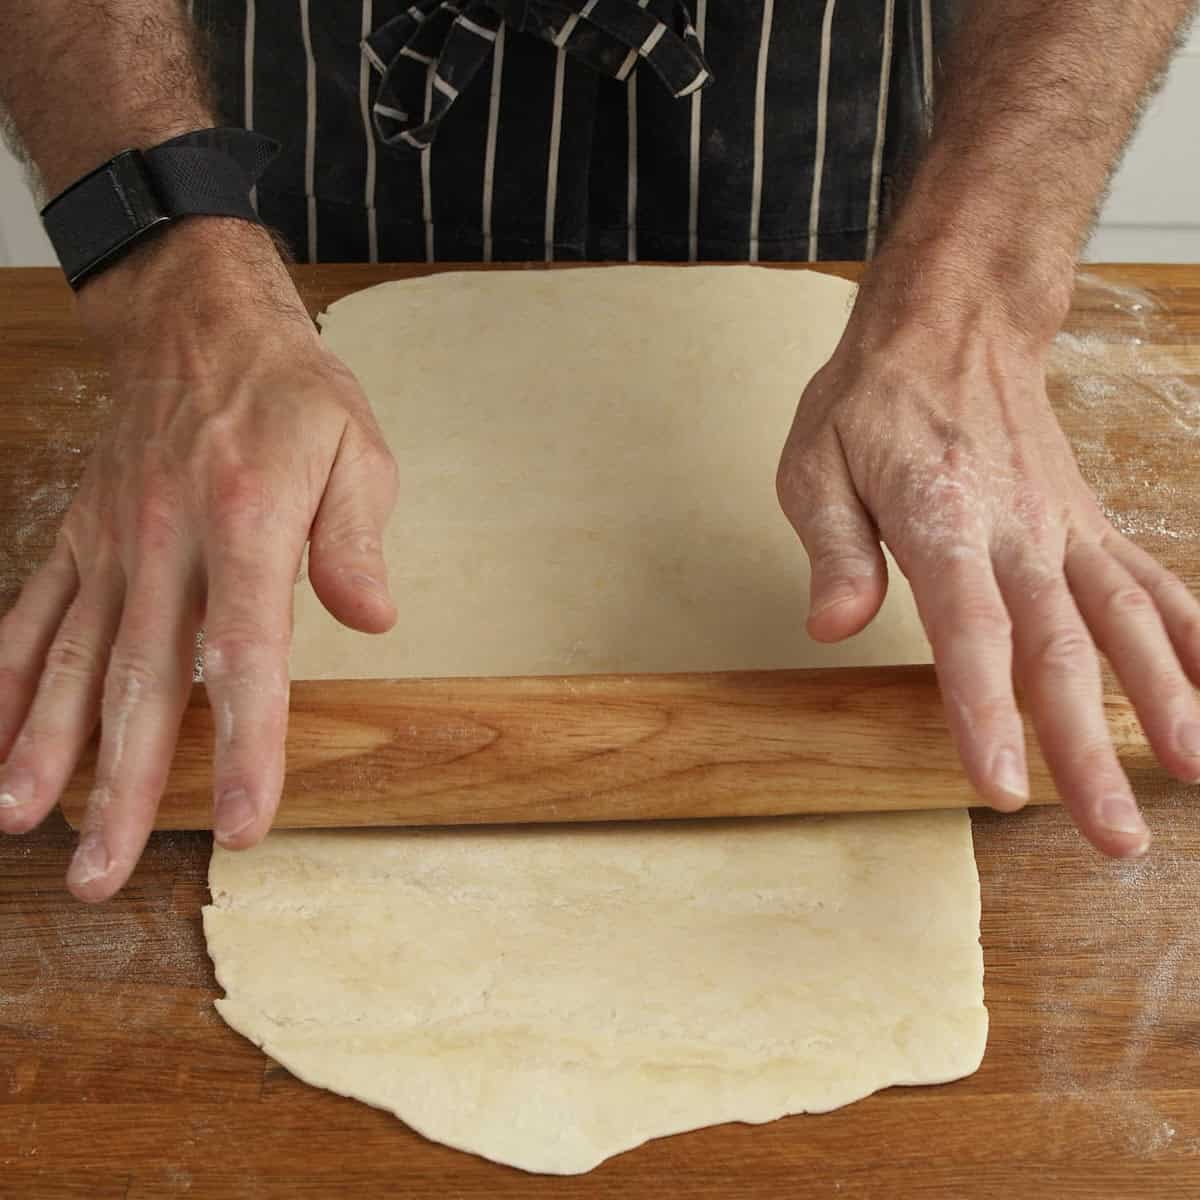
- Roll out the pastry for lining - Flour your work surface and remove the pastry from the fridge. Allow it to come up to temperature for about 5 minutes to prevent it from breaking. Roll the pastry into a large, 3 mm thick sheet and cut it into more manageable pieces. At home, I like to keep half the pastry in the fridge while I work with what fits on my bench and what I have time for.
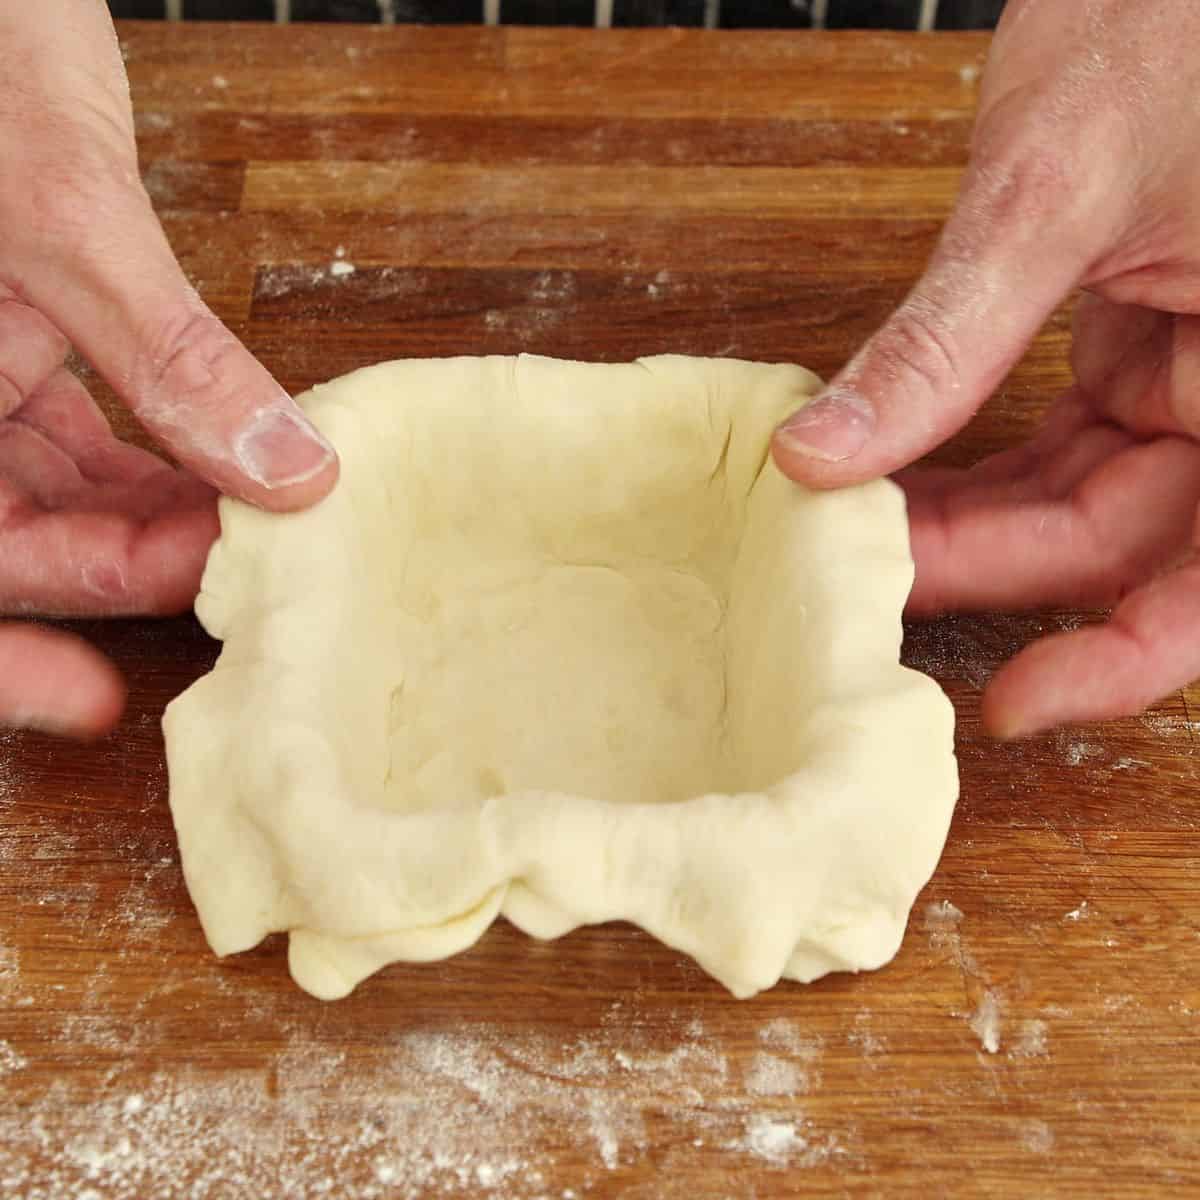
- Line the tins with plenty of overhang - Cut the pastry to fit the pie tins, ensuring there is sufficient overhang for later steps. Use common sense when cutting. You have ample pastry, so do not cut back excessively. Line each tin and trim most of the excess pastry, leaving enough overhang to add the lid and create a crimped edge. Place the lined tins in the fridge as the pastry will warm during handling, and the main trick is to keep the pastry chilled at all times.
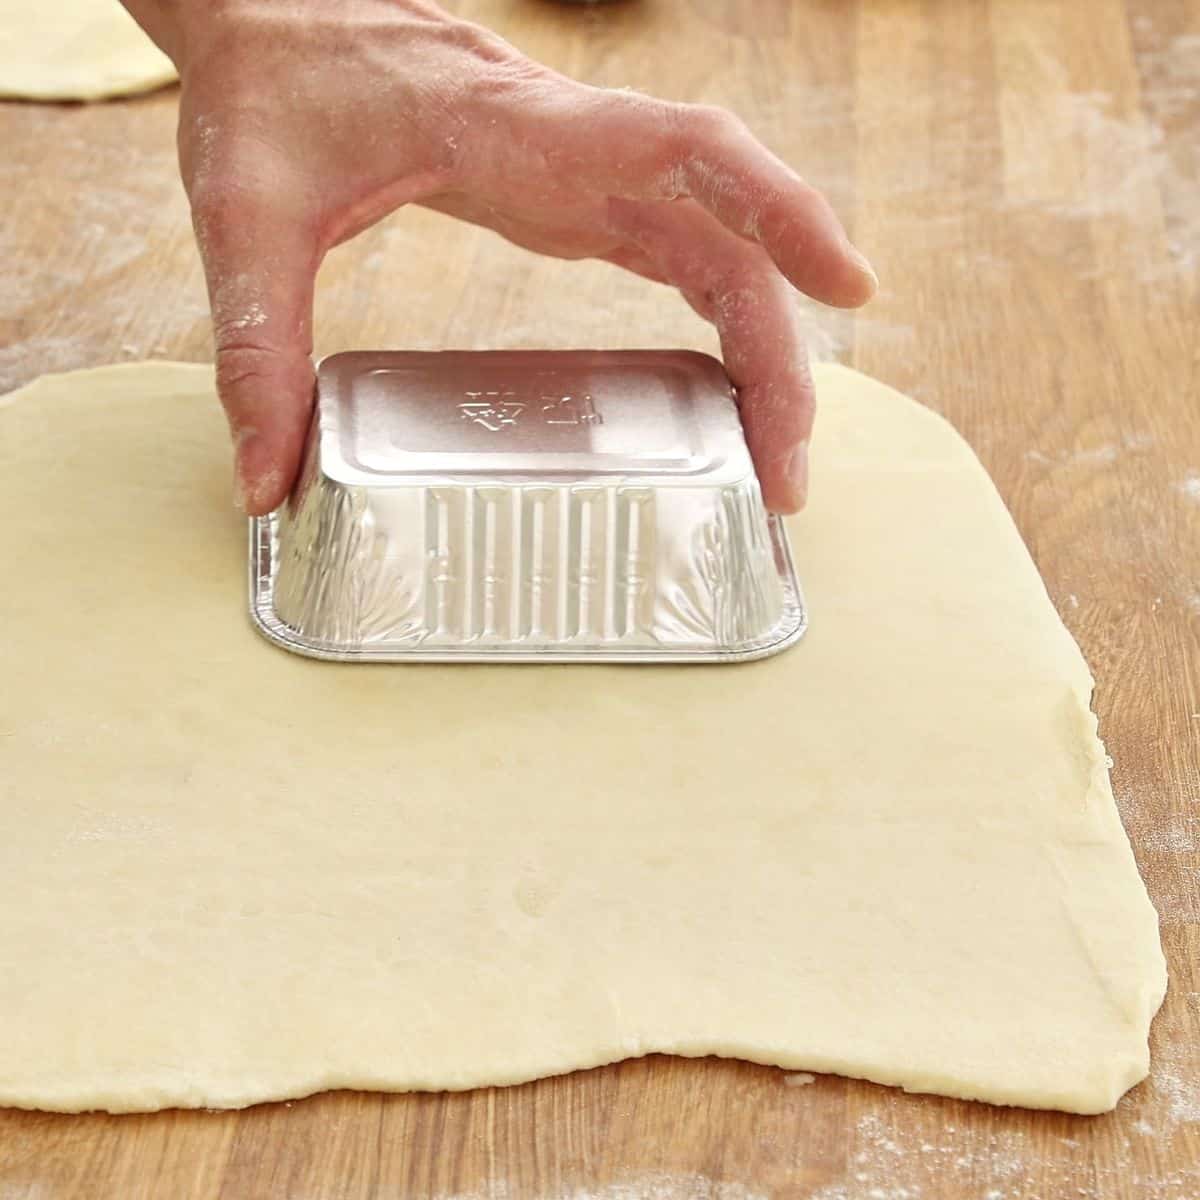
- Cut the lids - You can prepare the lids by cutting them now and storing them in the fridge until ready. The lids should cover the tops with just a slight overhang-do not cut them as large as the bottoms since there are no walls to line.
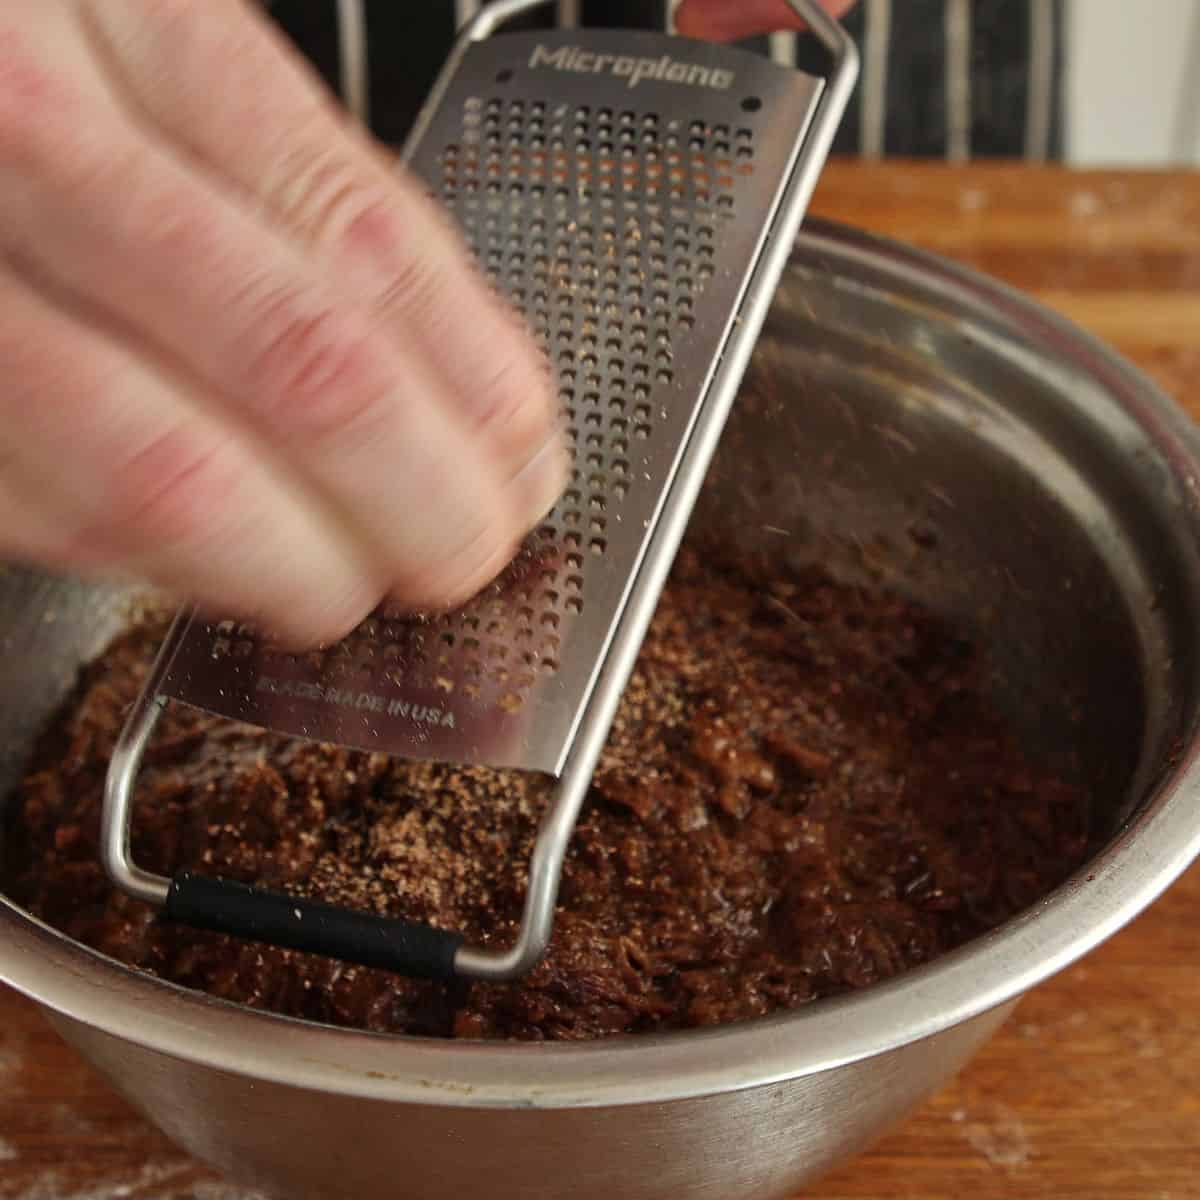
- Add the nutmeg and preheat the oven - Preheat the oven to 180°C (356°F). Once the filling has cooled, add a small amount of freshly grated nutmeg. This ensures the nutmeg subtly comes through in the final pie. Stir the mixture well.
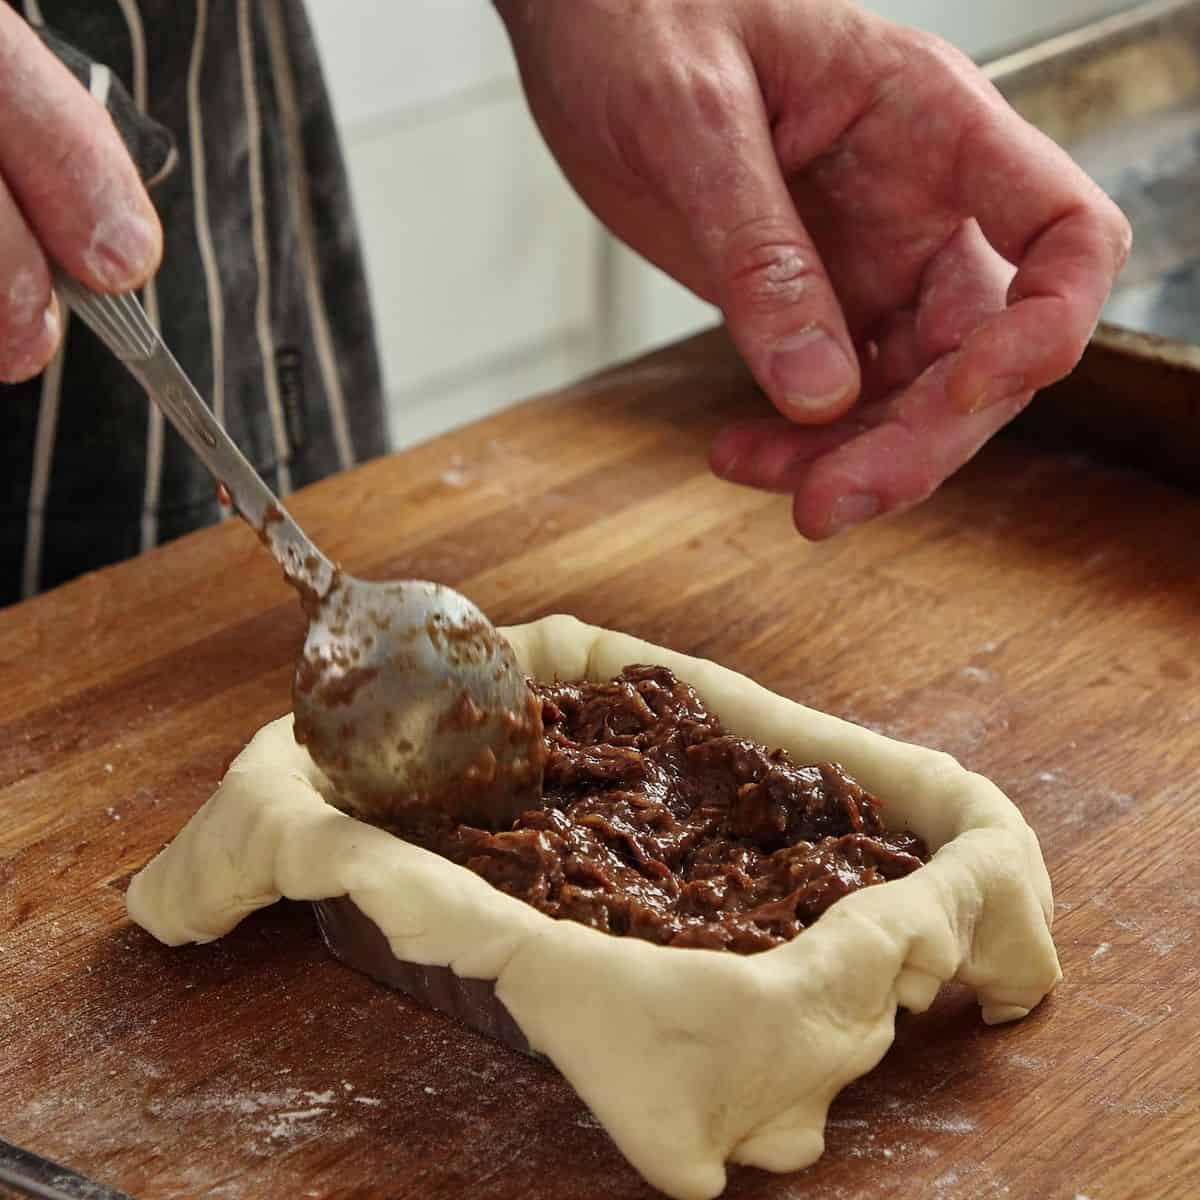
- Fill the pies generously - Fill each pie crust, reaching just below the edge of the rim.
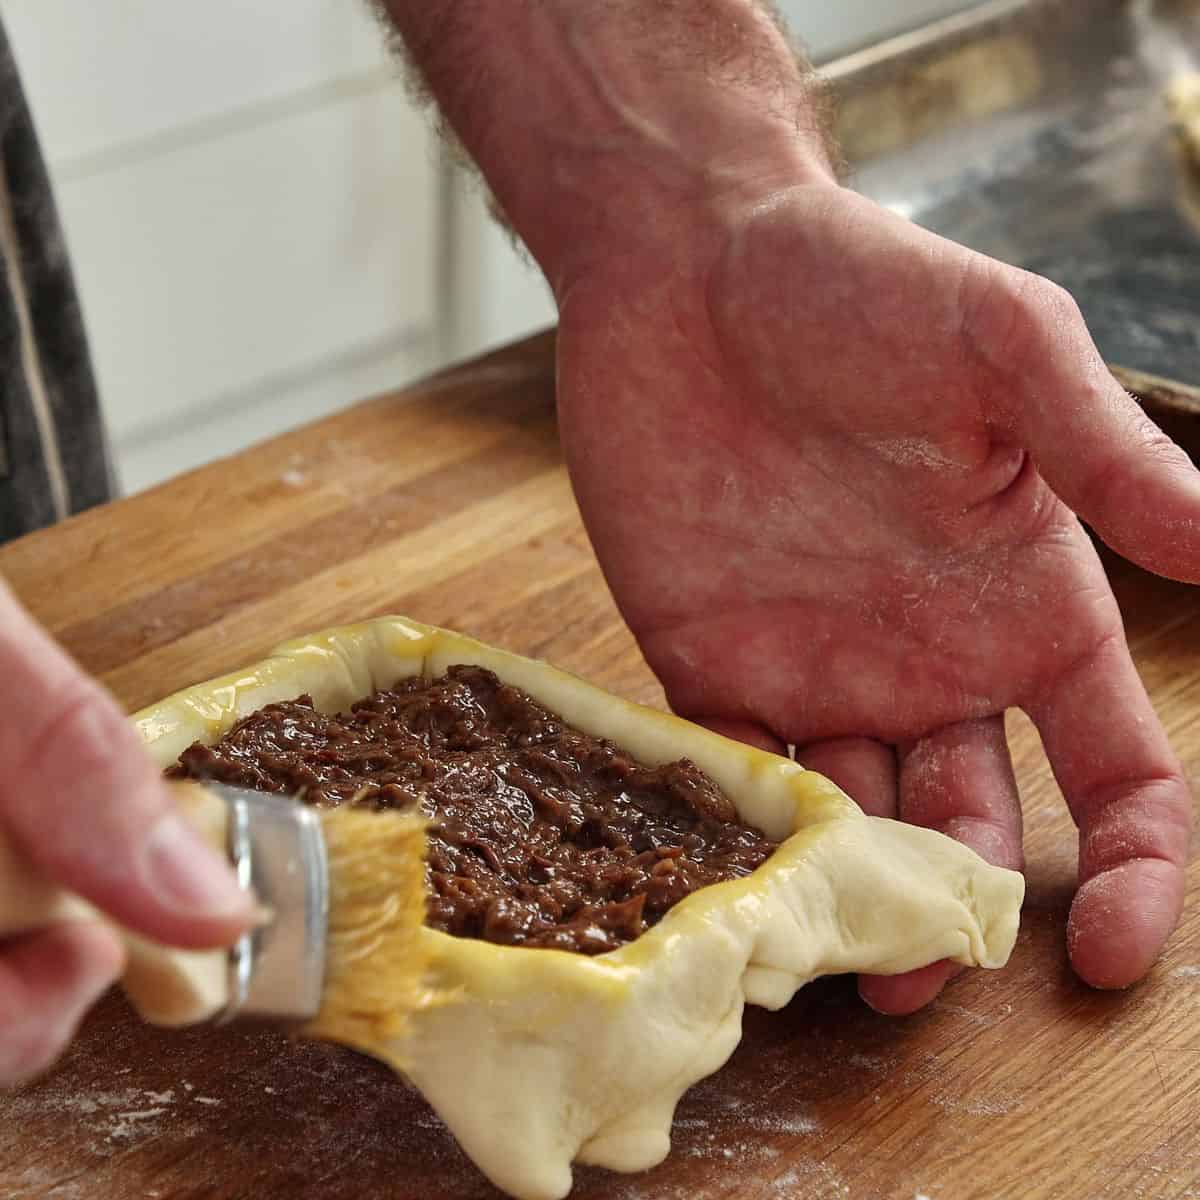
- Brush the edges and add the lids - Beat two egg yolks with a touch of water until well combined, then strain through a sieve to remove any lumps. Lightly brush the pastry edges like glue that will hold the top and bottom together. Place the lids on top and seal them tightly.
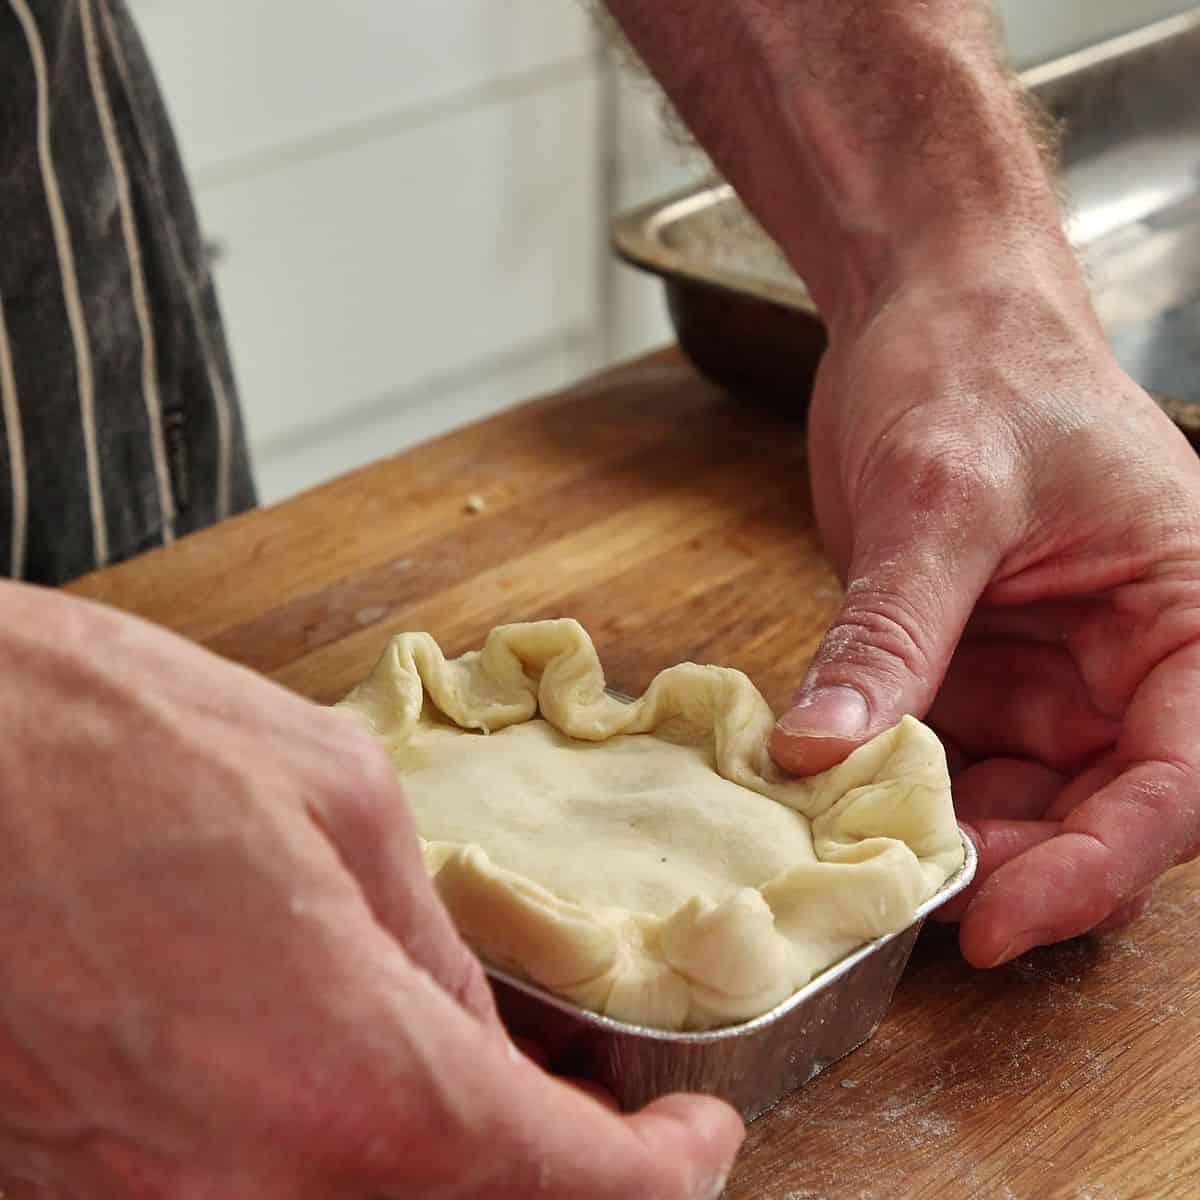
- Crimp and seal - Tidy up the edges if desired, then crimp them to your liking. A simple method is to use a fork and press it down around the outside edge. You can also press them down with your forefinger to make a more dramatic-looking pie. Ensure that the edges are properly sealed, as we don't want the filling popping out in strange places.
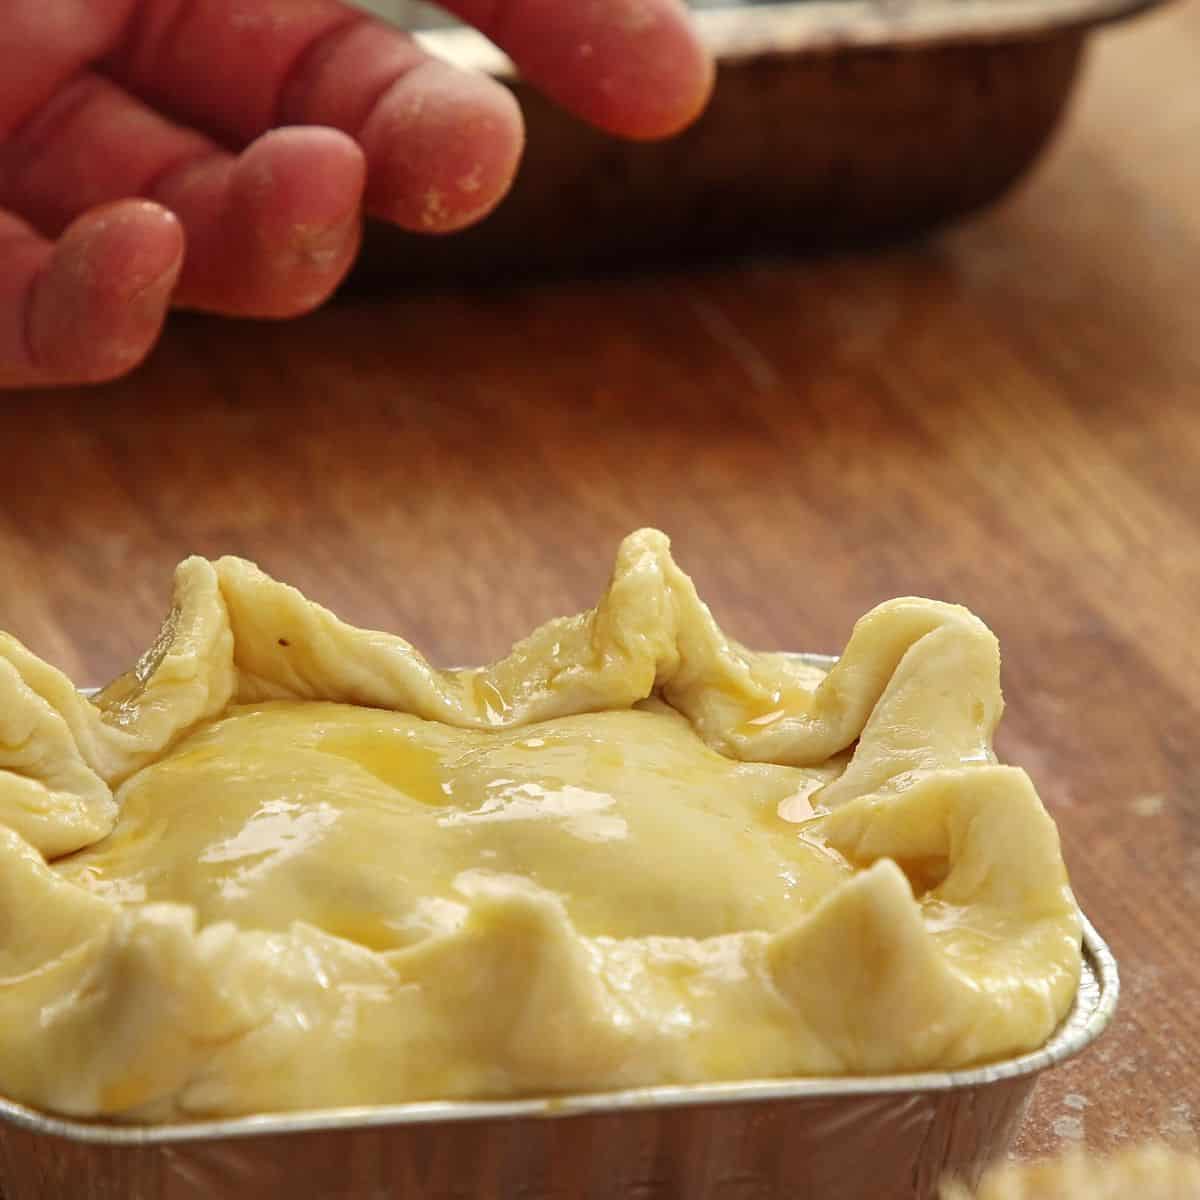
- Apply egg wash and chill - After sealing the pastries, brush them evenly with egg wash, ensuring coverage all over the visible parts. Allow them to chill in the fridge for 5 minutes before the final few steps.
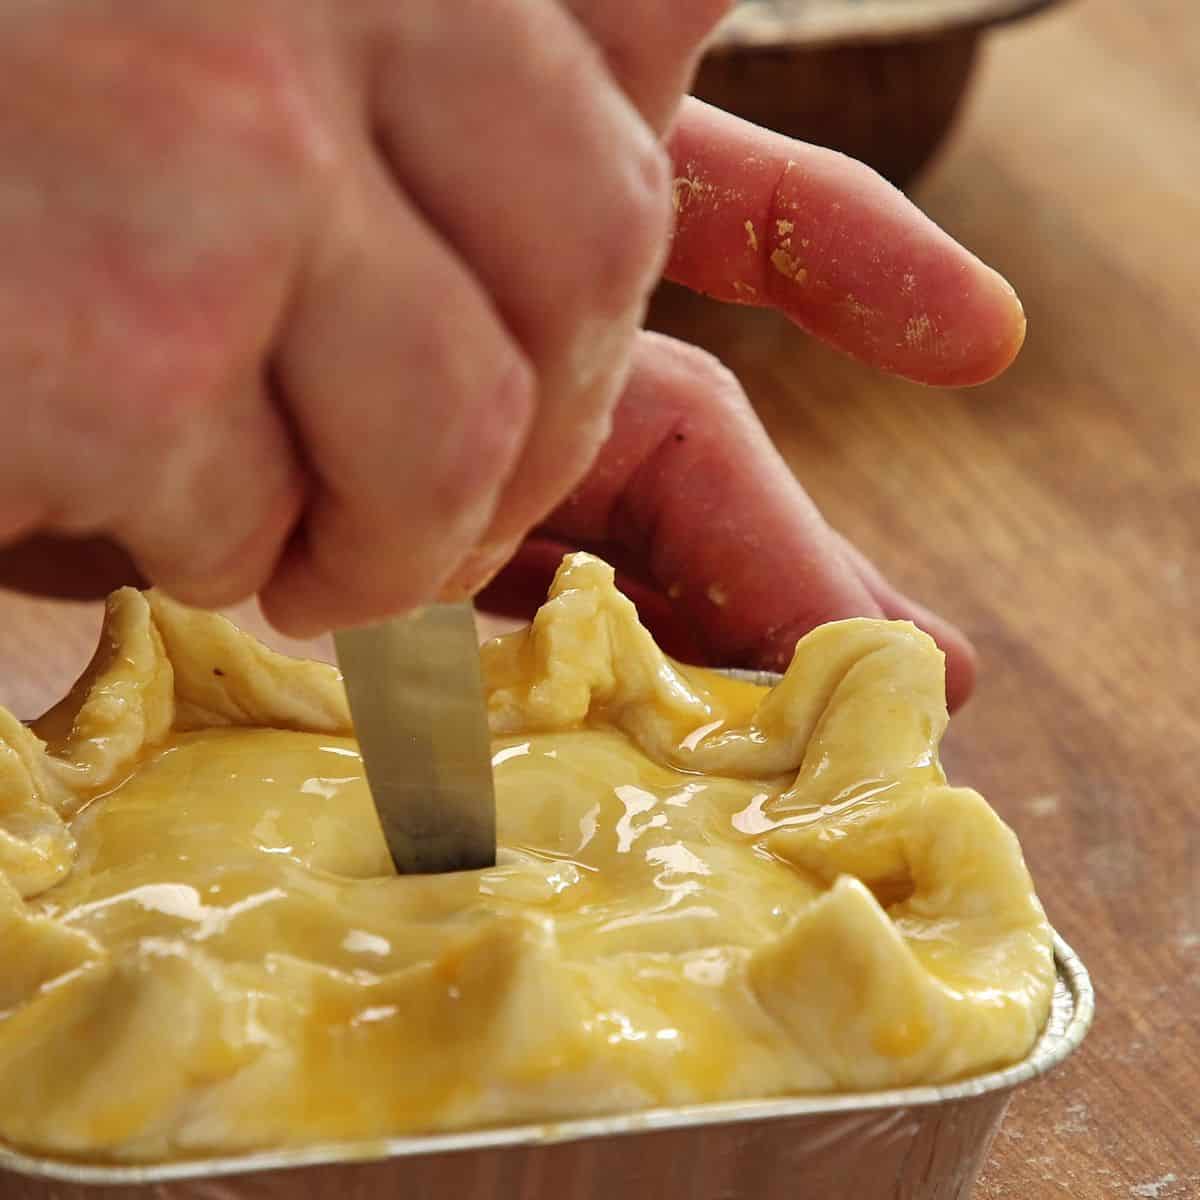
- Apply second egg wash and cut steam vents - Brush each pie with a final layer of egg wash. This final layer is what gives it that glossy professional look. Using a sharp knife, make a small slit down the center of each pie to allow steam to escape during baking.
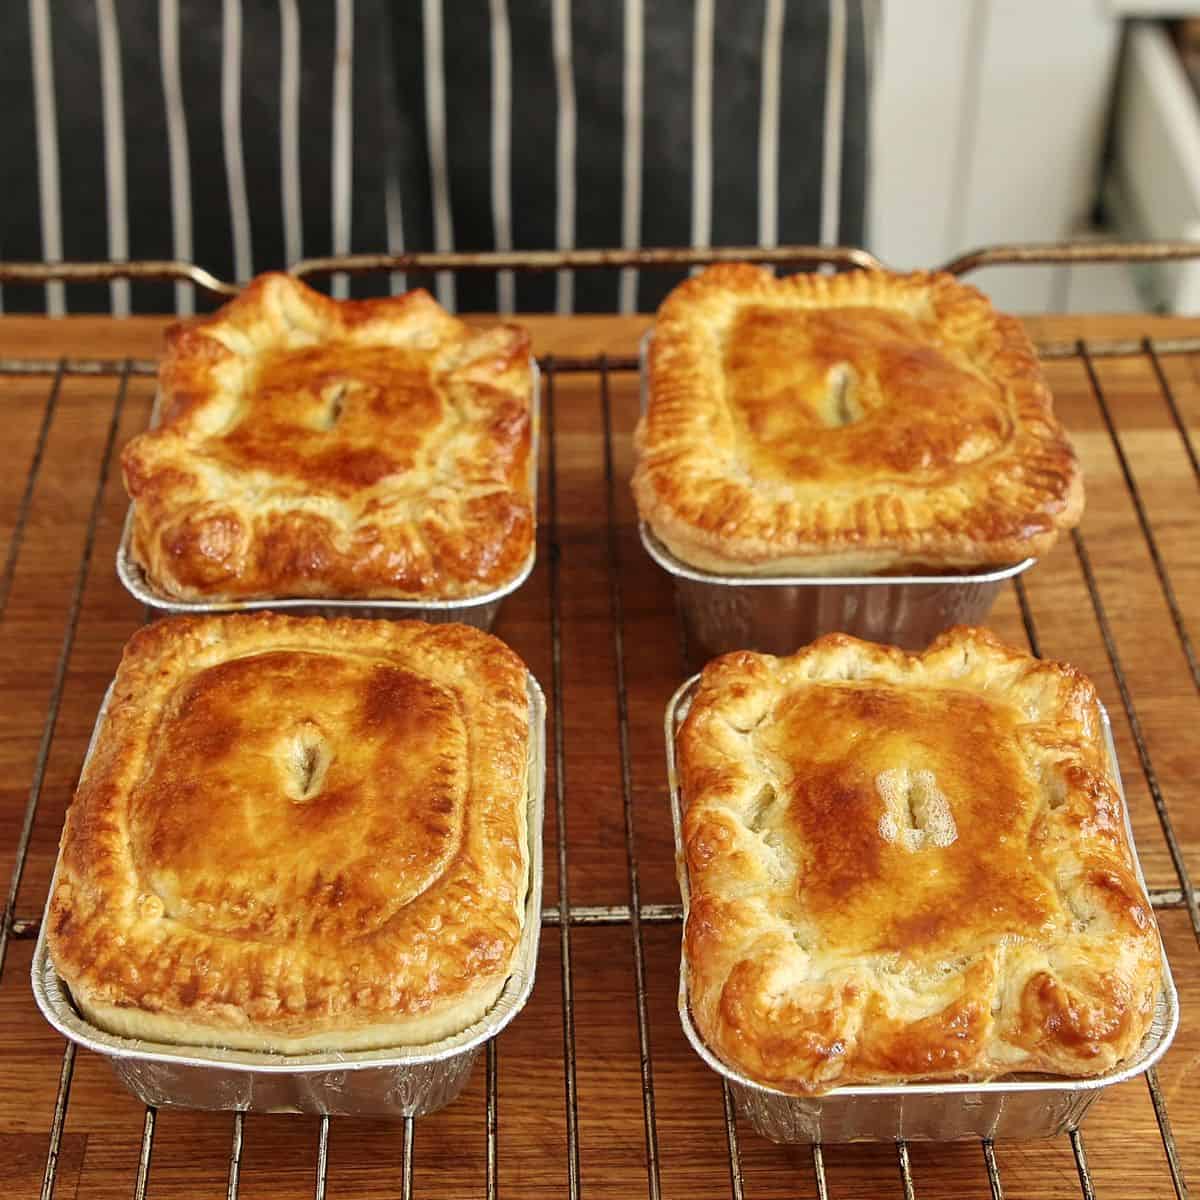
- Bake until deep golden brown - Bake for about 35 minutes, rotating the tray halfway through for an even bake. Allow the pies to cool for 15 to 20 minutes before serving. They should be deeply golden brown, shiny, and flaky. The filling will have a balanced fiery pepper kick to it, but before you taste it, you have to let them cool down a touch, as they are lava straight from the oven. I usually give them a good 30 minutes on a wire rack in the tins. It's hard but doable, especially after burning your mouth a few times.
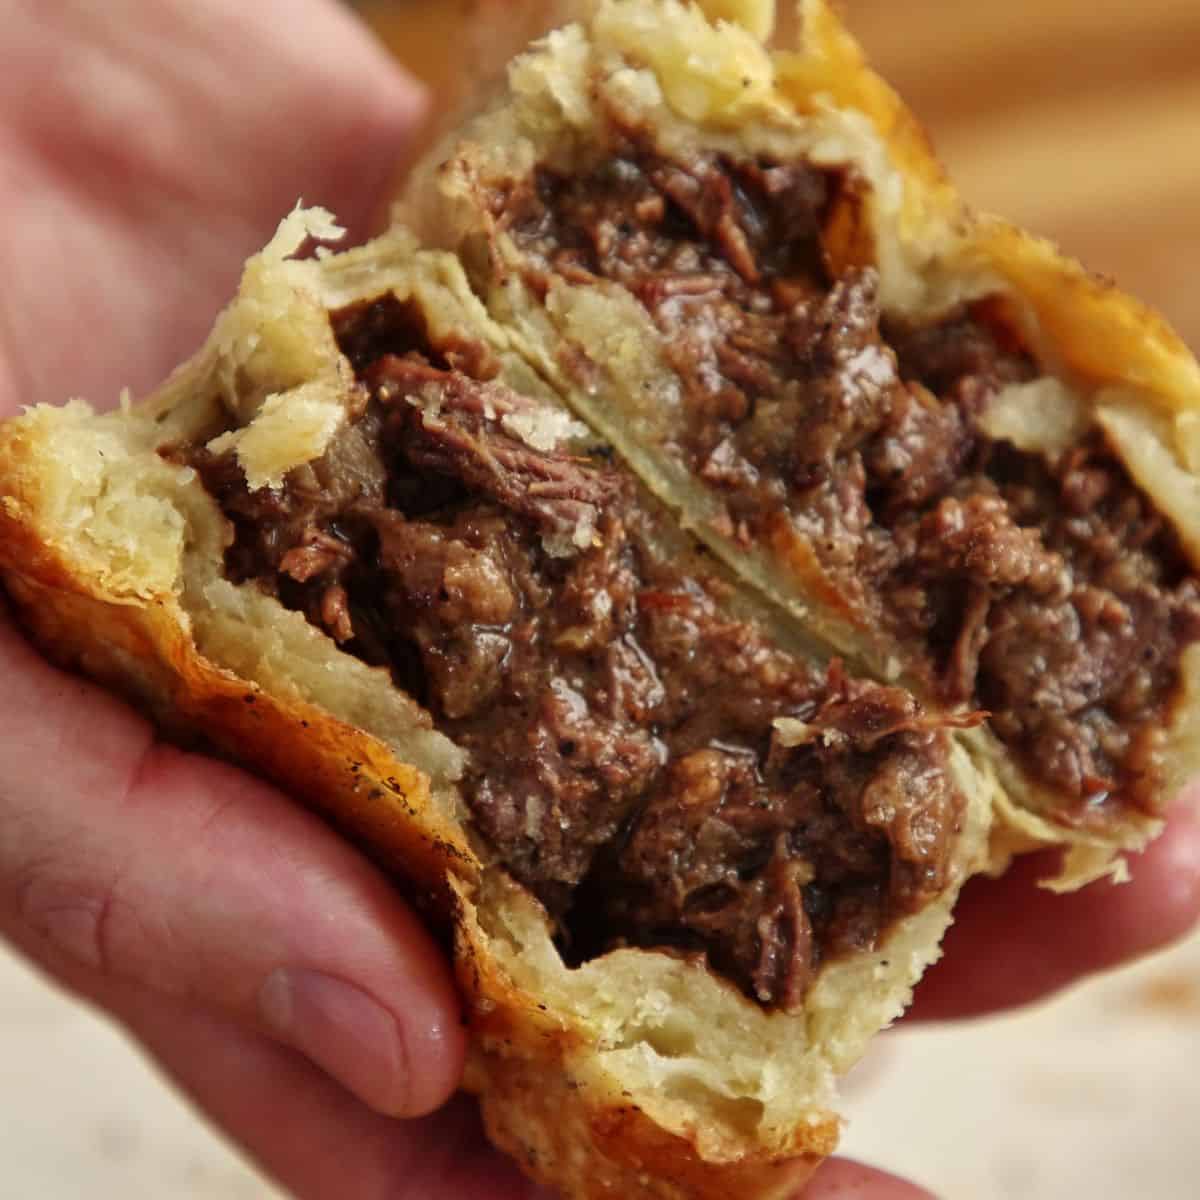
Watch how to make it
Pro tips when making pepper steak pies
- Pastry - Work light and quick when mixing your pie pastry. This will prevent gluten from tightening your pastry as well as keep the butter cold so it doesn't melt out. These are the two biggest secrets to great flaky pastry.
- Chill - Once the pies are assembled, place them into the fridge for a few minutes before cooking. Cold pastry puffs up better, while warm pastry becomes oily and tough.
- Base - If you use a glass or ceramic dish, blind bake the base for 10 to 15 minutes first.
- Dry - Pat the beef dry before flouring and searing to avoid it stewing in the pan instead of browning properly.
- Filling - Reduce the gravy until it is thick enough to hold a line when you drag a spoon through it. It thickens further as it cools, and a loose filling makes the base soggy and leaks.
- Vent - Cut a slit in each lid and leave it open. If the steam cannot escape, it will push the seal open or randomly crack the lid.
Substitutions and variations
- Store-bought puff pastry - Thaw overnight in the fridge, then let it sit at room temperature for 5 minutes before rolling. You'll need about 500 g (1.1 lb) for 6 individual pies or one large pie. This is the shortcut most recipes use and it works, but scratch rough puff produces a flakier, more structured crust.
- Gluten-Free Pastry Adjustment - For those following a gluten-free diet, replace the all-purpose flour in the pastry with a gluten-free flour blend (such as Bob's Red Mill 1-to-1). While this substitution may result in a less flaky pastry, it will still be suitable for use. Additionally, use gluten-free flour to coat the beef before preparing the dish.
- Vegetarian mushroom filling - replace the beef with 600 g mixed mushrooms (portobello and chestnut), cut into chunks. Sear in batches until deeply browned, then proceed with the same method using vegetable stock instead of beef stock. The pepper-coriander spicing still works beautifully.
- Steak and kidney - the other canonical garage-pie filling. Add 200 g diced beef or lamb kidney (trimmed of sinew) along with the beef in step 11.
- Individual vs. Large Pie - For a single large 23 cm (9-inch) pie, increase the baking time to 45-50 minutes. The method remains the same but is scaled up accordingly.
Useful equipment
- Heavy-bottomed Pot or Dutch Oven - Perfect for even browning and long braises. Enameled cast iron (Le Creuset, Staub) or a stainless steel stockpot with a thick base are suitable options. For a hands-off method, braise in the oven at 160°C (320°F) for 1.5 to 2 hours instead of using the stovetop.
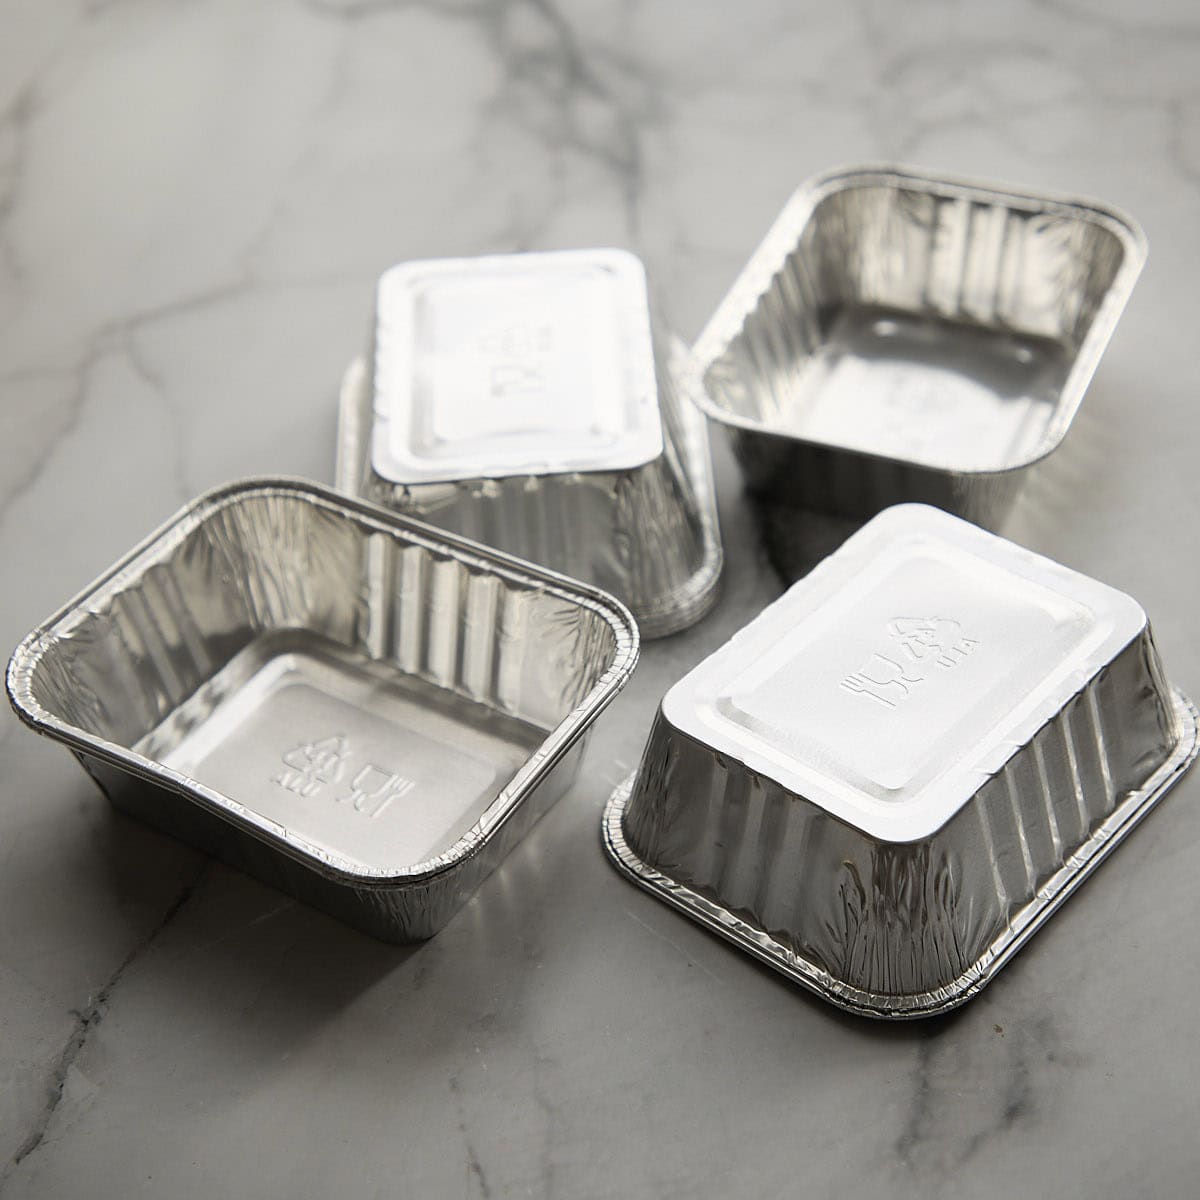
- Aluminum Pie Tins - Use 250 ml (1 cup) individual tins, which have the same volume as traditional garage pies. Disposable aluminum tins are recommended for their excellent heat conductivity, ensuring a crisp bottom crust.
- Spice Grinder - Used to grind the toasted spices.
- Pastry Brush - For applying an egg wash. Natural brushes are better than silicone for pies and pastry.
Storage, make-ahead and reheating instructions
- Storage Instructions - Baked pies can be stored in the refrigerator for 3 to 4 days in an airtight container. Unbaked, assembled pies should be refrigerated and used within 1 day to prevent the pastry from softening.
- Freezer Storage Instructions - To store unbaked assembled pies, place them on a tray and freeze until solid. Wrap each pie individually in plastic wrap followed by foil. The pies can be stored frozen for up to 3 months. When baking from frozen, add an extra 10-15 minutes to the recommended bake time.
Baked pies may also be frozen for up to 2 months. To reheat frozen baked pies, place them in a preheated oven at 160°C (320°F) and heat for 20-25 minutes. - Make-Ahead Instructions - The pastry and filling can both be prepared up to 3 days in advance and stored separately in the refrigerator. Assembly and baking should be done on the day of serving.
- Reheating - Reheat baked pies in a preheated oven at 160°C (320°F) for 15 to 20 minutes, or until warmed through. The microwave can be used for reheating the filling but may cause the pastry to become soggy.
Frequently asked questions
Garage pies are small individual savory pies sold at South African petrol stations, kept warm in a pie warmer at the till. They're called garage pies because you'd grab them from the garage (petrol station) forecourt shop.
The beef is done when it can be easily shredded with a fork without much resistance. It should still have some texture and not be completely tender. The braising time typically ranges from 1.5 to 2 hours on low heat, depending on the cut and its thickness.
Yes. Freeze unbaked assembled pies on a tray until solid, then wrap individually in plastic wrap and foil. They keep for 3 months. Bake from frozen at 180°C (356°F) for 45-50 minutes. Baked pies also freeze well for 2 months-reheat from frozen at 160°C (320°F) for 20-25 minutes.
You can thicken it by stirring in a little bit of cornstarch mixed with water and simmering it on low for a minute to thicken.
Chuck or any well-marbled stewing cut with a bit of fat is recommended. Suitable options include chuck roast, beef cheek, or short rib meat off the bone. The fat and connective tissue will break down during the long braise, resulting in a rich and delicious filling. Lean cuts such as sirloin or eye of round should be avoided as they will 100% be dry and tough.
Serving suggestions
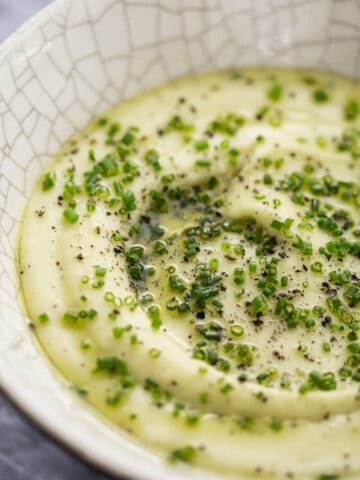
More South African recipes
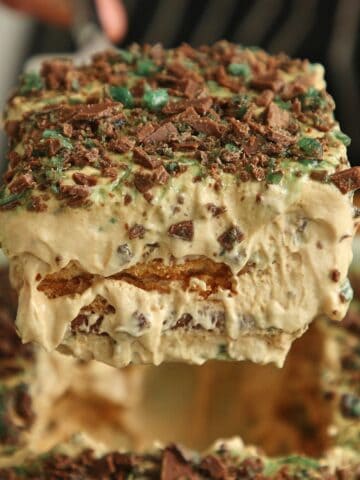
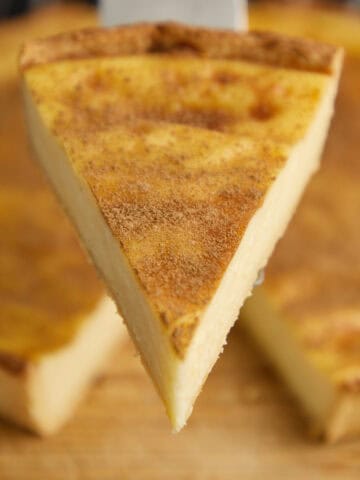
If you found this post helpful or have learned something, please comment, subscribe, and follow me on social media for more delicious recipes.
Recipe
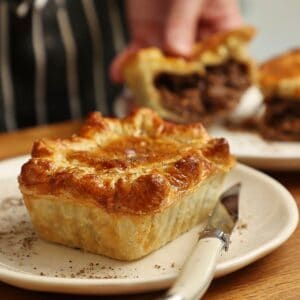
South African Pepper Steak Pie (Garage Pie)
Ingredients
For the pastry
For the filling
- 15 grams (1 tablespoon) vegetable oil - or olive oil, or beef dripping for frying
- 500 grams (1.1 lb) beef - chuck or stewing beef, diced into roughly 3 cm chunks
- 30 grams (3 ½ tablespoon) flour - all-purpose
- 1 (1 large) large onion - finely chopped
- 125 grams (½ cup) water - to deglaze pan fond
- 4 cloves (4 cloves) garlic - minced
- 500 grams (2 cups) beef stock
- 20 grams (2 tablespoon) Worcestershire sauce
- 5 grams (1 tablespoon) black peppercorns - toasted and coarsely cracked
- 5 grams (1 tablespoon) coriander seeds - toasted and coarsely cracked
- ⅓ (½ teaspoon) nutmeg - freshly grated
- 9 grams (1 ½ teaspoon) salt
- 15 grams (1 tablespoon) malt vinegar - optional, for balance
For assembling
- 2 (2) egg yolks
- 20 grams (4 teaspoon) water

Instructions
- Make the pastry. Whisk the flour and salt together in a large bowl. Add the very cold cubed butter and toss through the flour until every piece is coated. Do not rub the butter in - those whole cubes become steam pockets in the oven. Add the ice-cold water and mix gently with a fork until you have a shaggy mess with butter lumps everywhere. Tip onto a floured surface, press into a rough rectangle, then fold into thirds like a letter. Wrap in parchment and chill for at least 1 hour.
- Toast the spices. In a dry pan on medium heat, toast the black peppercorns and coriander seeds for about 1 minute, tossing often, until fragrant. Do not burn. Crack them coarsely in a pestle and mortar or spice grinder - keep them coarse, not powdered. Set aside.
- Sear the beef. Toss the beef chunks with the flour until coated. Heat the oil or beef dripping in a heavy pot on high heat. Sear the beef in batches until heavily browned all over. Do not overcrowd the pot. Remove the beef and set aside. Do not clean the pot - the brown crust (fond) is the flavor foundation.
- Cook the onions and build the base. Turn the heat to low. Add the onions and garlic to the pot and cook gently until soft and translucent, scraping up the fond. Add the salt to help the onions release moisture. Once the fond is picked up, add the 125 ml water and let it stew for 2 minutes.
- Braise the beef. Return the beef to the pot. Add the beef stock, Worcestershire sauce, malt vinegar (if using), and the cracked toasted spices. Mix well. Bring to a gentle simmer, then turn the heat down to low. Cover with a cartouche (parchment paper cut to fit) or a lid. Simmer gently for 1.5-2 hours until the beef is fork-tender, stirring occasionally. Alternatively, braise in the oven at 160°C (320°F) for 1.5-2 hours.
- Roll and fold the pastry (second session). While the beef braises, take the chilled pastry out and let it sit for 5 minutes. On a floured surface, roll it into a 40 x 20 cm (15 x 7 inch) rectangle. Letter-fold it (one third down, the other third over), turn 90 degrees, and repeat the rolling and folding two more times for a total of three letter folds. Wrap and return to the fridge.
- Finish the filling. Once the beef is fork-tender, break up the meat slightly with a fork - you want some chunks, not shredded bits. The filling should be glossy and coating-thick. Transfer to a container, cover with parchment, and chill completely in the fridge. Warm filling will melt the pastry.
- Line the tins. Let the pastry come to temperature for 5 minutes, then roll it out to 3 mm thick. Cut circles with generous overhang and line your pie tins (250 ml / 1 cup individual tins or one 23 cm / 9 inch tin). Snip off excess, leaving enough for crimping. Chill the lined tins. Cut lids with a slight overhang and chill those too.
- Assemble the pies. Heat the oven to 180°C (356°F). Grate the fresh nutmeg into the cold filling and mix. Fill the lined tins generously to the top. Beat the egg yolks with the 20 ml water, pass through a sieve, then brush the pastry edges. Add the lids and seal tightly. Crimp the edges with a fork. Brush with egg wash all over. Chill for 5 minutes, then apply a second coat of egg wash and cut a small steam vent in the center of each pie.
- Bake. Bake for 35 minutes, rotating the tray halfway, until deep golden brown and blistered on top. For a large pie, bake 45-50 minutes. Let cool for 15-20 minutes before serving - the filling is extremely hot.
Video
Notes
- The beef - Chuck is the default, but any well-marbled braising cut works - beef cheek or short rib meat off the bone. The fat and connective tissue break down into gelatin over the long braise, which is what makes the gravy glossy and the meat tender. Skip lean cuts like eye of round or fillet. They cost more and cook up dry and stringy. Cut into 3 cm (just over 1 inch) pieces so they brown properly and still hold their shape after a couple of hours in the pot.
- The pepper - This is a pepper pie, so the pepper is the main flavor and worth getting right. Black peppercorns are the classic choice. Toast them and crack them coarse rather than grinding to powder, so you get pockets of heat instead of a flat, even burn. White pepper gives a cleaner, sharper heat if you like that. Fresh or salt-packed green Kampot pepper is milder and brighter with a citrusy edge - it's soft, so skip the dry-toast, crush it, and stir it in near the end. If you use the salt-packed kind, cut back on the added salt because it comes already seasoned.
- The pastry - Two things make rough puff flaky: cold butter and a light hand. Keep the butter almost frozen and mix just until the dough holds, with streaks and lumps of butter still visible - not a smooth dough. Those butter layers turn to steam in the oven and push the pastry apart into flakes. Overwork it, or let the butter warm and melt in, and you get a dense, greasy crust instead. For a shortcut, store-bought all-butter puff works - about 500 g (1.1 lb) for six pies - though scratch rough puff bakes up flakier and holds its shape better.
- Assembly, keep everything cold - Your filling has to be fridge-cold before it goes anywhere near the pastry. Warm filling melts the butter in the crust and the base turns greasy and heavy. Fill each tin to just below the rim, not over it, or the pies leak and the lid won't seal. Brush the pastry rim with egg wash first - it works like glue between base and lid - then press the edges together and crimp firmly. Cut a small vent in each lid so steam escapes upward instead of building under the lid and steaming the crust soft.
- A crisp base, not a soggy one - The disposable aluminum tins earn their place - thin metal conducts heat fast and helps set the bottom crust. Bake on the lowest oven rack, or slide the tins onto a baking tray you've preheated, so the base gets direct heat early and colors instead of steaming. Keep that steam vent open. Between a cold filling, a hot tray, and an open vent, the bottom bakes through rather than going pale and damp.
- How to tell it's done, without a thermometer - Three things. The beef should give almost no resistance to a fork and break into chunks, not shred to mush. The gravy should be glossy and coat the back of a spoon - not soupy, not a stiff paste. The pastry should be deep golden all over. Lift a pie and check the underside is set and colored before you pull the tray. A pale base means it needs a few more minutes.
- Other cooking methods - The filling is a straight beef braise, so it takes to other methods well. Oven: covered at 160°C (320°F) for 3.5 hours, until the beef is fork-tender. Slow cooker: low for 6 to 8 hours. Pressure cooker: about 35 to 45 minutes at high pressure, then simmer the gravy uncovered to reduce it, since pressure cooking holds the liquid in. [The slow-cooker and pressure-cooker times are starting points, so cook until fork-tender for your equipment.]
- If the gravy is too thin or too thick - Remember it firms up as it cools, so in the pie it wants to be spoonable and glossy, not runny. Too thin at the end of the braise: simmer it uncovered to reduce, or stir in a teaspoon of cornstarch slaked in cold water and cook a minute. Too thick or pasty: loosen it with a splash of hot stock. Get it right before it goes cold and into the pastry - a runny filling soaks the base, and a stiff, pasty one won't settle into the corners.
- 9. Make-ahead and storage - Both the pastry and the filling keep in the fridge for up to 3 days, stored separately. Assemble and bake on the day you want to eat them - raw assembled pies hold only about a day in the fridge before the pastry softens. To freeze, freeze the raw assembled pies solid on a tray, then wrap each one. They keep 3 months raw, or 2 months baked. Reheat baked pies in the oven at 160°C (320°F), 15 to 20 minutes from the fridge or 20 to 25 from frozen. Skip the microwave - it warms the filling but turns the pastry soft.
Nutrition
This recipe, and 109 others.
Everything I actually cook, organized in one book, with the exclusives that never made the blog and an online edition that behaves with flour on your hands. No ads. $19.99, yours for life.
Get the cookbook →This site contains affiliate links. I may earn a tiny commission on qualifying purchases at no extra cost to you. By bookmarking these links you help support the upkeep of this site.
Comments
No Comments