If you don't know what koji is and what it does, you're in for a treat. An extremely useful edible mould that has the potential to help solve a lot of global problems like hunger, malnutrition and effective organic farming.
It is also the main ingredient used in making popular Asian foods like miso, soy sauce and sake used in delicious condiments like Japanese den miso and Teriyaki.
Want to make your own? Then let's teach you how to make koji.
Jump to:
What is koji?
Aspergillus oryzae. The biological name for the species of mould responsible for giving us koji. It's a filamentous fungus that can be grown on many substrates like rice, barley, vegetables and anything else rich in carbohydrates.
It's been used in Asian countries for centuries in the making of soy sauce, miso, douchi, and alcoholic drinks like amazake(low alcohol), sake(medium alcohol), and Shōchū(high alcohol).
Koji's usefulness lies in the fact that it produces a huge range of enzymes when grown on a substrate. Up to 50 different enzymes have been found.
The most useful to us being amylases which break up carbohydrates into it's building blocks, sugars, and proteases that break up proteins into it's building blocks, amino acids.
Examples of how these work are, miso and sake.
In miso, the soybeans have a high protein content and when mixed with koji, salt, and water the soybeans disintegrate because the amylases cleave the carbohydrates and the proteases the proteins.
A once bland and indigestible ingredient gets turned into one of the most delicious umami-rich, nutrient-dense foods known to mankind.
When making miso, a mould strain producing high protease is selected, and grown at a specific temperature, to promote high protease development instead of amylase.
With sake, the opposite is done. A high-amylase producing strain of mould is selected and the mould grown within a specific temperature range to promote amylase production.
The amylase then cleaves the carbohydrates in a carbohydrate-rich ingredient, like rice, into simple sugars, which the yeast in sake brewing can consume and turn into alcohol.
The mould produces these enzymes to free up the building blocks it needs to survive and eventually sporulate.
Most of the time we stop the process at the time enzyme production is at its highest. Other times you might choose to let the mould spore in order to harvest more spores for next time you want to grow koji.
To grow, it needs a specific environment. And, as we have seen, different temperatures yield different results depending on what we want to make with it.
Let's look at what you'll need to make it at home.
Useful equipment for this recipe


How to make a fermentation chamber
You need a little incubation set-up to properly make koji. You could wing it but chances are you will probably mess it up and give up altogether, which is not the desired result.
Don't worry, all you need is the following:
- An insulated box - This could be a small wooden cabinet, Styrofoam box or even an unused fridge or freezer.
- Thermostat and humidity controller - Here are the ones I use.
- Heating mat - Like this one.
- Small humidifier - Like this one.
- Clean linen cloth - Any will do.
- Tray to grow the koji in - Either flat or perforated to allow for airflow.
The point to all this is to create an environment where the temperature and humidity can be kept constant.
To set this up plug your two controllers into a power socket and then connect your heating mat to the thermostat and the humidifier to the humidity controller.
This is all very easily done. I barely passed math at school so I'm sure you will manage it too.
My setup

Note
Jumping ahead but, sometimes we ferment or age an ingredient at 60 °C (140 °F). Your heating mat won't reach that temperature. I insulated my fridge doors with aluminium foil and used a small fan heater to reach and keep that temperature.
It doesn't consume too much electricity once the temperature is reached and very little energy to maintain the temperature when well insulated.
For home use, you could use a rice cooker or slow cooker to ferment at higher temperatures. It's what I use when doing small batches.
Simply set your thermostat to 59 °C (138.2 °F) and then plug the rice cooker or slow cooker set to keep warm into the thermostat. More on that another day.
Other options for incubation
- Brod & Taylor Folding Proofer & Slow Cooker - Works well and great for other ferments too.
- Dehydrator - The minimum setting on most of these is 30 °C (80 °F) which is what you need. Make sure to cover the tray with plastic wrap so it does not dry out. Koji won't grow if it's not humid enough.
- Sous vide water bath - Pretty neat setup. Set your temperature on the sous vide and simply let the tray of koji sit on the water container then cover the tray with plastic wrap and poke a few holes in it for air.
- Oven with the light turned on - Cheapest but most unreliable way of growing koji.
Ingredients needed
You need mould spores to grow koji. I list a few places I've bought from before at the end of this article.
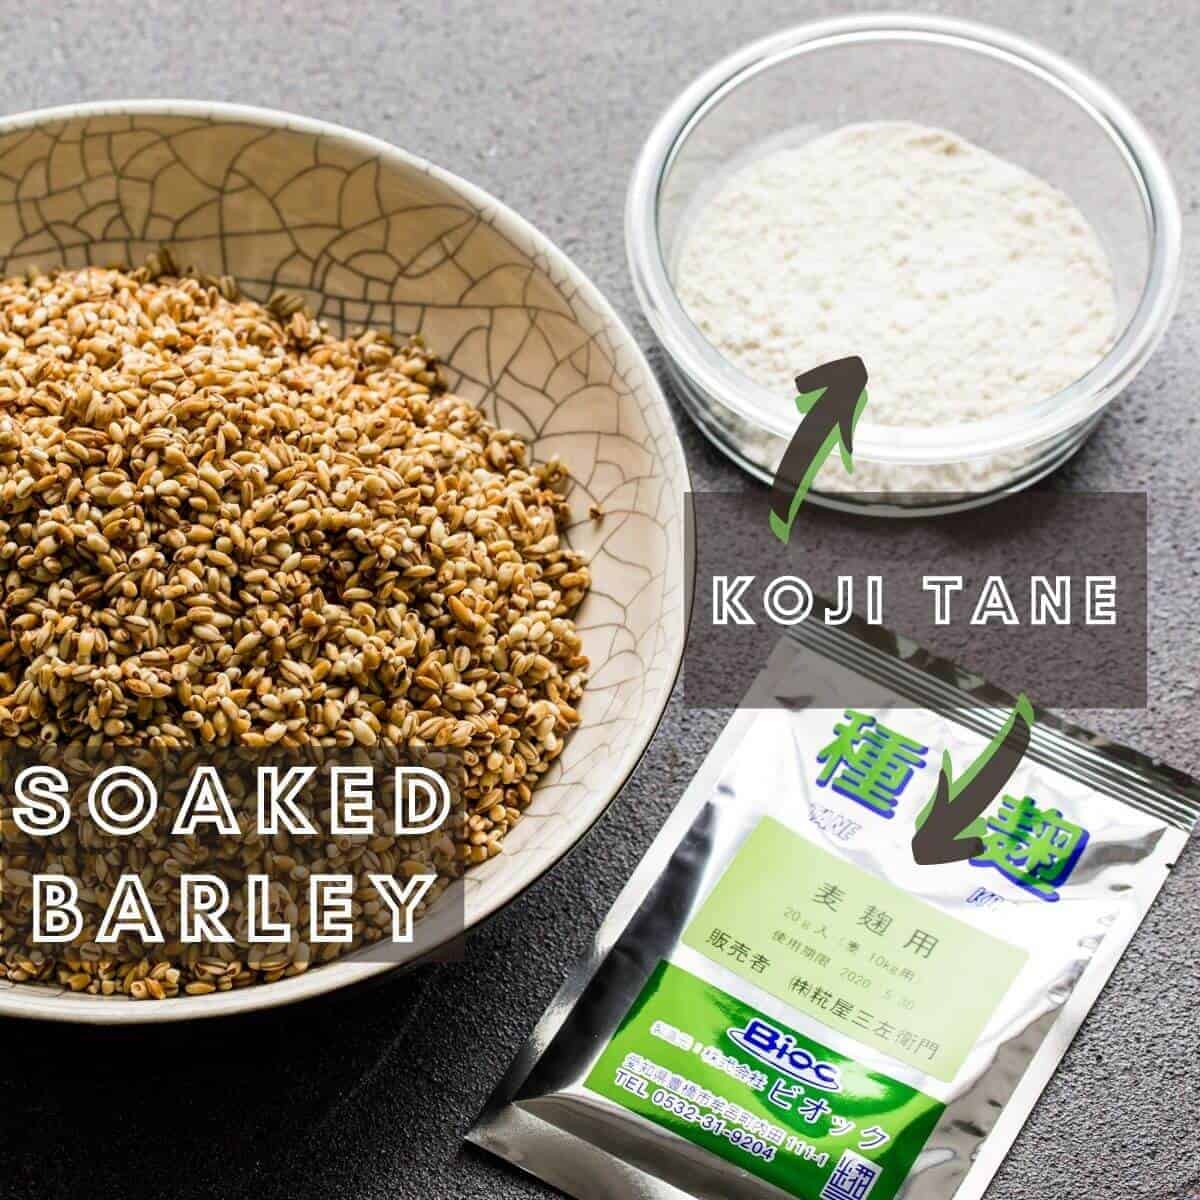
- 1000g Pearl barley or polished rice. This is called the substrate and can be other starchy foods too.
- 4g Koji tane (I always use more than suggested on the packet in case the potency of the spores has gone down a bit)
You either need the pure Aspergillus Oryzae spores or Koji tane. A white powder that is spores mixed with rice flour or blended dried rice koji that has fully spored.
If you buy pure spores you need to mix it with lightly toasted white flour that's been cooled down.
We toast the flour to sterilise it and mix the spores in the flour to ensure even distribution when inoculating a substrate.
How to grow it
The process is very simple. However, you will need practice to get it perfect. Like anything in life.
- Soak the barley or rice for 12 hours in the fridge or overnight at room temperature.
- Sterilise all your utensils and hands. Also, boil or steam the linen cloth. This is to make sure no bad bacteria get involved.
- If you don't have a steamer at home. Use a colander lined with cloth set over a pot filled ¼ with water and a lid that closes the colander. The colander needs to fit inside the pot but not touch the water.
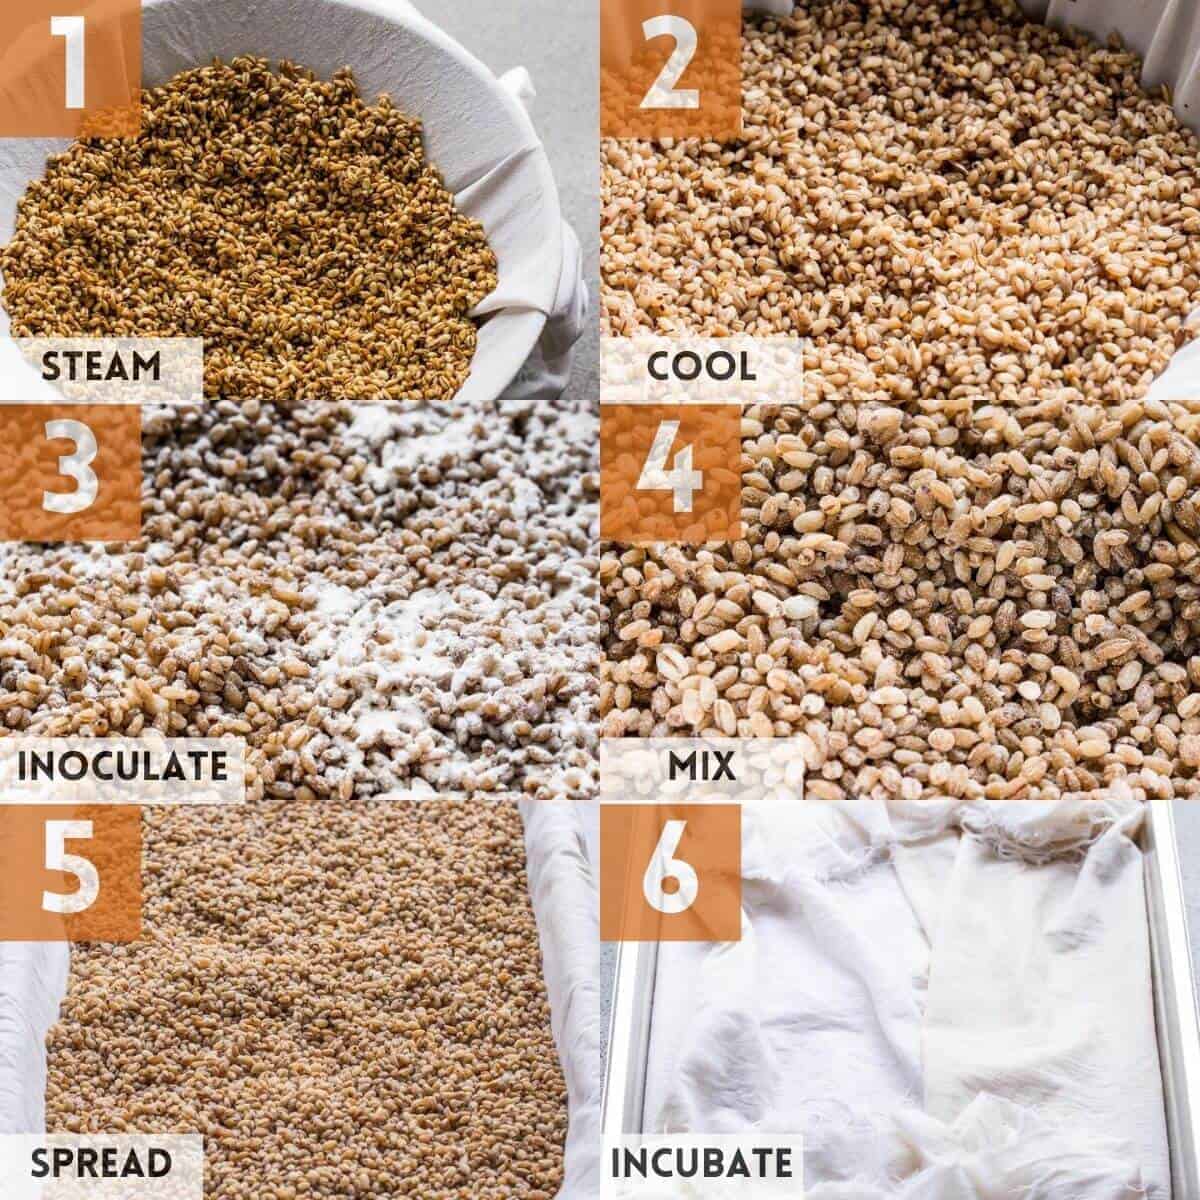
- Steam barley for about 45 minutes or until just cooked but not blooming. Do not boil it as it would ruin the process and drown the mould later on. If you are making the rice koji the process is the same but the steaming time will be around 20 minutes. Make sure to test the doneness every 10 minutes to know at which stage it's at.
- Once your barley/rice is cooked, cool it down in a separate sterilized tray or bowl to about 35 °C (95 °F). Sprinkle over the Koji tane and mix well. This is to inoculate the barley with spores.
- Line your perforated or flat tray with a slightly damp cloth(not wet) and spread the inoculated substrate out and cover with the cloth completely.
- Place into your incubation setup. Place the thermostat needle into the barley/rice and let the humidity controller sensor dangle close by.
Now the real fun starts.
Depending on the purpose, we need the Koji to produce either more protease or more amylase. This means that we need to maintain a temperature of 28 °C (82 °F) - 30 °C (86 °F) for protease production and 30 °C (82 °F) - 34 °C (93 °F) for amylase production.
For that reason:
- Set your thermostat to maintain a temperature of either 28 °C(82 °F) or 32 °C (89.6 °F). Set your humidistat to 70% and makes sure the humidifier is switched on and has enough water.
- Place a buffer like a bowl or wire rack in between the warming mat and the tray with barley so that there is some circulation and the barley does not directly touch the heating source.
- Close the incubation chamber and keep an eye on the temperature. You can connect the thermostat and humidistat to your phone via Wi-Fi so that it tells you when things are changing.
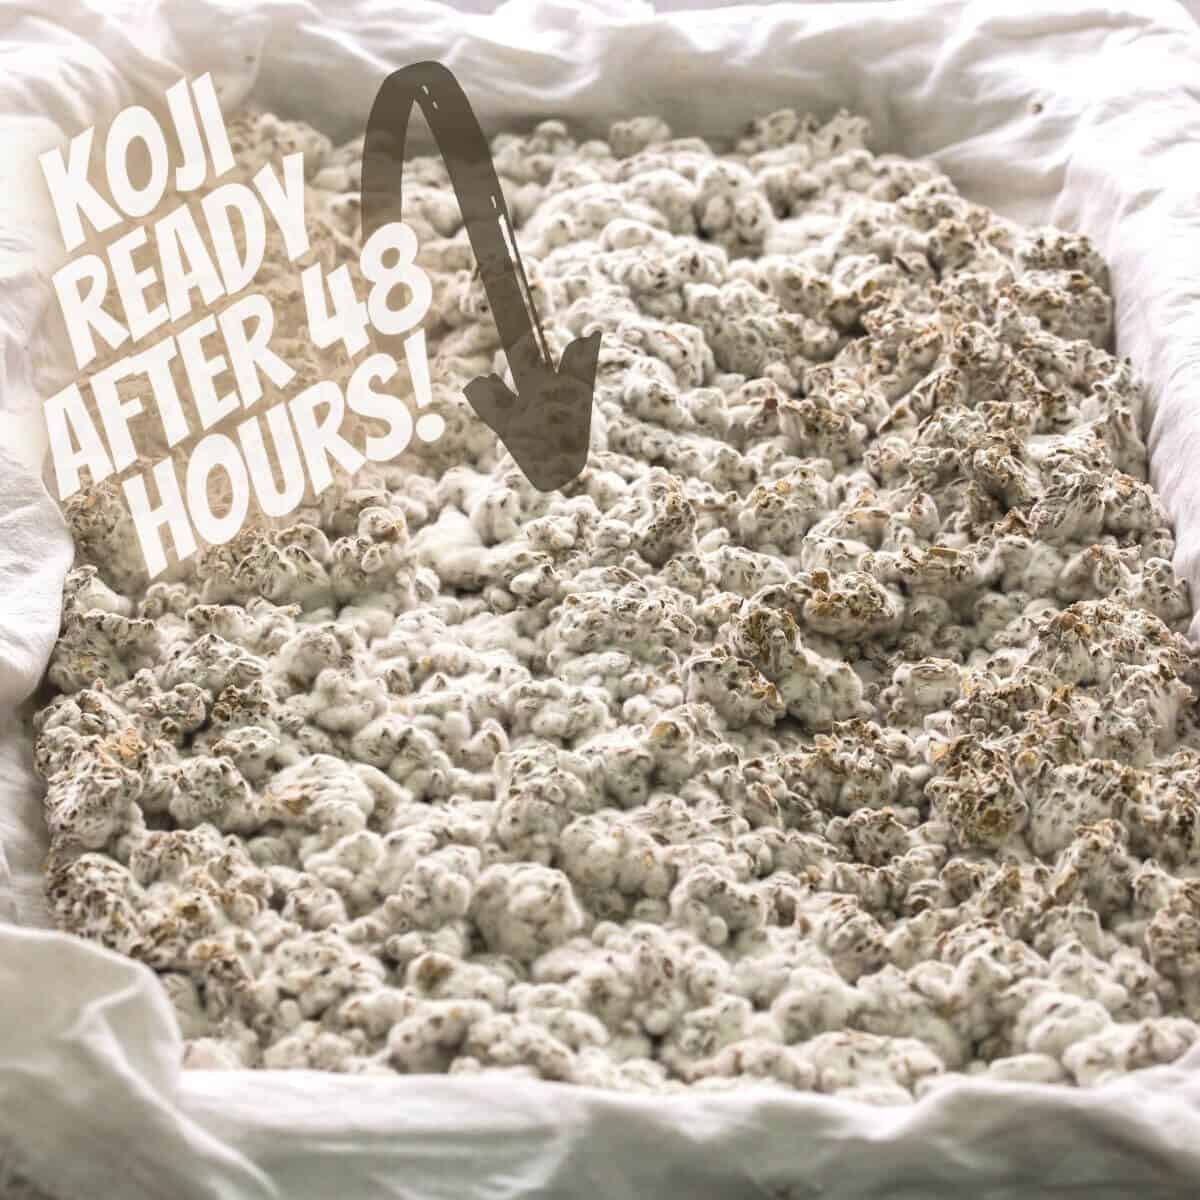
- We now start a 48-hour cycle. Over the next 12 hours, the koji will start "infiltrating" the barley. At some point, it will start to form a mycelium and the koji will produce its own heat. When this happens we have to break it up and cool it down.
- We want the temperature to stay within range. So, break it up and spread it out when the temperature jumps. Don't worry if the temperature goes a bit above the maximum limit. Just don't let it stay there for too long.
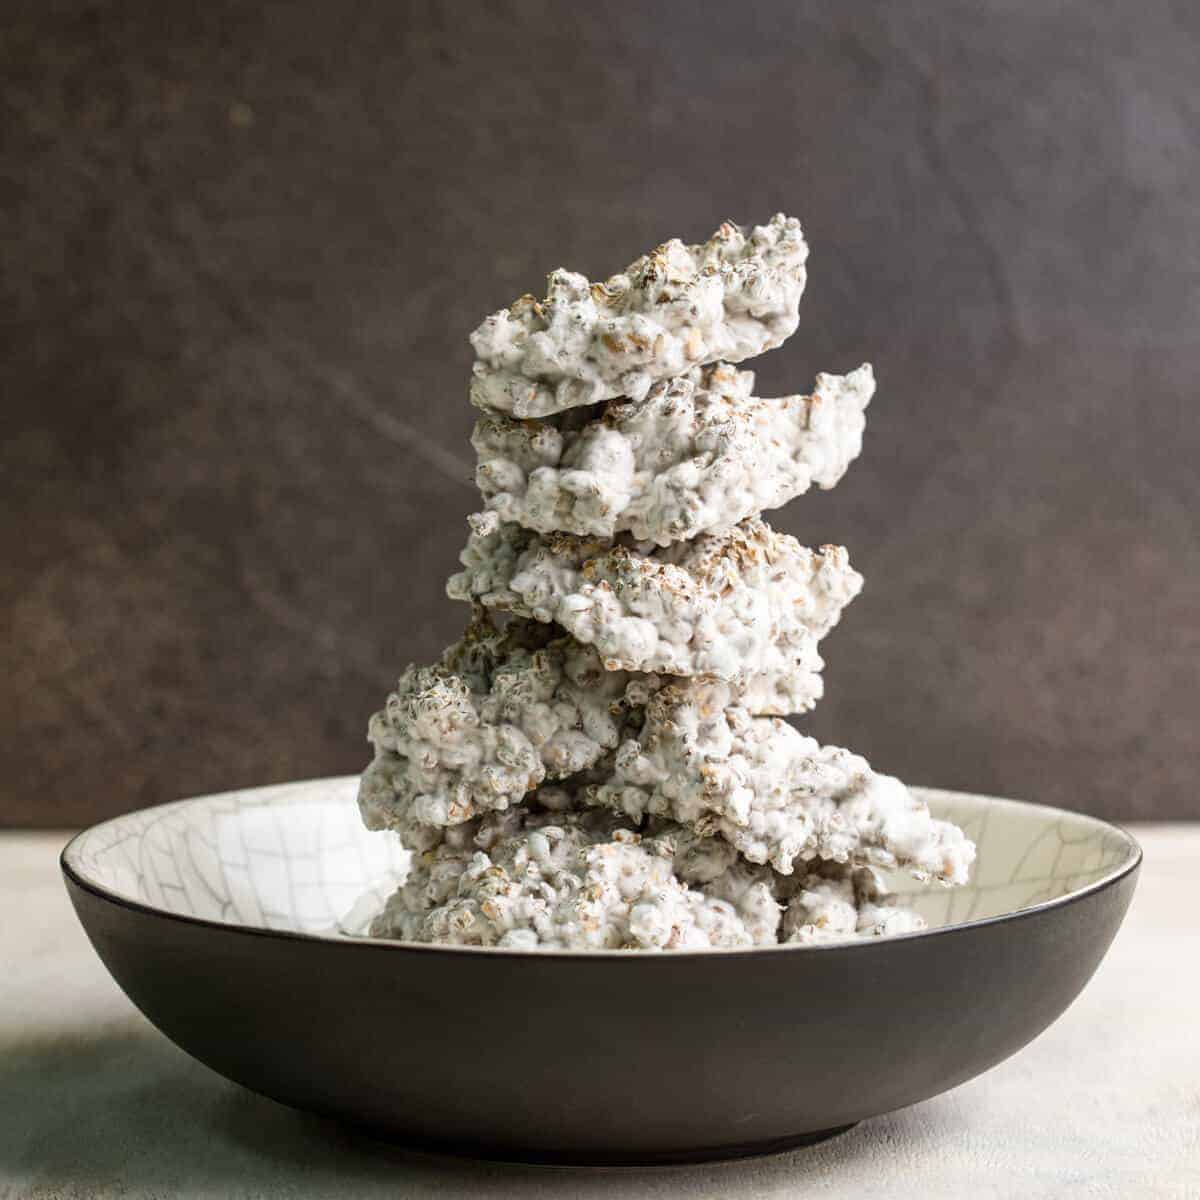
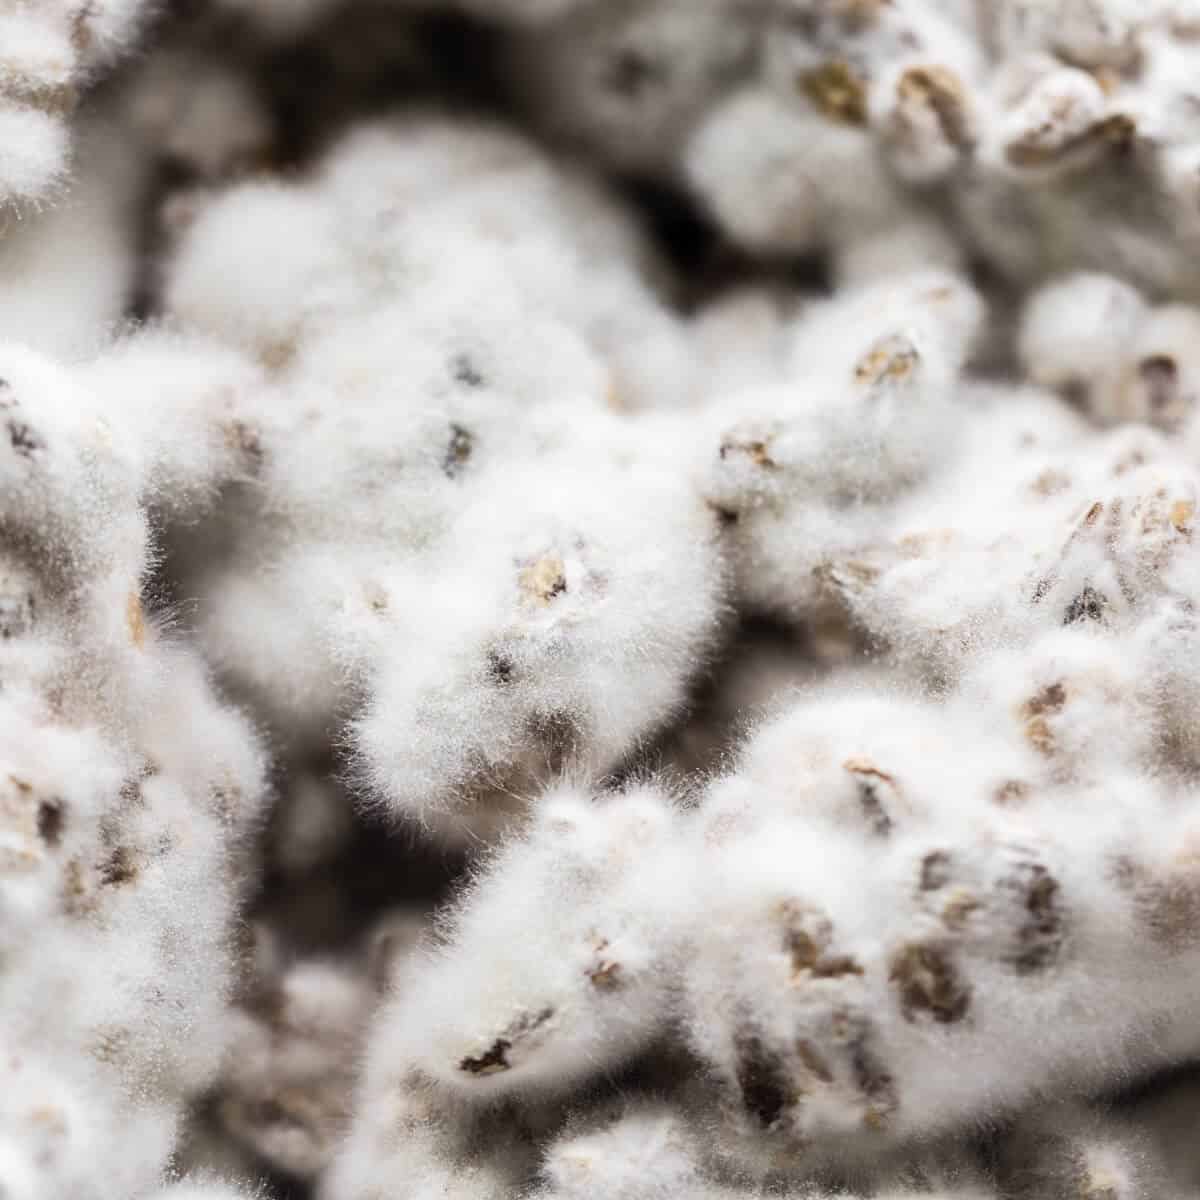
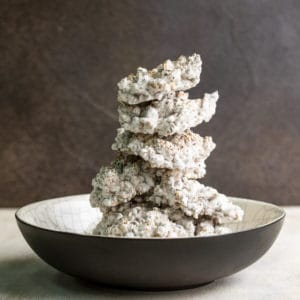
- Keep this up until 48 hours are finished and the barley is covered in a thick mycelium of white mould.
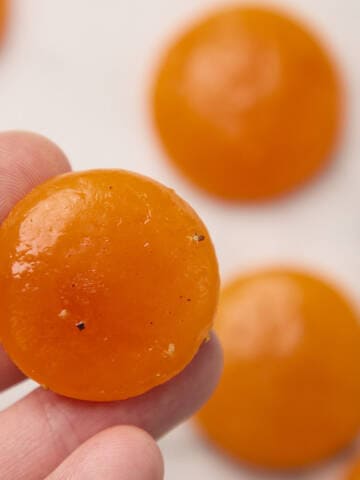
You now have fresh koji. Taste it. It's delicious just like that.
If you made koji to produce protease, it should have a mushroomy flavour, a bit like the rind of camembert cheese. If you make it to produce amylase, it will have a sweeter aroma and flavour, a bit similar to very ripe apricots.
Once you have tasted koji you can not un-taste it. You will immediately be able to identify it in naturally brewed soy sauce, miso, and sake.
Video
Variations
You don't have to grow koji on barley or rice. It can be grown on many substrates. For instance, when making soy sauce you grow it directly on soybeans and toasted cracked wheat, or a combination of others. Here's a list of just some of the substrates you can also use.
- Bread - One of the more creative ways to use up old bread. The Noma fermentation book has a wonderful rye miso recipe you could follow. In my kitchen, I use Borodinsky bread or sourdough leftovers from the previous day. Any other bread will work.
- Sweet potato - Vegetables are also a great substrate to grow it on. The book, Koji alchemy, concentrates on that a lot.
- Peeled beans - Make sure the beans are fully cooked but not mushy and peel the outside skin off. Otherwise, the mould will not be able to break through the tough skin and start growing.
- Buckwheat - Tricky but doable. Good for those who love a challenge.
- Split peas - Instead of using barley or rice to grow it on for miso, try growing straight onto split peas(green or yellow) and then mix with more cooked split peas, water and salt to make stunning miso.
- Lentils - Lentil shoyu(soy sauce), is one of the things I made that always surprises my clients most when doing tastings for them. I use a mixture of different lentils blended with toasted crushed wheat and grow Aspergillus sojae on it. It then goes into a salt brine and ferments for months.
- Quinoa - Also one for the brave but, miso and soy sauce made from quinoa is outstanding.
What to do with it
Once you have grown it the possibilities of what to do with it are almost endless. Below are a few traditional and non-traditional products to make with it.
- Soy sauce - Once you've made your own, you won't ever use store-bought soy sauce again.
- Miso - One of the easiest most versatile koji ferments to make.
- Sake - Made by using rice koji and extremely tricky but, very rewarding when done.
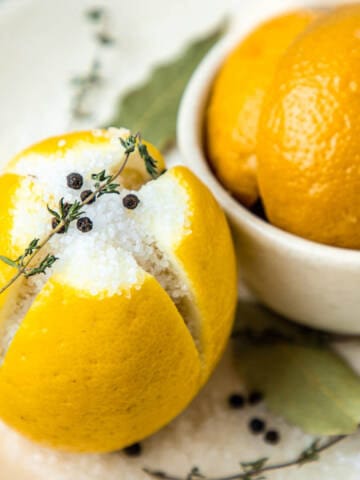
- Shio koji - A cure or marinade made with salt, koji and water. Used to briefly marinate beef, chicken or fish.
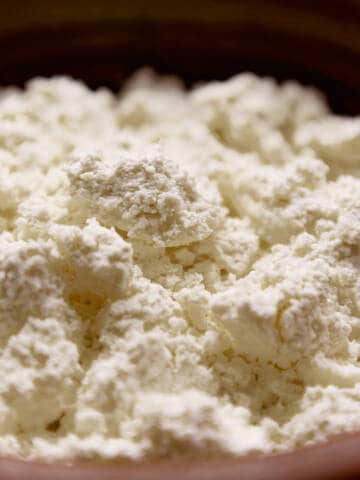
- Flour - Dried and ground up into a fine powder. Used in bread making and baking.
- Amazake - Lightly fermented alcoholic drink.
- Koji milk - Dried koji blended with water and strained.
Where to buy spores
Here are a few companies I've used in the past to buy it. They are all slightly different but they are all very helpful and good at what they do.
- Fermentation Culture - They also produce their own shoyu, miso and other ferments. (non-affiliate)
- Good old Amazon - This strain is best for making soy sauce. (affiliate)
- Bio'c (product site) - This is the best quality I've bought. It's a longer wait than the others though, and dealing with the post etc is a bit of a pain. But, worth the effort. (non-affiliate)
Helpful books and resources
You can read a lot on Wikipedia and the sites mentioned above. It's where I learned most of what I know today about the subject.
Below are also a few interesting books on fermentation I own and recommend. There are hundreds of others but these are the most well known and most understandable.
Koji Alchemy
Miso | Tempeh | Natto

Noma Fermentation Guide

The Art Of Fermentation
Frequently asked questions
Store airtight in the freezer for years. Otherwise, you can dry it out or store it in the fridge for up to a week.
Technically yes. By wrapping the substrate in corn husks. This is not recommended though because the mould strains won't be pure and you run the risk of severe poisoning.
At 40°C the mould starts to sporulate prematurely not yielding the correct amount of enzymes. At 42°C it will die.
Tips for success
- Only buy koji spores from trusted or reputable suppliers. Badly produced spores contain other unwanted mould strains and can lead to spoiled batches.
- Make sure to use a quality substrate. It's best to use polished rice and pearl barley as it's easier for the koji to get to the food source.
- Make sure all equipment, utensils and your hands are fully sterilised. Mould fermentation is not protected by salt or acid and happens at high humidity at a lovely temperature for any bacteria to multiply.
- Make sure to not under or overcook your substrate. Undercooked will lead to the koji not growing and overcooked, to the koji drowning and not producing enzymes.
- Never let your koji go above 40 °C or 104 °F. The mould will die above this temperature. It grows best kept at around 30 °C or 86 °F.
- It grows best on perforated or breathable wooden trays.
- Make sure the thermometer is inside the substrate.
- For best results, mature the koji in the fridge for 2 - 3 days before using or storing.
Related recipes
If you are interested in fermentation or Asian foods you will find the following recipes useful
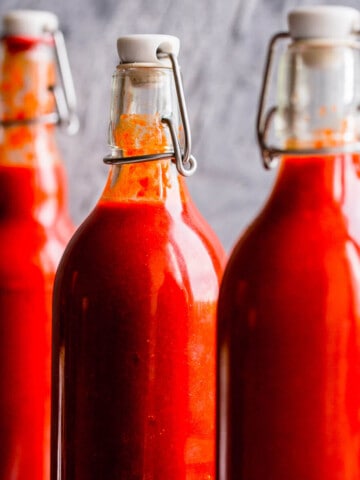
- Homemade sriracha hot sauce
- Fermented cucumbers
- Homemade Beef Bresaola
- Rye sourdough starter
- Sauerkraut
- South Arican Biltong(Cured Meat)
- Sweet Miso Baked Eggplant
This site contains affiliate links. I may earn a tiny commission on qualifying purchases at no extra cost to you. By bookmarking these links you help support the upkeep of this site.
If you found this post helpful or have learned something, please comment, subscribe, and follow me on social media for more delicious recipes.
Recipe
How To Make Koji Rice Or Barley
Ingredients
- 1000 g (5 cups) Pearl barley or polished rice
- 4 g (1 teaspoon) Koji tane
Instructions
- Soak the barley or rice for 12 hours in the fridge or overnight at room temperature.
- Sterilise all your utensils and hands. Also, boil or steam the linen cloth. This is to make sure no bad bacteria gets involved.
- If you don't have a steamer at home. Use a colander lined with cloth set over a pot filled ¼ with water and a lid that closes the colander. The colander needs to fit inside the pot but not touch the water.
- Steam barley for about 45 minutes or until just cooked but not blooming. Do not boil it as it would ruin the process and drown the mould later on. If you are making the rice koji the process is the same but the steaming time will be around 20 minutes. Make sure to test the doneness every 10 minutes to know at which stage it's at.
- Once your barley or rice is cooked, cool it down in a separate sterilized tray or bowl to about 30°C or 86°F. Sprinkle over the Koji tane and mix well. This is to inoculate the substrate with spores.
- Line your perforated or flat tray with a slightly damp cloth(not wet) and spread the inoculated barley/rice out and cover with the cloth completely.
- Place into your incubation setup. Place the thermostat needle into the substrate and let the humidity controller sensor dangle close by.
- Set your thermostat to maintain a temperature of 30°C or 86°F . Set your humidistat to 70% and makes sure the humidifier is switched on and has enough water.
- Place a buffer like a bowl or wire rack in between the warming mat and the tray so that there is some circulation and it does not directly touch the heating source.
- Close the incubation chamber and keep an eye on the temperature. You can connect the thermostat and humidistat to your phone via Wi-Fi so that it tells you when things are changing.
- We now start a 48-hour cycle. Over the next 12 hours, the koji will start "infiltrating" the barley or rice. At some point, it will start to form a mycelium and the koji will produce its own heat. When this happens we have to break it up and cool it down.
- We want the temperature to stay within range. So, break it up and spread it out when the temperature jumps. Don't worry if the temperature goes a bit above the maximum limit. Just don't let it stay there for too long.
- Keep this up for 48 hours until the substrate is covered in a thick mycelium of white mould.
- You now have fresh koji. Taste it. It's delicious just like that.
Video
Notes
- Storage instructions - Store airtight in the freezer. Otherwise, you can dry it out for longer storage or store it in the fridge for up to a week.
- Tip - If you made koji to produce protease, it should have a mushroomy flavour, a bit like the rind of camembert cheese. If you made it to produce amylase, it will have a sweeter aroma and flavour, a bit similar to very ripe apricots.
- Safety - Keep everything extremely clean and sanitised. Mould ferments can easily go wrong if bad bacteria creeps in. If you see strange colour mould growing throw it out. Only buy koji spores from trusted sources to ensure the purist mould.
- Alternative - You can grow koji on nearly any starch-rich substrate. This recipe works for making rice koji equally well.
Margret says
What a masterclass in koji! I'd heard of it from a YouTuber and tracked Shio koji down here in Sydney (Australia) last week and lashed out (AUD$20/1L) because I really REALLY wanted to try it. I was not disappointed! Just trying it took courage enough - not going to make it myself because I value my sanity BUT your post makes me appreciate it all the more. I got some chicken drumsticks at a bargain price, marinated them for a couple of hours in the Shio koji with some added spices, roasted them, and OMG - so moist, tender and delicious. I'm hooked! Can't wait to try other proteins with this hidden gem and I hope it gains a wider availability like many other ingredients we now can't imagine being without. I'm also looking forward to exploring your blog further - I appreciate and value the lessons I've already learned after a short peruse! THANK-YOU and cheers from Oz!!
Benjamin says
Hi, thanks for your detailed instructions.
I’m attempting my first batch of barley koji using an old bar fridge and a thermostat controlling an old rice cooker in the bottom for heating. A dish of water in the rice cooker weighs the switch plate down to stop it switching off and provides plenty of humidity (no humidity sensor yet so hopefully not too moist…). But I’m confused about the temperature you recommend!
All other online instructions I can find specify 38-40 degrees Celsius but you say 28-30 for amylase production, is that correct or a typo?
Thanks for any further advice!
Charlé Visser says
28 to 30 for max protease and the higher you go above 30 to max 38-40, for more amylase.
haegeen kim says
started my first koji experiment with barley, chick peas, other yellow peas and lentil. they are now on 3rd day and each one is on different stage (some are all coated white evenly, some not). Is this normal? I am trying to push few more days until they are all coated nicely with fuzzy white. Would this be right approach? thank you and love your website and great information!
Charlé Visser says
If you mixed them and you have white mould and 48 hours then pull it. It’s ready. If the substrates if you have no mould by 48 hours then start over. Make sure whatever you use is not over cooked or too raw. Also it should not be covered in an outer fibrous shell like whole wheat grains or what have you. Chickpeas I find works best when shelled for exactly that reason. Lentils I cook fully but not mush then dry them a bit before mixing with koji so they not too wet. Hope that helps. Dm me on instagram your pics and can tell you more
Michael K Malone says
Hi Charlie, It's Christmas Eve and I'm sure you aren't monitoring this site so here goes... I live in Orlando, Florida and am a helpless Foodie. I have all the bells and whistles you've mentioned in this blog, but, am so very lost as how much Koji to use in my starter. I've made 400g's of a steamed starter and have two bags of Purchased Koji and don't know how much to use in the starter. It's two bags just delivered to me of Sagohachi Rice Koji at 600g each which appears to be normal rice inoculated with spores. I'm lost and please help.
Charlé Visser says
I think you might have bought prepared rice koji… send me pics on instagram so I can have a look.
Laurel Lahaie says
What if you don't see much after 48 hours? How long can you go and be safe?
Charlé Visser says
If you don’t see anything after 48 hours something went wrong. Could be humidity, temperature or spore quality issue.
Gay McDonald says
Hi Charle, I made a mistake when "inventing" a sweet sauce to serve with "dessert sushi". I picked up a bag of Koji grains instead of a bag of dried Miso - both from Meru Miso in Australia. I added the Koji to my orange zest and juice, then realized my error as I was pouring it in! I have saved the Koji/juice because I am hoping there is something I can do with it. Right now, it's fermenting "as is". I am on your site this morning, Aus time, trying to find ideas! Best wishes, stay safe and well
PS the dessert sushi is in rice paper rolls, rice cooked in the watery part of coconut cream can chilled, sauce made from thick part of same can, plus sliced strawberry, kiwi fruit and mango. Could be berries. My sauce is white miso, orange zest and juice, pineapple juice, yuzu miso, ume vinegar, squeeze of lime, and a little cornstarch to thicken. Will sprinkle with black sesame seeds when serving You are welcome to use it
Charlé Visser says
That sounds pretty wack but pretty intriguing and I'm sure stealing that idea!)) Thanks!
Afri says
learned a lot
Jordan.M says
Hi, I am new to fermentation and this post really explained everything I needed to know about making koji. The equipment and book links are also incredibly helpful. Without this I wouldn't know where to start. Thanks for sharing this