Moroccan preserved lemons, also called salted or fermented lemons, are a staple in North African cooking.
Their bright, tangy, and slightly savory taste is essential in Moroccan cuisine, adding depth to traditional dishes like Moroccan lemon chicken tagine or eggplant zaalouk.
Nowadays, preserved lemons are widely used in Middle Eastern and Mediterranean recipes, and chefs all over the world, love adding them to dishes to brighten their flavor.
Beyond tagines, preserved lemons improve simple recipes like citrus lemonade, lemon honey vinaigrette, and marinated olives.
They require minimal ingredients to prepare, and the combination of salt and natural acidity makes them a safe and straightforward beginner-friendly ferment.
Jump to:
- Best lemons to use for preserving
- Ingredients
- Instructions
- Watch how to make it
- Top tips for perfectly preserved lemons
- Aging your lemons for maximum flavor
- Substitutions and variations
- How to use preserved lemons
- Equipment
- Storage
- Frequently asked questions
- Common issues
- Hygiene and safety
- More fermentation recipes
- Recipe
- Comments
Best lemons to use for preserving
Traditional Moroccan preserved lemons are typically made with small varieties that have thin, aromatic skins and a golden-yellow to orange color. These can be hard to find outside Morocco, but you can still make delicious preserved lemons with other varieties available.
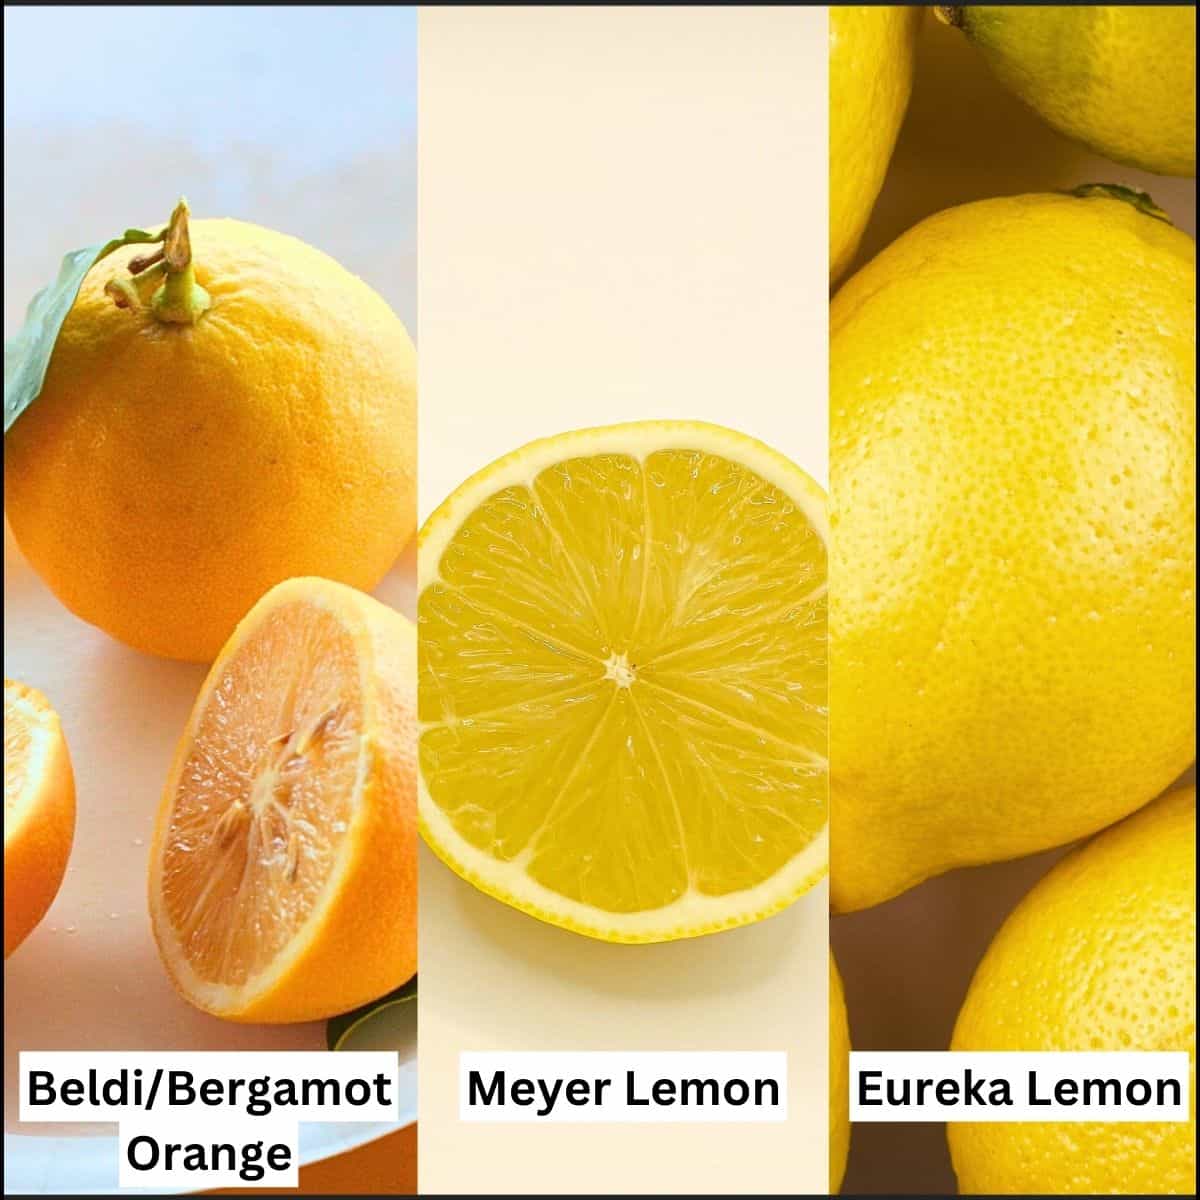
- Beldi lemons/ Bergamot orange - This is the variety used in classic Morrocan salted lemons. They are sweet, small, and have a very thin skin. Their shape is quite flat with a distinctive little nose/nipple at the end.
- Meyer lemons - The next best lemon outside Morocco. Thin-skinned and sweeter than regular lemons, making them ideal for preserving. They soften quickly, making the process faster. They yield a large amount of juice too which is important for the process to work.
- Eureka lemons - These are your everyday lemons and are available in nearly every store and grocer. They have thicker skin resulting in longer fermentation time.
Use unwaxed lemons, as the wax coating on many store-bought lemons can interfere with the fermentation process. Choose lemons that are heavy for their size and have a bright, even yellow color. They'll be juicier with a thinner skin and better aroma.
Larger, thicker-skinned lemons like Eureka will take longer to soften during fermentation compared to thinner-skinned varieties like Meyer. The result will still be delicious, but be patient as the rinds take time to soften and develop their characteristic flavor.
Ingredients
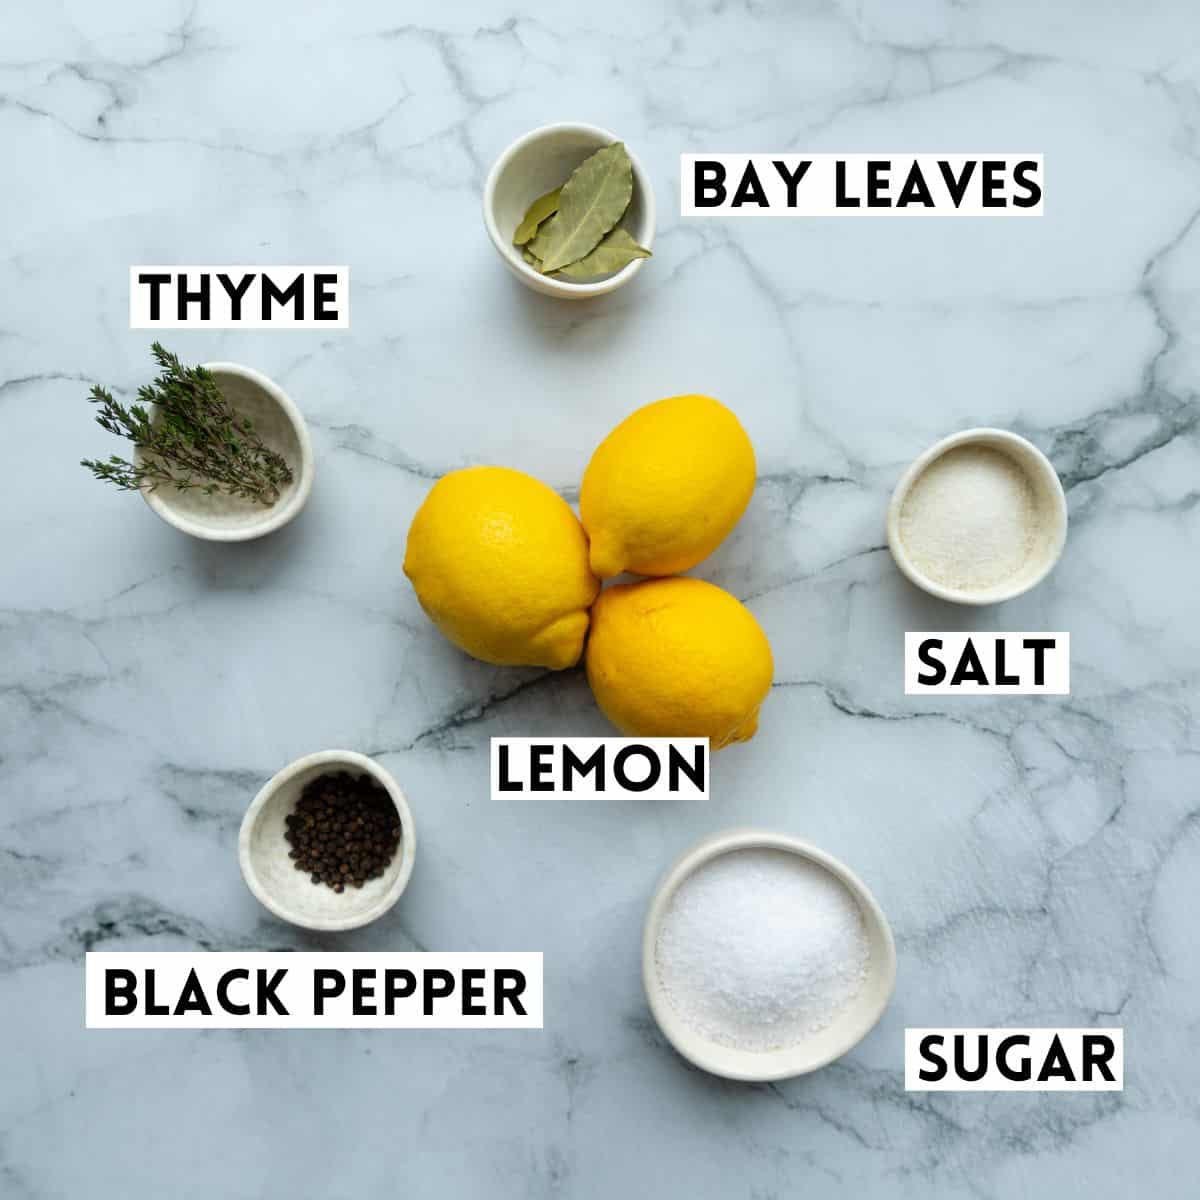
- Lemons: Use small, thin-skinned lemons if you can. They soften faster and soak up the flavors better. Bigger lemons work too, but they'll take longer to be ready.
- Salt: Use kosher salt or rock salt. Don't use regular table salt with anti-caking agents - it can affect the taste and make the lemons bitter.
- Sugar (Optional): A little sugar makes the lemons less sharp and adds some balance. You can use honey instead or skip it completely.
- Thyme (Optional): Fresh thyme adds a light, earthy flavor. You can also use rosemary, sage, or oregano if you like.
- Bay Leaves (Optional): A few bay leaves add a mild, herby flavor. They aren't traditional but can add a nice touch.
- Black Peppercorns (Optional): Whole black peppercorns go great with lemon. You only need a few to add extra flavor.
See the recipe card for quantities.
Instructions
Before you start, ensure your work surface, tools, and hands are all washed and hygienic. Optionally sterilize your fermentation jar to ensure no bad mold or bacteria take hold. Salted lemons are adequately salty and acidic to prevent bad bacteria, but it's best practice to sterilize the jar for extra protection.
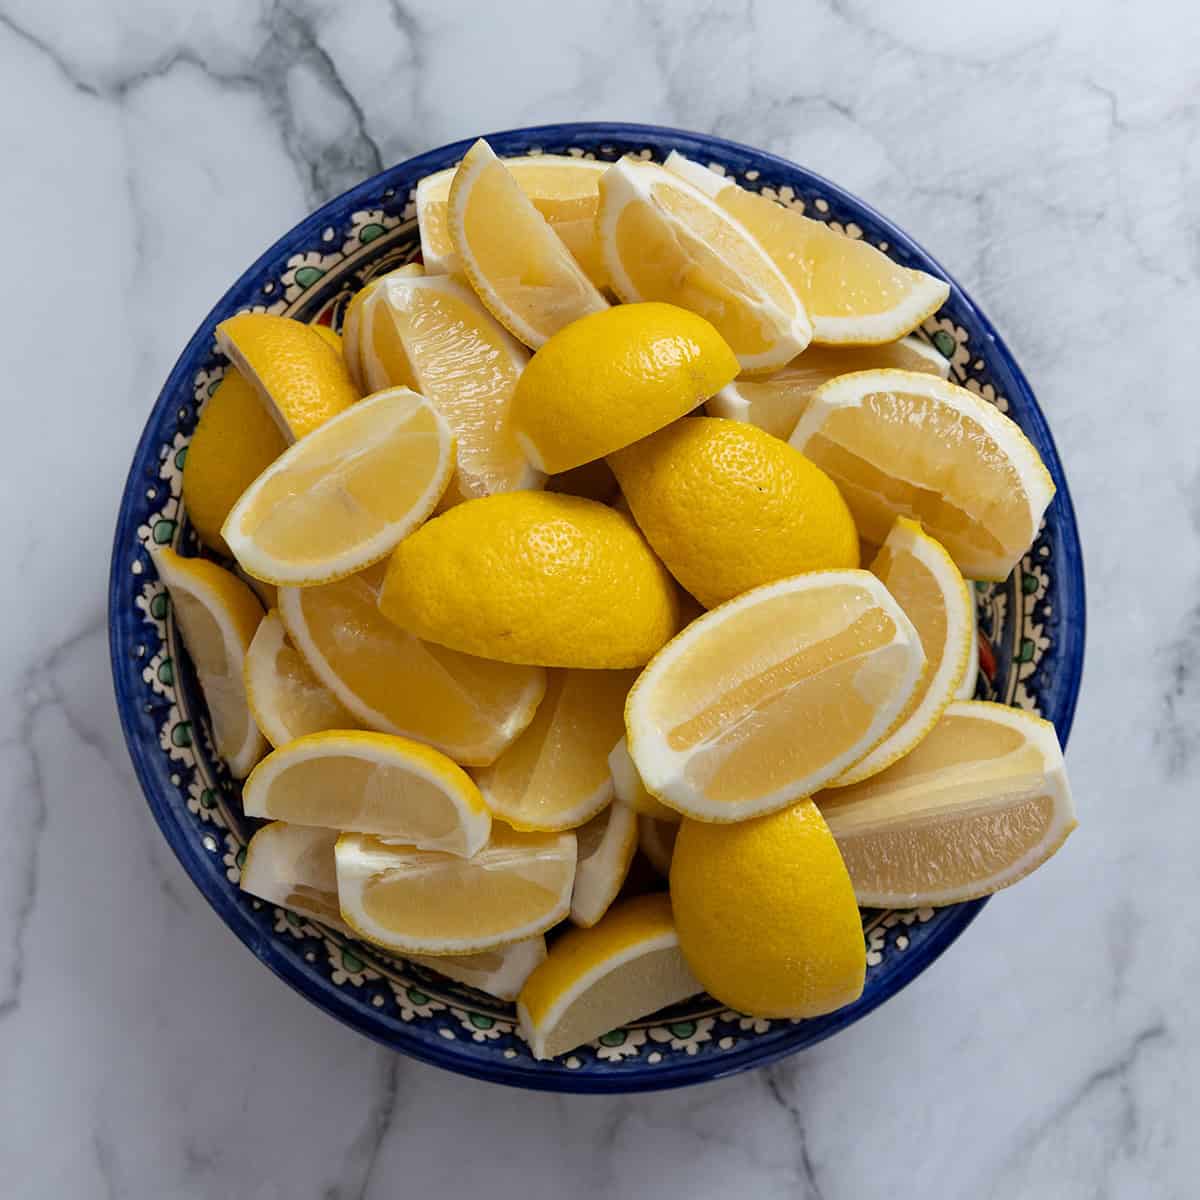
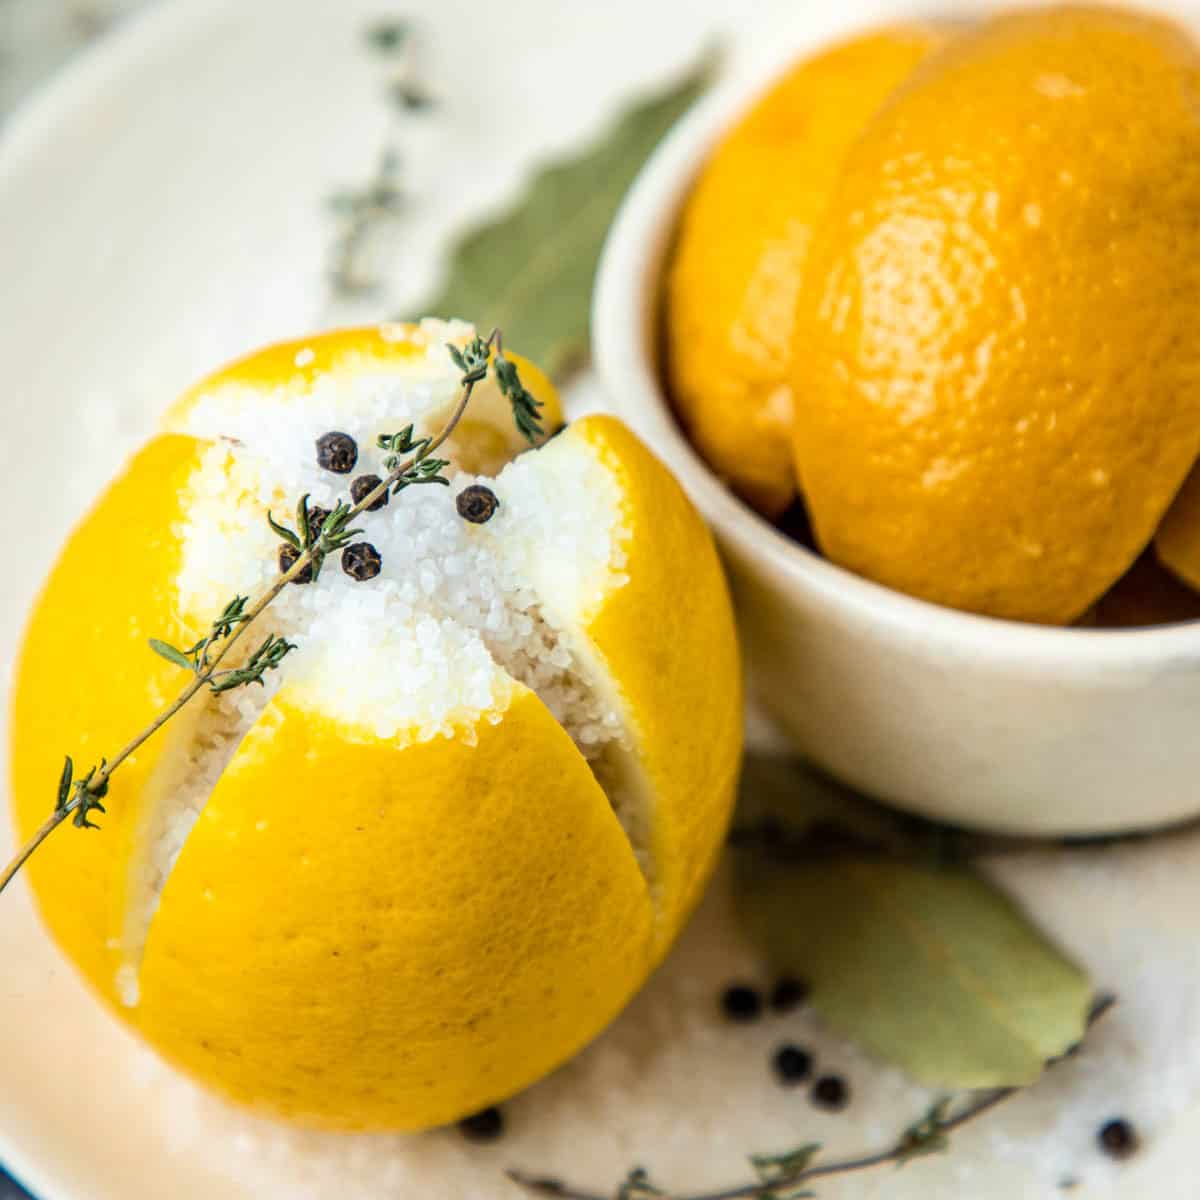
- Step 1: Rinse and cut the lemons into quarter segments. Remove the center white bits and any visible seeds. If using smaller Moroccan lemons do not cut the lemons through completely, as they preserve better when kept intact at the base.
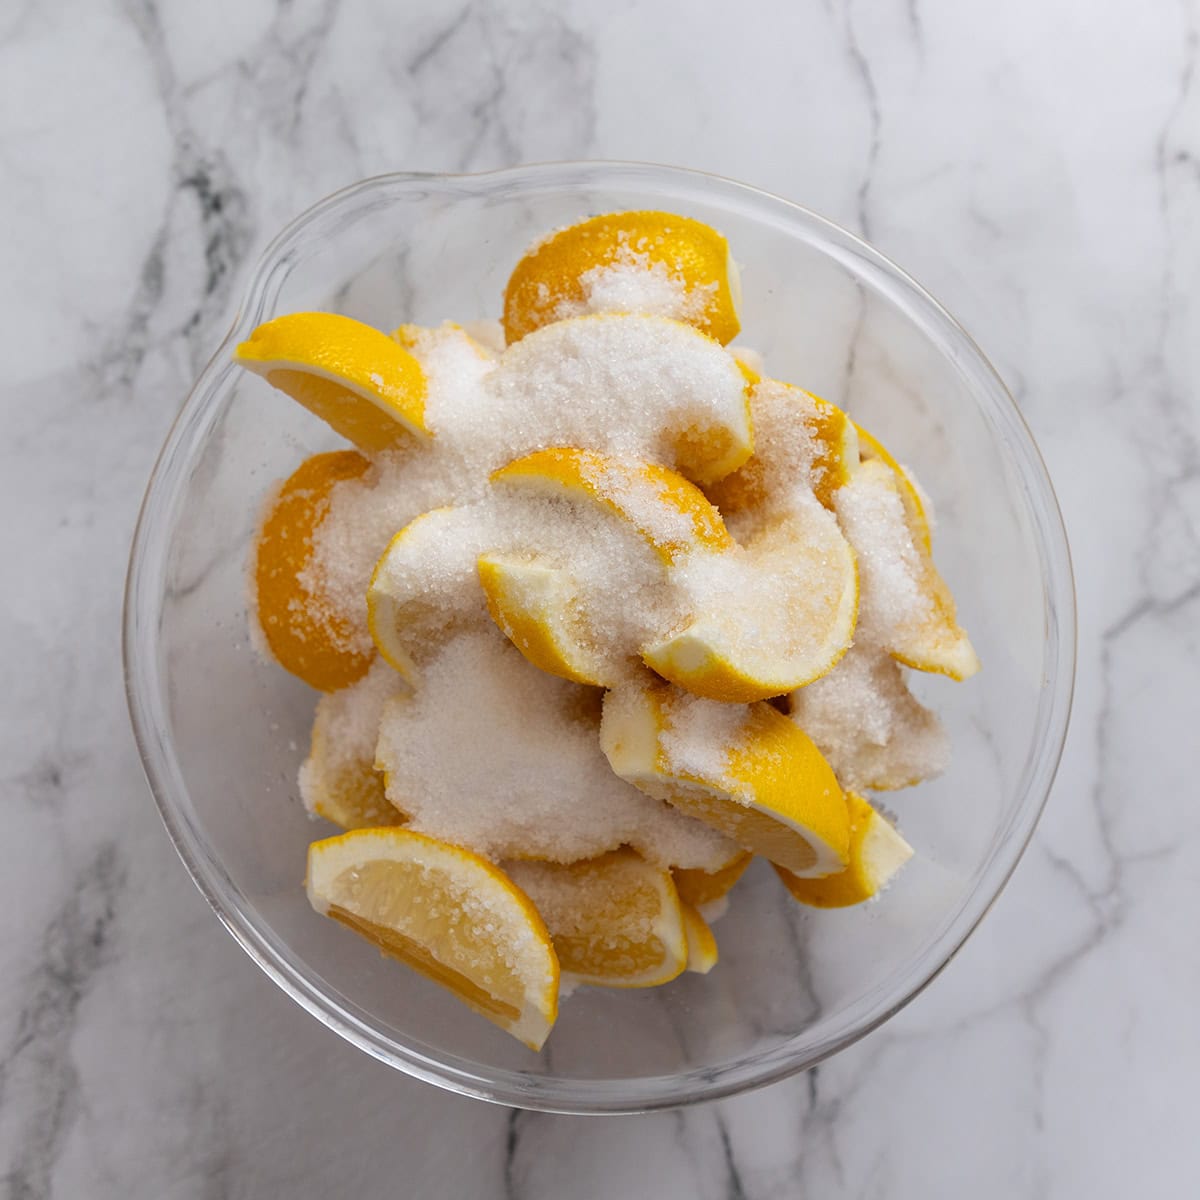
- Step 2: Add salt and sugar. If using herbs and pepper, do not add at this stage.
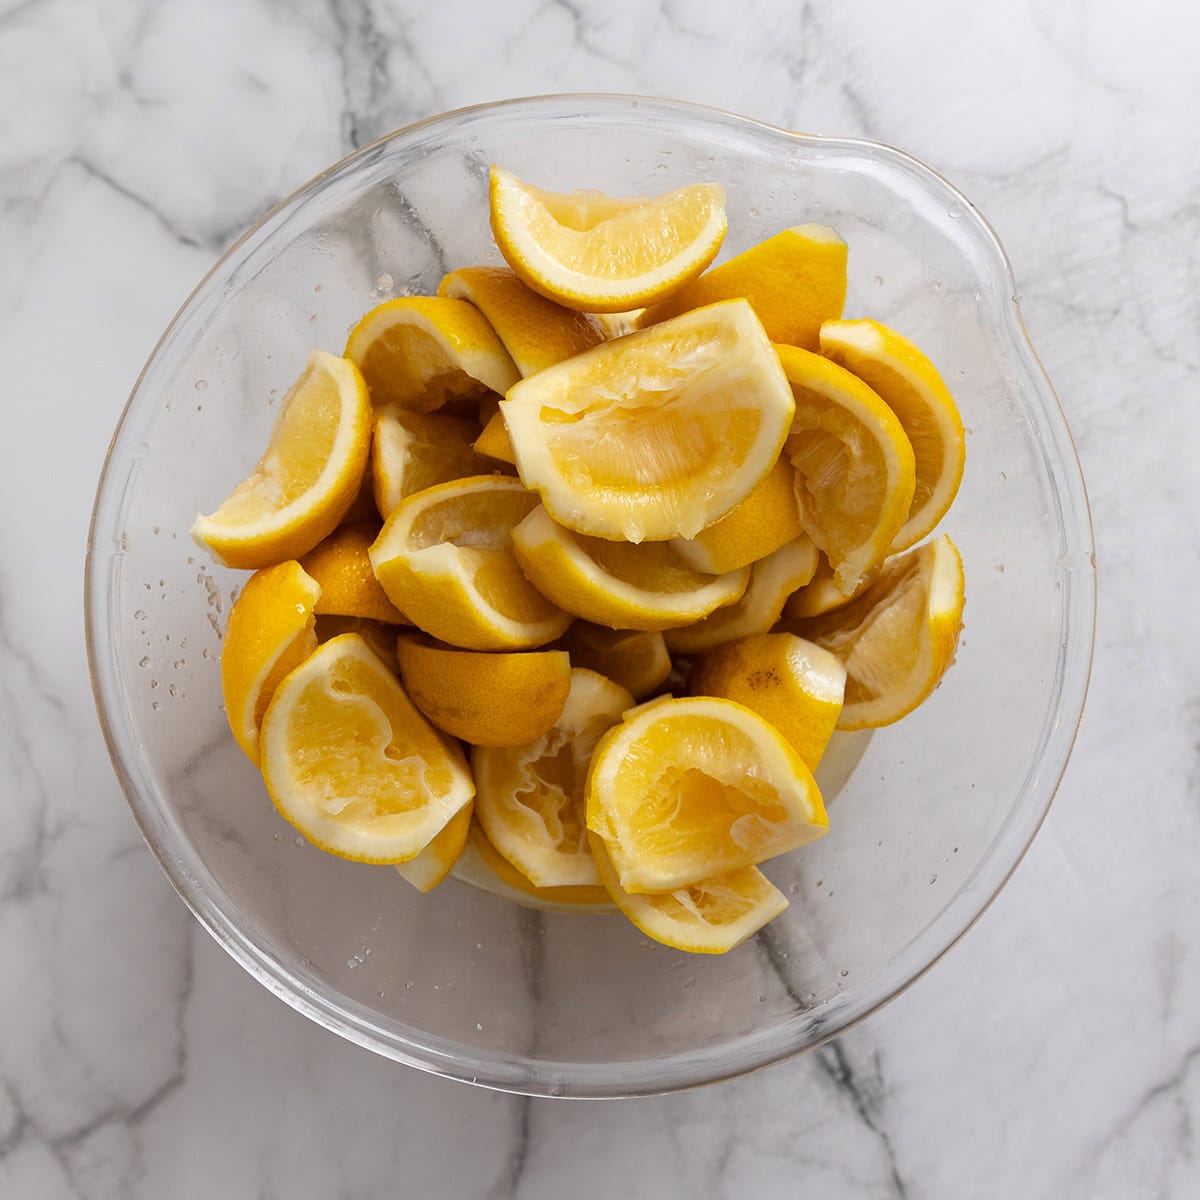
- Step 3: Squeeze and bruise the lemons to release all the juice. Squeeze a few extra lemons separately if there's not enough juice to cover the lemons in the next step.
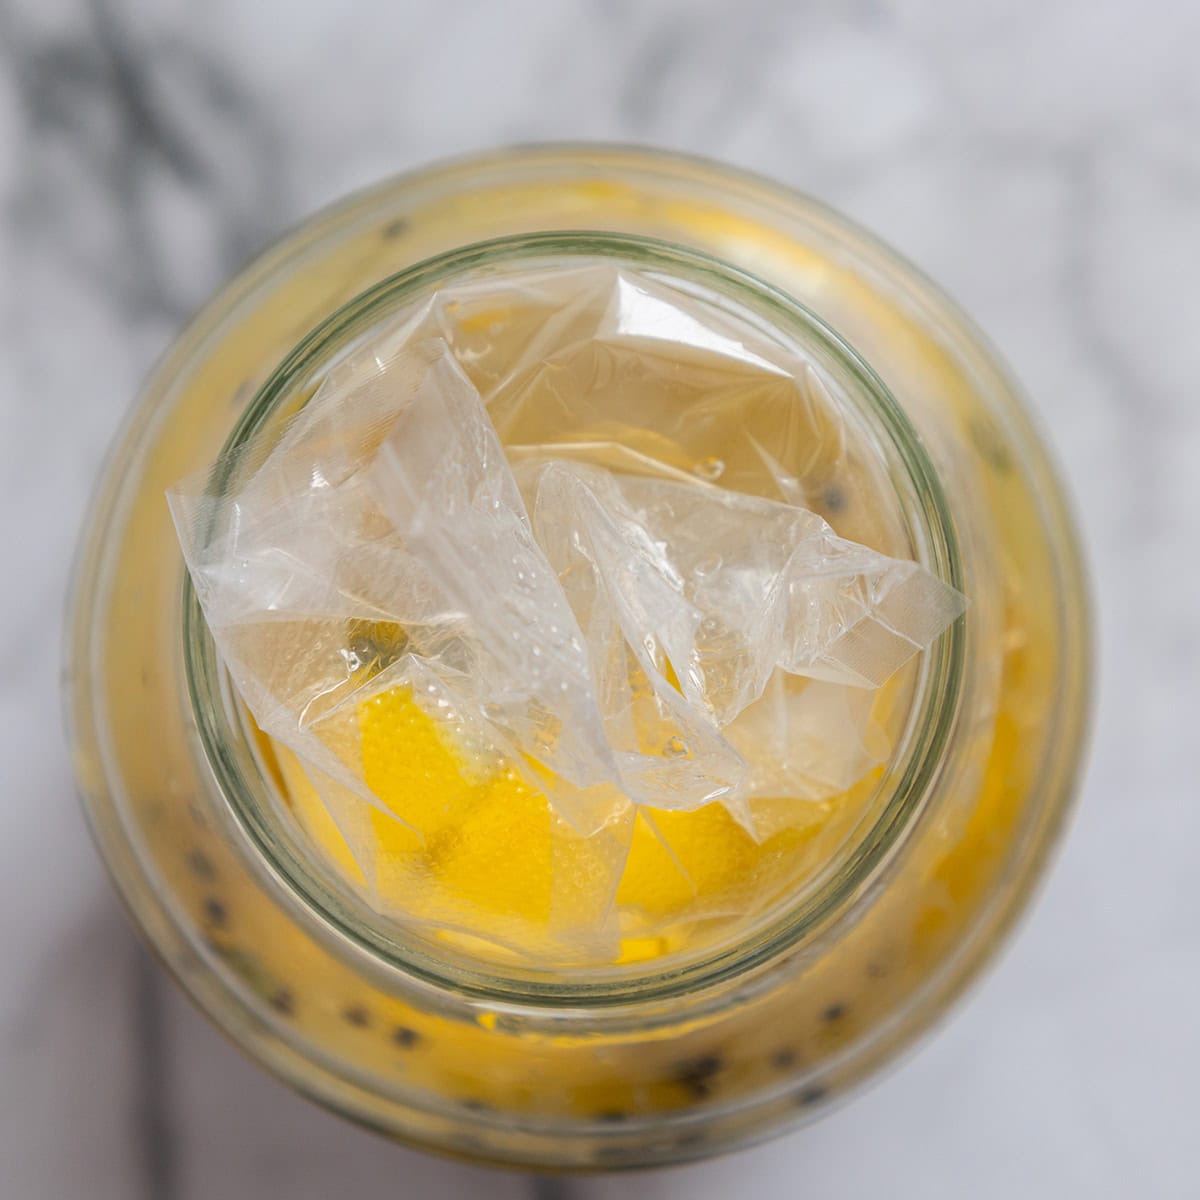
- Step 4: Pack the lemons tightly into a glass jar with any aromatics. Press them down to cover in juice, adding extra if needed. Weigh them down with a fermentation weight or a sealed water-filled bag. Close with a lid. Keep the lemons fully submerged and ferment at room temperature for at least 1 month.
Watch how to make it
Top tips for perfectly preserved lemons
- Use small, thin-skinned lemons - They soften faster and absorb flavors better.
- Pack tightly - Press the lemons into the jar to remove air pockets and prevent spoilage.
- Keep submerged - Always cover the lemons with their juice to avoid mold. Add extra juice if needed.
- Temperature - Let them ferment at room temperature, away from direct sunlight.
- Be patient - They require at least 1 month to ferment, but the flavor improves the longer you leave it. I recommend 6 months to a year.
- Use clean tools - Handle lemons with clean hands or utensils to prevent contamination.
Aging your lemons for maximum flavor
Minimum time - Let the lemons ferment for at least 1 month before using them. This gives them time to soften slightly and develop flavor.
Optimal flavor - Age them for 3 to 6 months. This allows any bitterness to mellow out and the flavors to become richer and more balanced.
Long-term aging - Preserved lemons can last for years if kept submerged in their brine and stored properly. Over time, they'll get even softer with an intense, concentrated flavor.
The longer the lemons age, the darker their skin becomes, and the brine might turn into a thick jelly because of the natural pectin present in the lemons. This is no cause for concern and a sign that you're doing it right.
Substitutions and variations
- Lime - You can use limes instead of lemons. Limes have a sharper, slightly more bitter flavor. The fermentation process works the same, but the flavor will be unique.
- Rose - Add dried rose petals or a splash of rose water for a subtle floral note. This isn't traditional but can give a fragrant twist to the preserved lemons, especially if you're using them in salads or desserts.
- Herbs - Besides thyme, try rosemary, sage, or oregano. Each herb adds individual flavor-rosemary is piney and bold, sage is earthy, and oregano has a strong, slightly bitter taste that pairs well with citrus.
How to use preserved lemons
Preserved lemons are naturally quite salty, so keep that in mind when adding them to anything.
The peel is the most flavorful part-chop, slice, or blend it into marinades, dressings, and sauces. The pulp can be used when called for in a recipe, but mostly it gets discarded. The skin is where all the magic comes from.
- Tagines & Stews - Essential in Moroccan dishes like lemon chicken with olives.
- Sides - Add to classic sides like creamy mashed potatoes or creamed spinach.
- Dressings & Sauces - Blends well into vinaigrettes, aioli, and yogurt sauce served with lamb koftas.
- Seafood - Add it to dressing for sea bass crudo or last minute to crispy skin salmon fillet.
- Rice & Couscous - Stir into pilafs, Moroccan spiced couscous, or risottos.
- Cocktails - Muddle into a G&T or add to lemonade.
Equipment
- A Large bowl for mixing the lemons with salt and sugar.
- 2L or 67-ounce swing-top glass jars and a fermentation weight if you try to avoid plastics.
- Weighing scales if you prefer metric measurement, which is more accurate.
Storage
Store in the fridge sealed airtight, use clean utensils when taking some for cooking, and make sure they are always submerged in the brine.
They freeze great without any negative effects in texture or flavor.
These can also be dried and blended into a powder if you want to use it in spice mixes.
Frequently asked questions
It can be kept for years in the fridge if stored properly or even frozen in vacuum pac bags for longer storage.
Rinsing them means washing off flavor. There's no need to wash them off. Just be mindful of over-salting your dishes with additional salt.
It's not common to use the pulp, but sometimes they come in handy when used in stews and soups. The rind is the most usable and intensely flavored part.
Yes, if hygiene practices were neglected when preparing them, when checking them during fermentation, or when using dirty utensils or hands when using some for cooking. Bacteria is rare but mold can easily grow.
There's no shortcut to getting the flavor of traditional preserved lemons. If you want a somewhat similar substitute and are happy to forgo the intense flavor then simmer lemon rind until soft. Add salt, sugar, and lemon juice. Let it marinate for 30 minutes and you'll have an inferior but usable product.
Common issues
- Mold - You should monitor the process often to spot mold as soon as it appears. Wipe it off with vinegar if there's not a lot and on the glass. If it's a lot and growing on the brine or lemons, you have to throw out the whole batch.
- Off smell - If something smells off, throw it out. It's not worth the risk.
- Cloudy brine - Cloudy brine is fine and often caused by the cellulose and pectin in the lemons. Most of the time it clears up by itself.
- Tough rind - If you made it with Eureka lemons(regular), the process will take longer because the skin is thicker. It's best to have patients and wait until they soften.
Hygiene and safety
Preserved lemons are not a classic ferment in the sense that they have loads of microbial activity. It's full of salt and acidity, making it hard for most microbes to grow, yet it is still a fermented food and we should take the necessary steps to ensure we prepare them safely.
- Sterilize Your Jars - Wash jars with hot, soapy water, then sterilize them in the oven at 250°F (120°C) for 10-15 minutes, or boil them for 10 minutes. Let them cool before use.
- Keep Everything Clean - Wash your hands, utensils, and surfaces thoroughly to avoid contamination.
- Check for Spoilage - Inspect for mold or off smells once a week. If anything seems wrong, discard the whole batch.
More fermentation recipes
If you found this post helpful or have learned something, please comment, subscribe, and follow me on social media for more delicious recipes.
This site contains affiliate links. I may earn a tiny commission on qualifying purchases at no extra cost to you. By bookmarking these links you help support the upkeep of this site.
Recipe

Moroccan Preserved Lemons
Equipment
Ingredients
- 1.6 kg (3 ½ lb) lemons - 8 large regular lemons - note 1
- 150 grams (1 cups) coarse salt - kosher - note 2
- 100 grams (½ cups) sugar - or honey (optional)
- 2 tablespoons (2 tablespoons) peppercorns - optional
- 6 leaves (6 leaves) bay leaves - optional
- 4 sprigs (4 sprigs) thyme - optional
Instructions
- Rinse and cut the lemons into quarter segments. Remove the center white bits and any visible seeds. If using smaller Moroccan lemons do not cut the lemons through completely, as they preserve better when kept intact at the base.
- Add salt and sugar. If using herbs and pepper, do not add at this stage.
- Squeeze and bruise the lemons to release all the juice. Squeeze a few extra lemons separately if there's not enough juice to cover the lemons in the next step.
- Pack the lemons tightly into a glass jar with any aromatics. Press them down to cover in juice, adding extra if needed. Weigh them down with a fermentation weight or a sealed water-filled bag. Close with a lid. Keep the lemons fully submerged and ferment at room temperature for at least 1 month.
Video
Notes
- Beldi/ Bergamot orange - This is the variety used in classic Morrocan salted lemons. They are sweet, small, and have a very thin skin. Their shape is quite flat with a distinctive little nose/nipple at the end.
- Meyer lemons - The next best lemon outside Morocco. Thin-skinned and sweeter than regular lemons, making them ideal for preserving. They soften quickly, making the process faster. They yield a large amount of juice too which is important for the process to work.
- Eureka lemons - These are your everyday lemons and are available in nearly every store and grocer. They have thicker skin resulting in longer fermentation time.
- Sterilize Your Jars - Wash jars with hot, soapy water, then sterilize them in the oven at 250°F (120°C) for 10-15 minutes, or boil them for 10 minutes. Let them cool before use.
- Keep Everything Clean - Wash your hands, utensils, and surfaces thoroughly to avoid contamination.
- Check for Spoilage - Inspect for mold or off smells once a week. If anything seems wrong, discard the whole batch.


Comments
No Comments